Subsify Documentation: This tab contains the web application documentation.
Getting Started
Subsify - Digital Tools & Subscription Reselling Laravel Script
Developed By: BugBuild Labs
Welcome to Subsify - Digital Tools & Subscription Reselling Laravel Script
Subsify is a flexible digital subscription management platform designed for resellers, sellers, and marketplaces offering streaming accounts, digital keys, or software licenses. This documentation helps administrators, support staff, and developers manage all backend and frontend functionality of the system.
Whether you're running a single-shop inventory or a full digital delivery network, Subsify provides automation and clarity through order workflows, stock assignment, account delivery, commission logic, and content customization.
Key Modules Include:
- Product and variant management with attribute controls
- Stock-based digital delivery (guest & customer orders)
- Role-based access control for admins, sellers, and customers
- Marketing tools: slider, widgets, blog, social, FAQs
- Commission and payout system for sellers
- Website customization with SEO and policy sections
- Contact management and customer inquiry system
This documentation covers everything from setup and login to managing subscriptions, website content, and customer communication — giving you full control over your digital subscription business.
Requirements
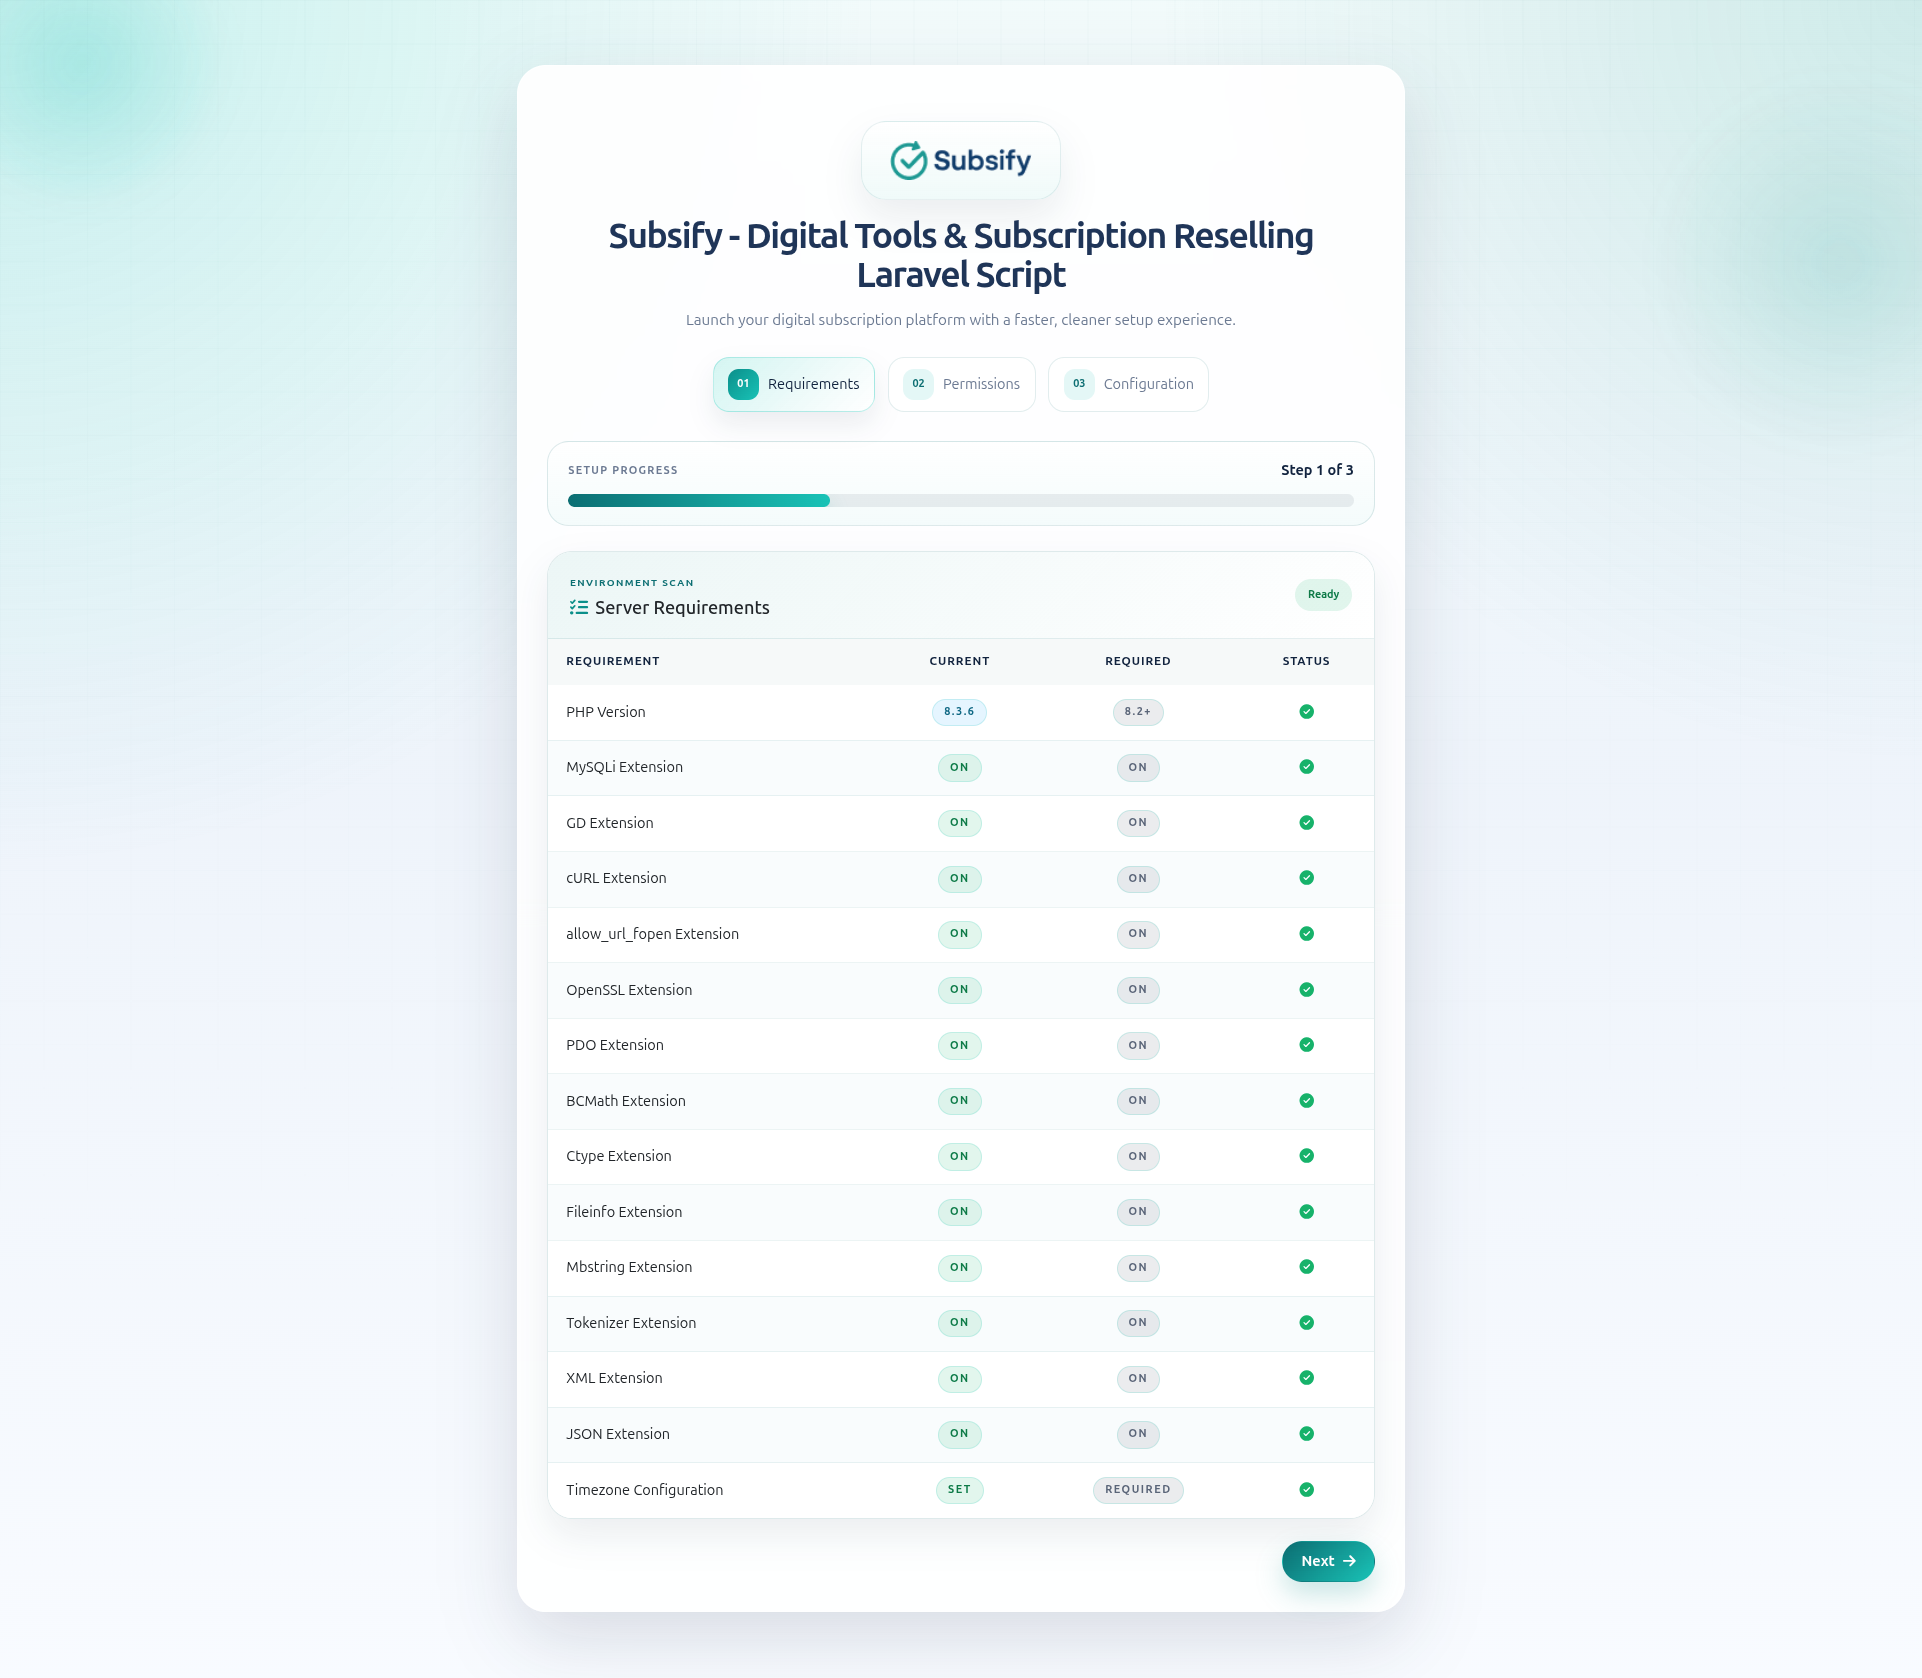
Ensure your server meets the following requirements before installing Subsify - Digital Tools & Subscription Reselling Laravel Script.
Backend Requirements:
- Laravel Version: 12.x
- PHP Version: 8.2 or higher
- MySQL Version: 8.0 or higher
Required PHP Extensions:
- MySQLi
- GD
- cURL
- allow_url_fopen
- OpenSSL
- PDO
- BCMath
- Ctype
- Fileinfo
- Mbstring
- Tokenizer
- XML
- JSON
Database Setup (via cPanel)
Use the following steps to create a database using cPanel.
Step 1 – Login to cPanel:
Access your hosting account’s cPanel (usually at https://yourdomain.com/cpanel).
Step 2 – Open MySQL® Database Wizard:
From the cPanel dashboard, search for and open MySQL® Database Wizard.
Step 3 – Create Database:
Enter a name for your new database and click Next Step.
Step 4 – Create Database User:
Enter a username and a strong password. Click Create User and save these credentials securely.
Step 5 – Add User to Database:
Select All Privileges to give full access to the database, then click Next Step to finish.
✅ You should now have these ready:
- Database Name
- Database Username
- Password
Upload Files & Set Permissions
Step 1 – Upload Application:
Download Main_Files.zip from CodeCanyon. Extract it locally. Inside WebSourceCode, zip the contents and upload to public_html or www. Extract the contents on the server.
Environment File Setup
The package does not include a ready-made .env file because it contains private installation data such as database credentials, mail settings, API keys, payment credentials, and other production secrets.
Step 2 – Create the Environment File:
After uploading the web source code to your server, copy .env.example and rename the copied file to .env.
Command (Linux): cp .env.example .env
Step 3 – Update Required Values:
Open the new .env file and update the values required for your installation, including APP_NAME, APP_URL, database credentials, mail credentials, Firebase, Pusher, payment gateway credentials, and any other service keys used by your project.
Step 4 – Generate Application Key:
Generate the Laravel application key after creating the .env file.
Command (Linux): php artisan key:generate
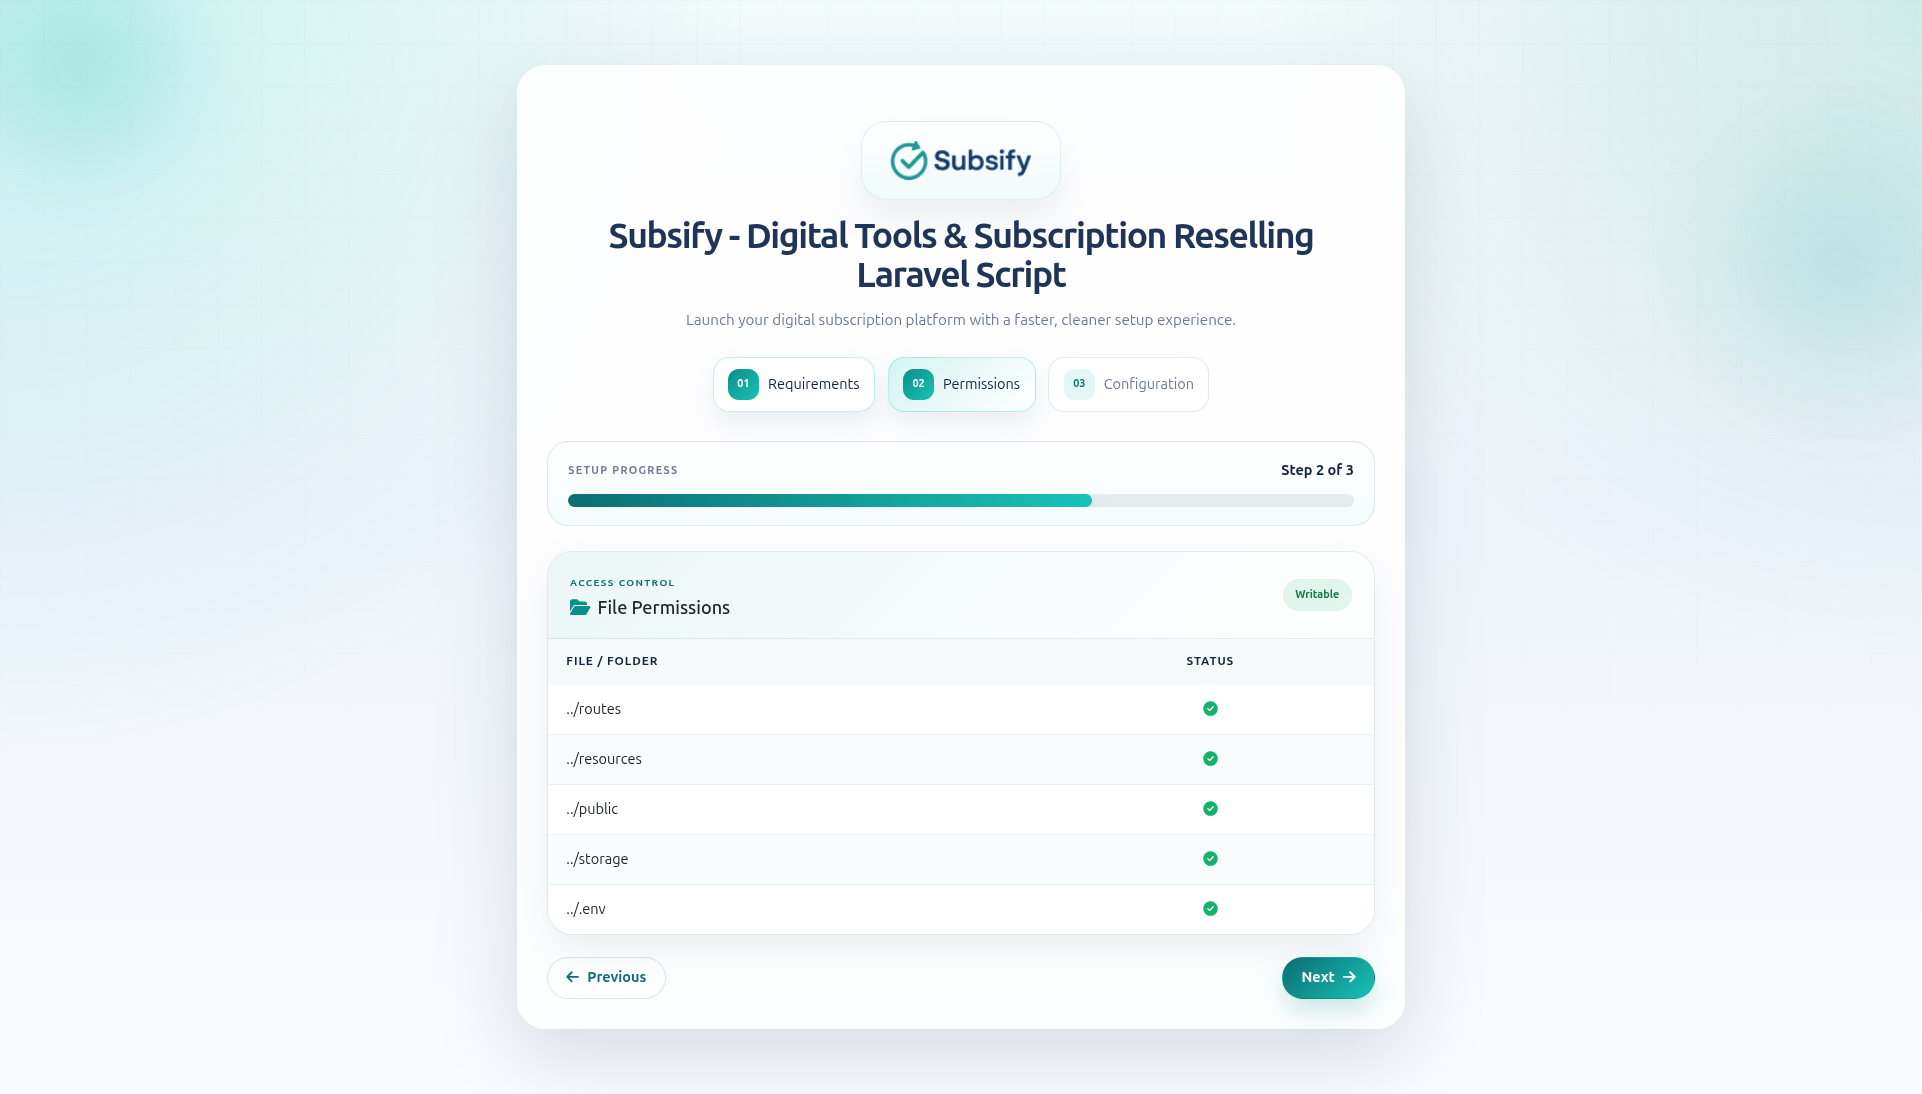
Step 5 – Set Writable Permissions:
Ensure the following folders and files are writable by the web server:
./routes./resources./public./storage./.env
Command (Linux): chmod -R 775 storage routes resources public
Step 3 – Create Environment File:
The package does not include a .env file. You must create one yourself before running the installer:
- Rename or copy
.env.exampleto.env:
cp .env.example .env - Generate a secure application key:
php artisan key:generate
This will automatically write a uniqueAPP_KEYvalue into your.envfile. - Then set writable permission on the newly created file:
chmod 775 .env
php artisan key:generate step. Without a valid APP_KEY, session encryption and user data protection will not work correctly.
Installation
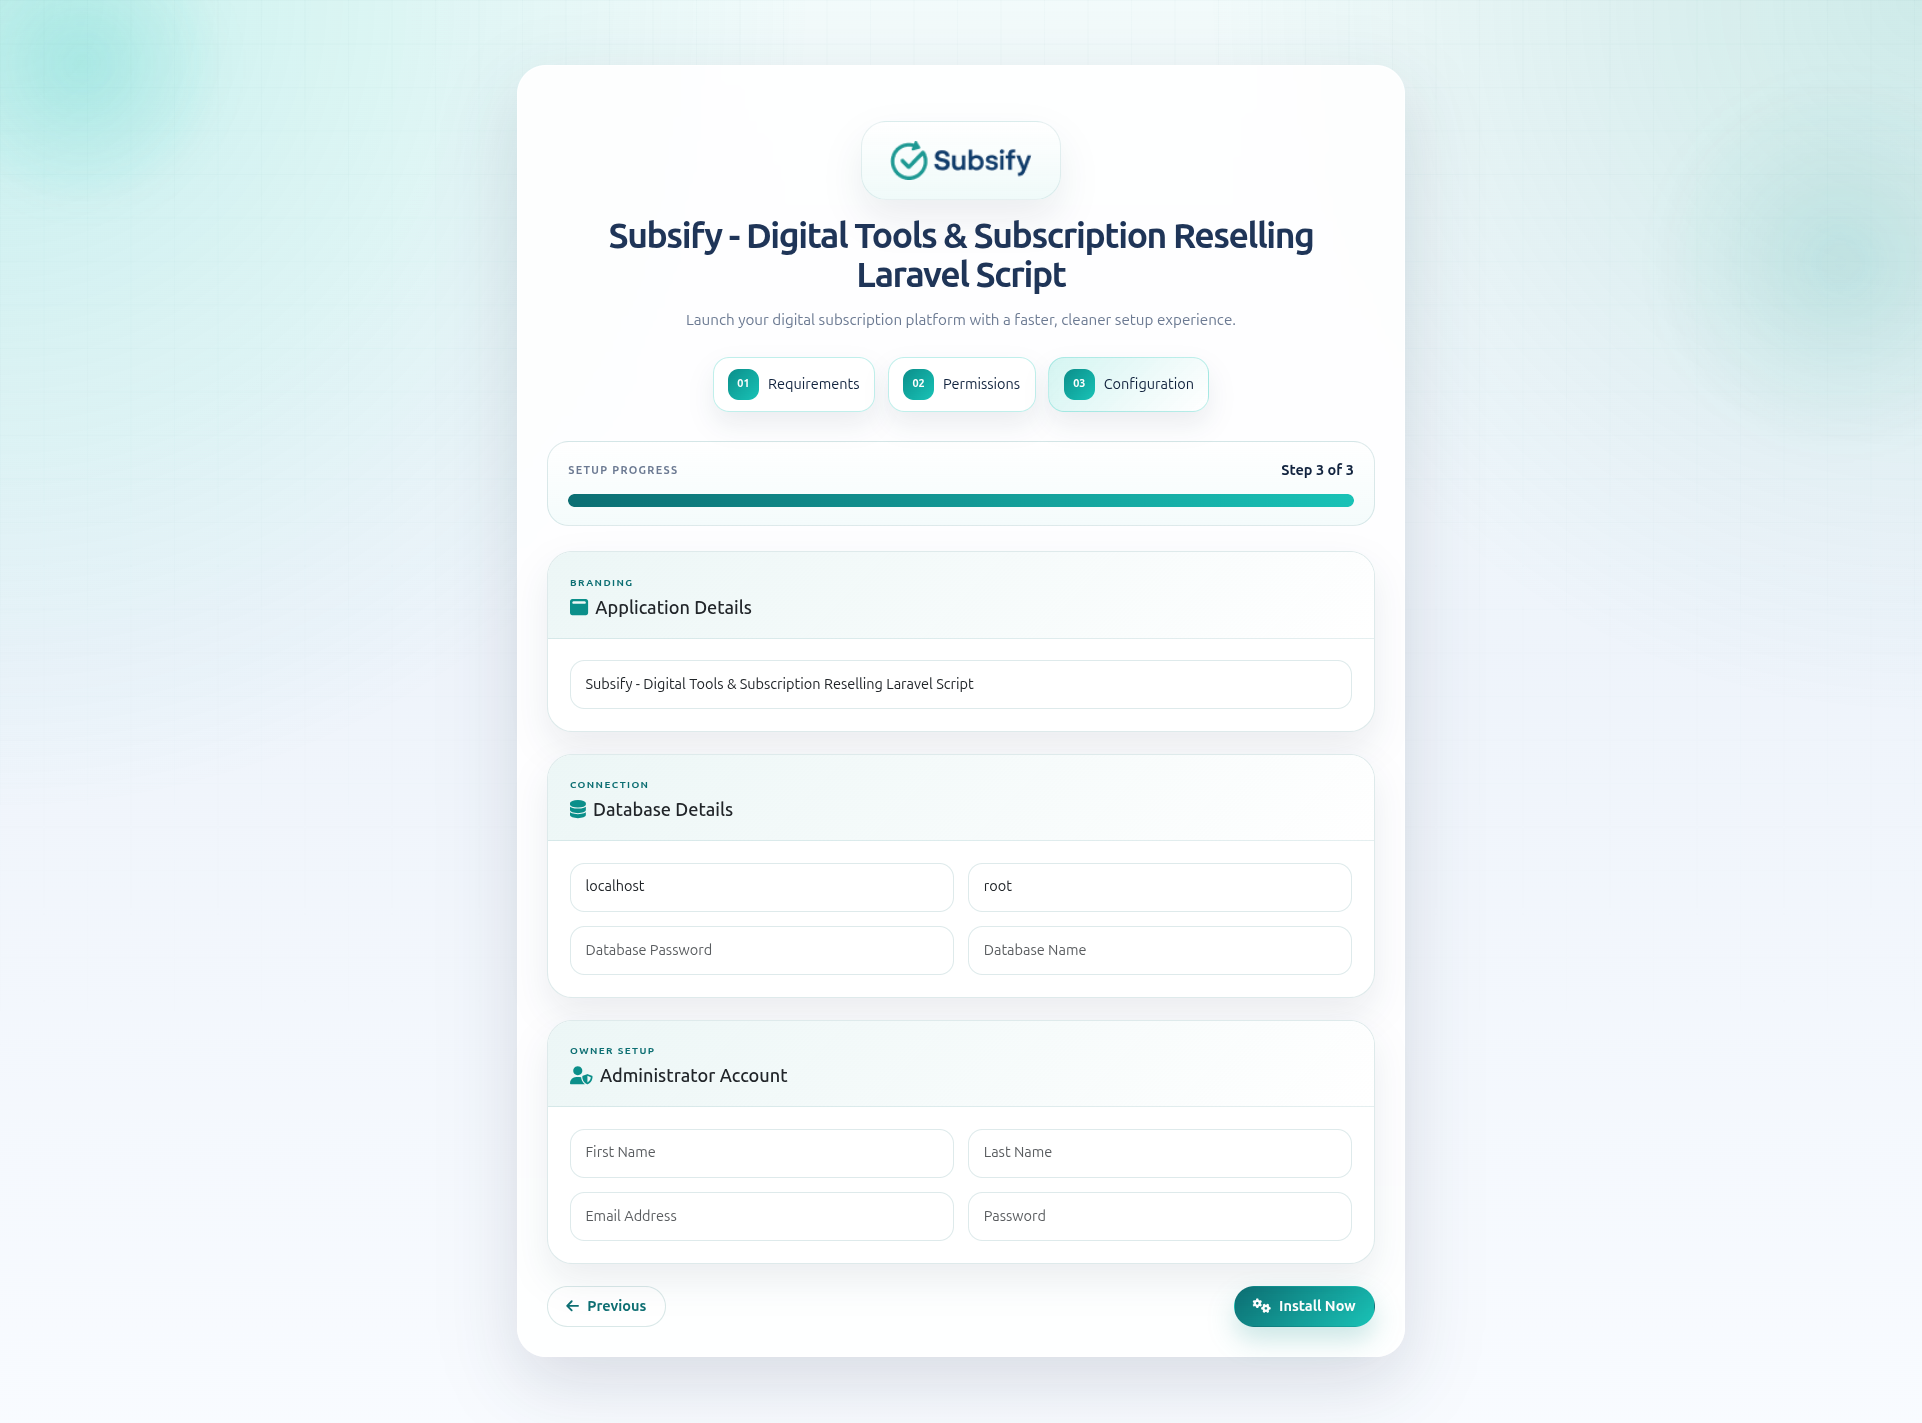
To install the Subsify – Subscription Management System (Laravel Script), follow these steps carefully:
1. Launch the Installer:
Visit your domain (e.g., https://yourdomain.com) in a browser. This will open the installation wizard.
2. Enter Branding Name (App Name):
In the App Name field, enter the brand or product name you want to use for this installation. Example: Subsify - Digital Tools & Subscription Reselling Laravel Script.
This branding name will be used in two important places automatically:
- It will be written into the
.envfile asAPP_NAME. - It will also be saved into the application settings as the site name, which is used across titles, emails, and frontend branding.
3. Enter Database Configuration:
Enter the database host as localhost, set the username, enter your database password, and provide the name of the database where the application will be installed.
4. Setup Admin Account:
Provide administrator credentials to access the backend of the system. These details will be used to log in after installation is complete.
first name, last name, email, and a secure password
5. Complete Installation: After filling out all required fields and ensuring proper permissions, click the Install Now button to finalize the installation process.
Login Flow
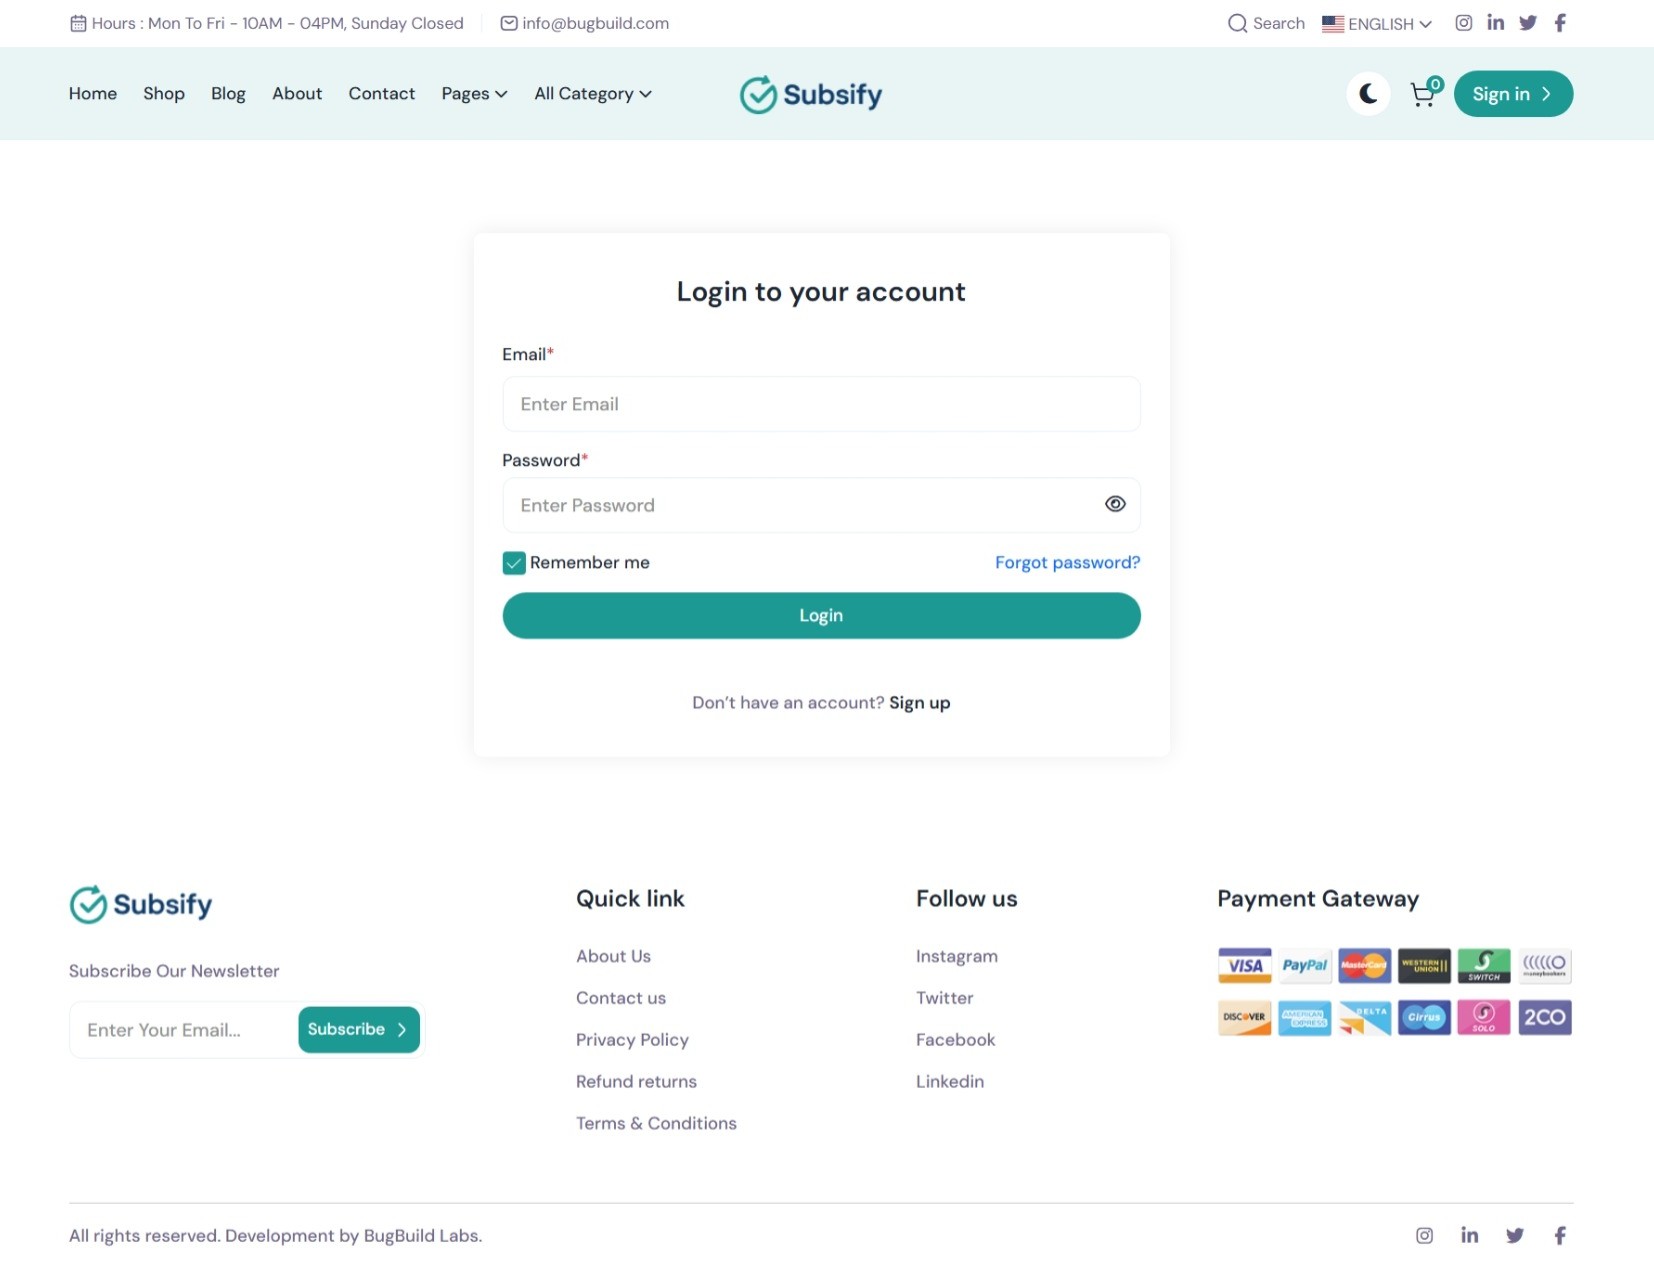
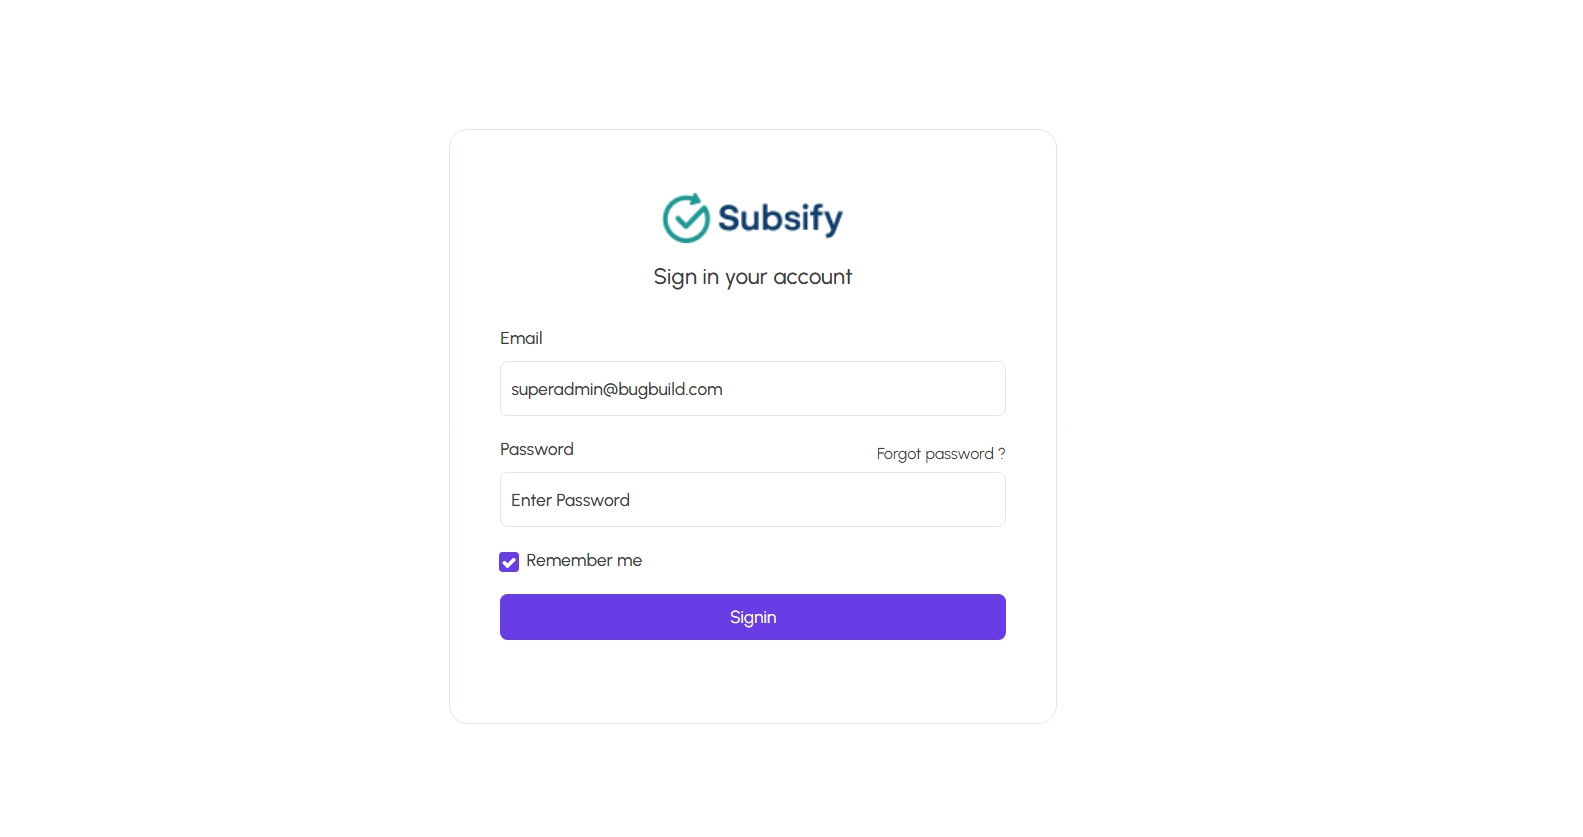
The Subsify platform offers a secure and role-based login experience for both general users and administrators. Depending on the user type, the login behavior adapts dynamically, including optional two-factor authentication (2FA) for extra security.
Step 1 – Customer Login:
Customers access the standard login page where they can enter their email and password. The form includes a "Remember Me" checkbox and a "Forgot Password?" link. Once authenticated, users are redirected to the customer dashboard.
Step 2 – Admin Login Redirection:
If the system detects that the email entered belongs to an admin account, the user is automatically redirected to a dedicated Admin Login page with a separate styling and endpoint. This improves access control and prevents unauthorized dashboard entry.
Step 3 – 2FA Verification (Admin Only):
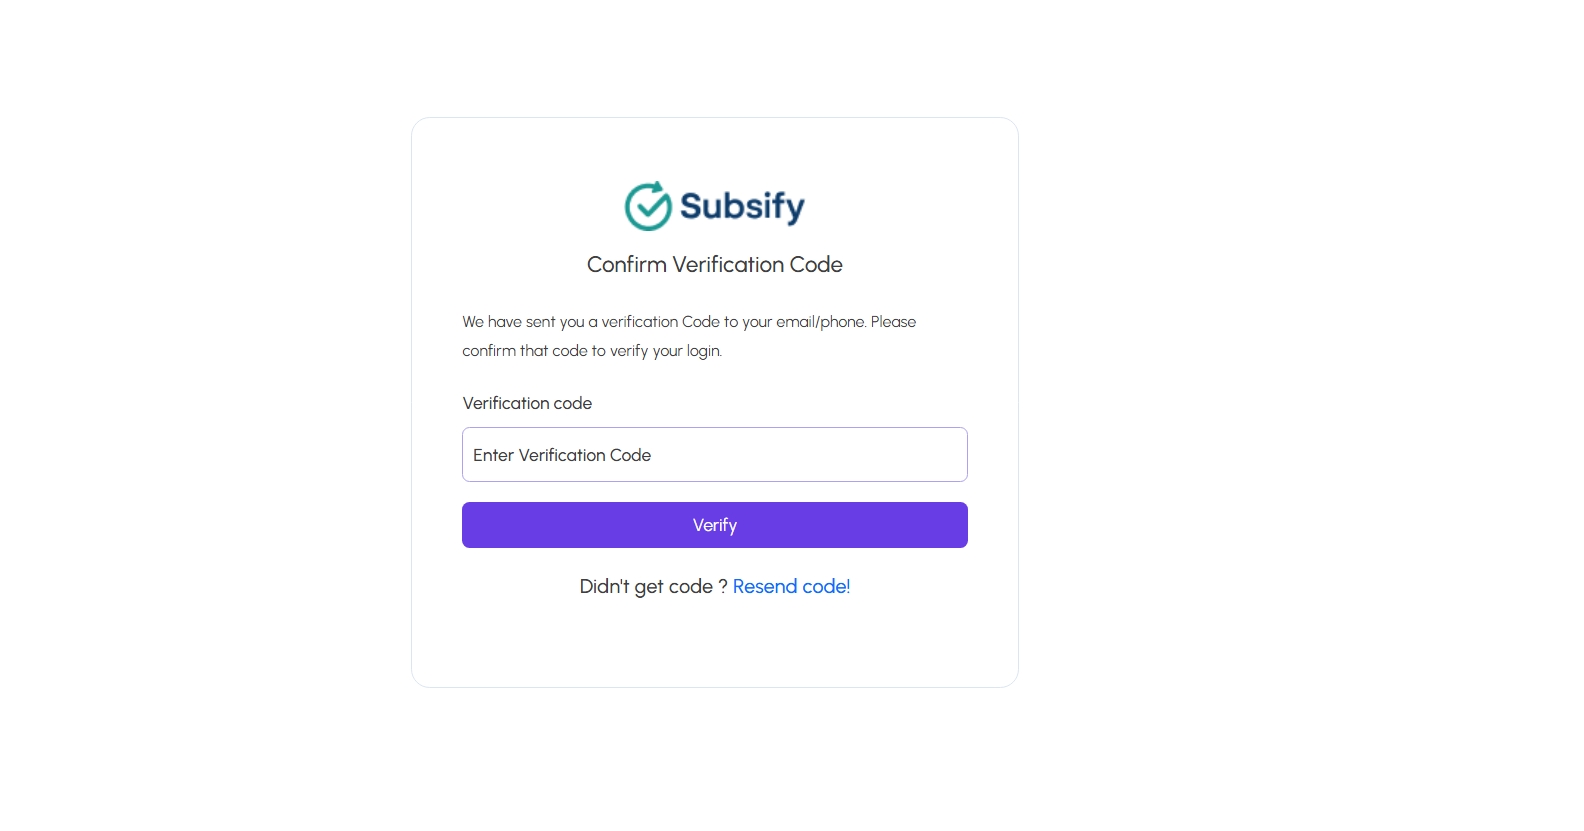
If two-factor authentication is enabled for the admin account, an additional screen will appear requesting a verification code. This code is sent to the admin’s registered email or phone. Admins must enter the code to successfully complete the login process.
This multi-step flow ensures role isolation, secure access, and a smooth user experience across both customer and administrative roles.
Forget Password
If a user forgets their password, they can securely reset it using the "Forgot Password" feature. This process includes three simple steps to verify identity and update login credentials.
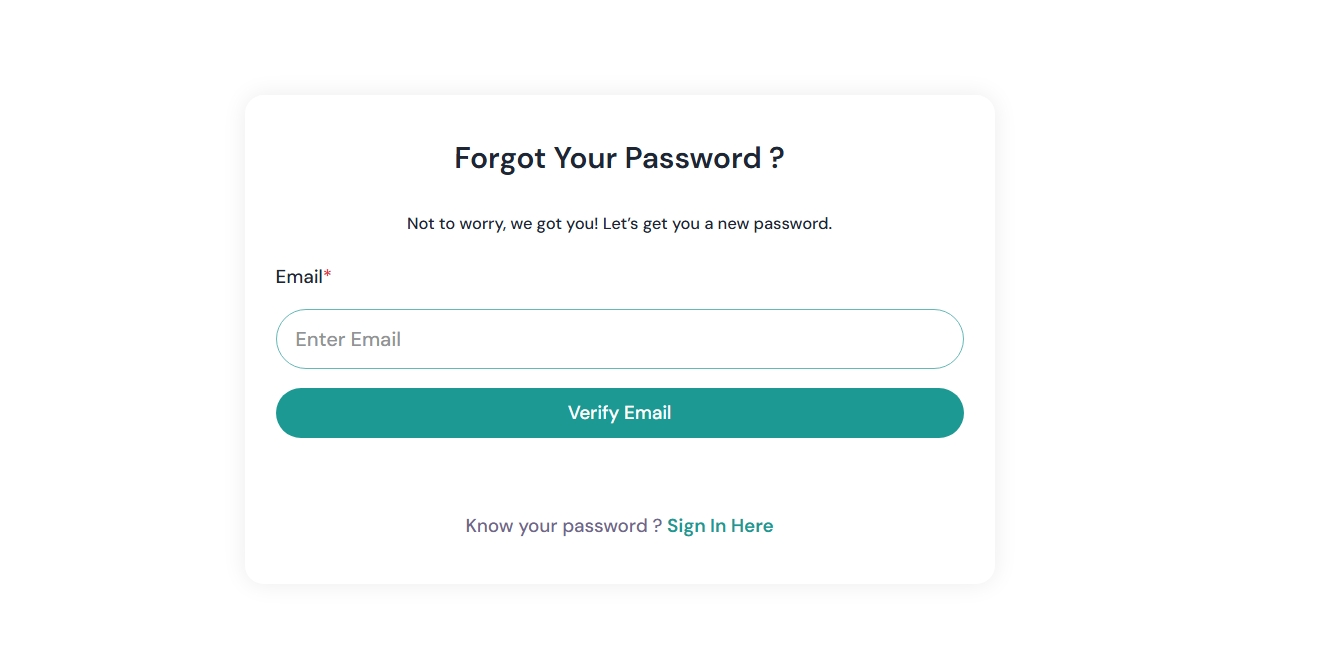
Step 1 – Request Email Verification:
The user navigates to the Forgot Password page and enters their registered email address. After clicking Verify Email, a verification code is sent to their inbox.
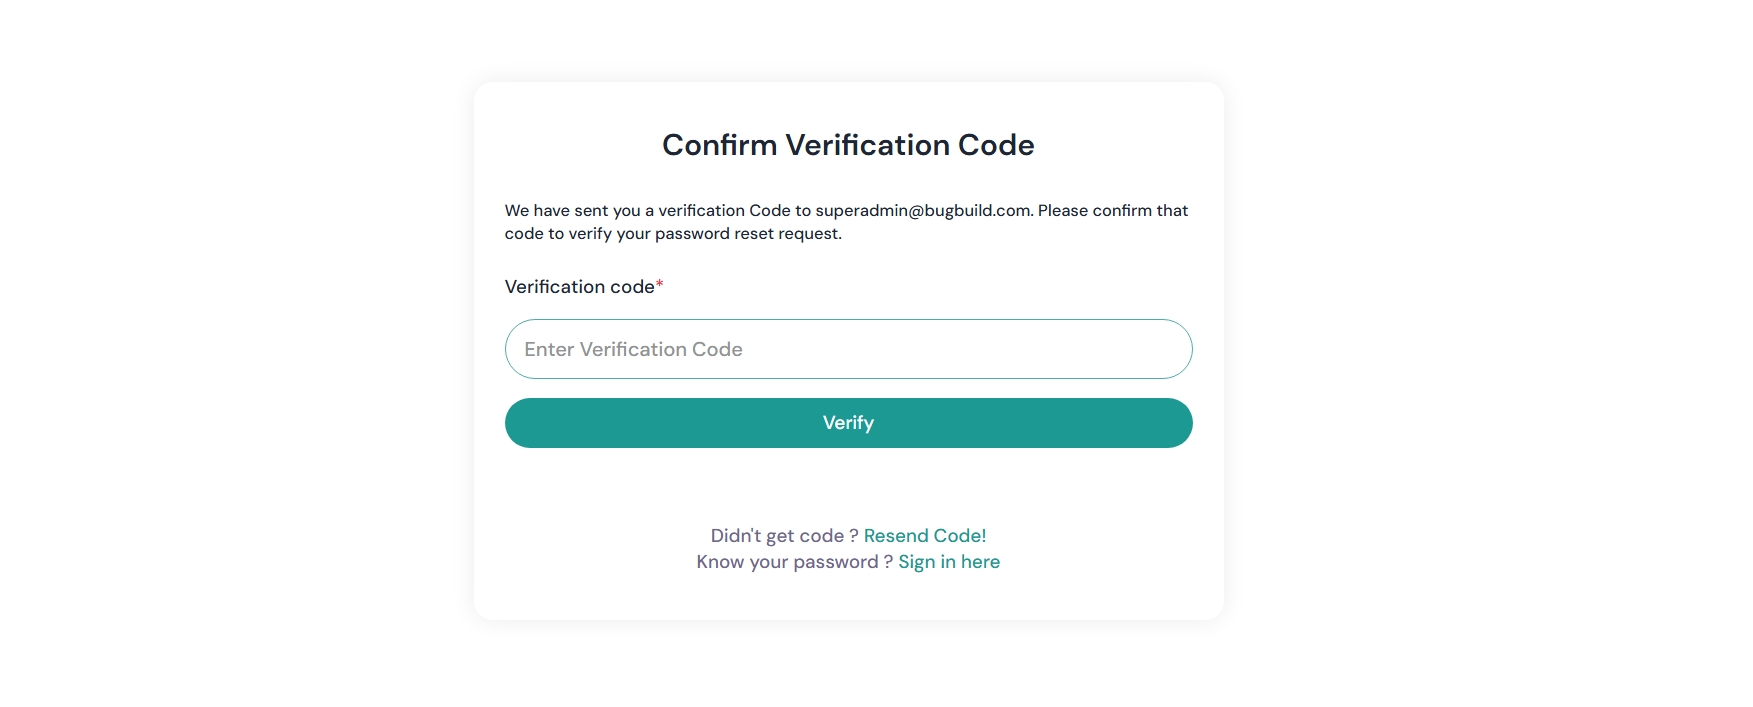
Step 2 – Enter Verification Code:
The user is then prompted to enter the code they received. This step helps validate ownership of the email before allowing any password changes. If the code is not received, there's an option to Resend Code.
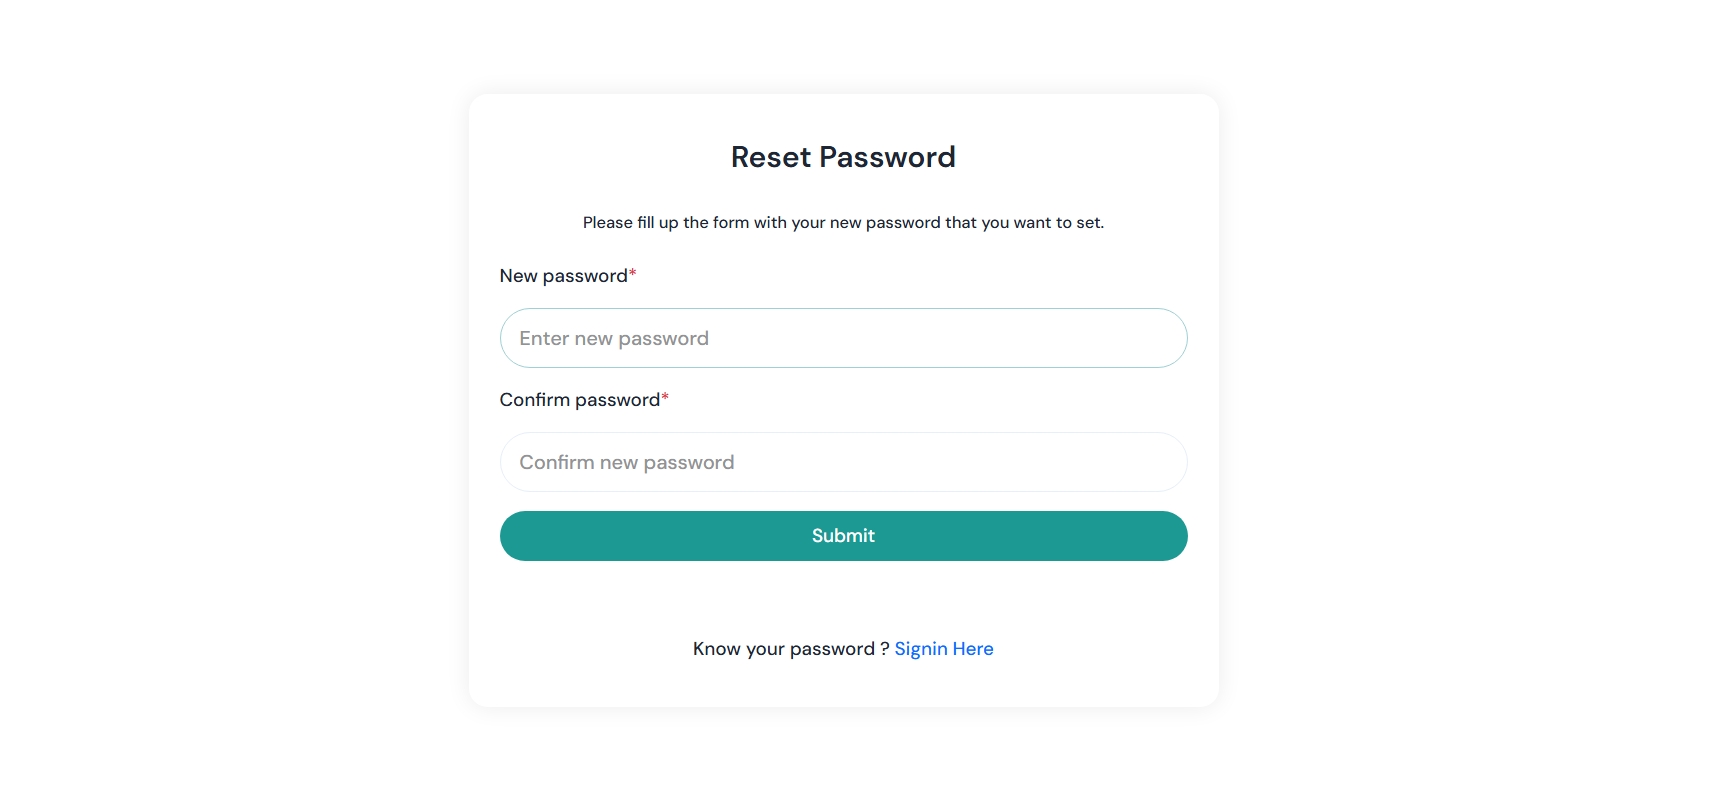
Step 3 – Reset Password:
Once verified, the user is redirected to the Reset Password page. They must enter a new password and confirm it. On successful submission, their password is updated and they can log in with the new credentials.
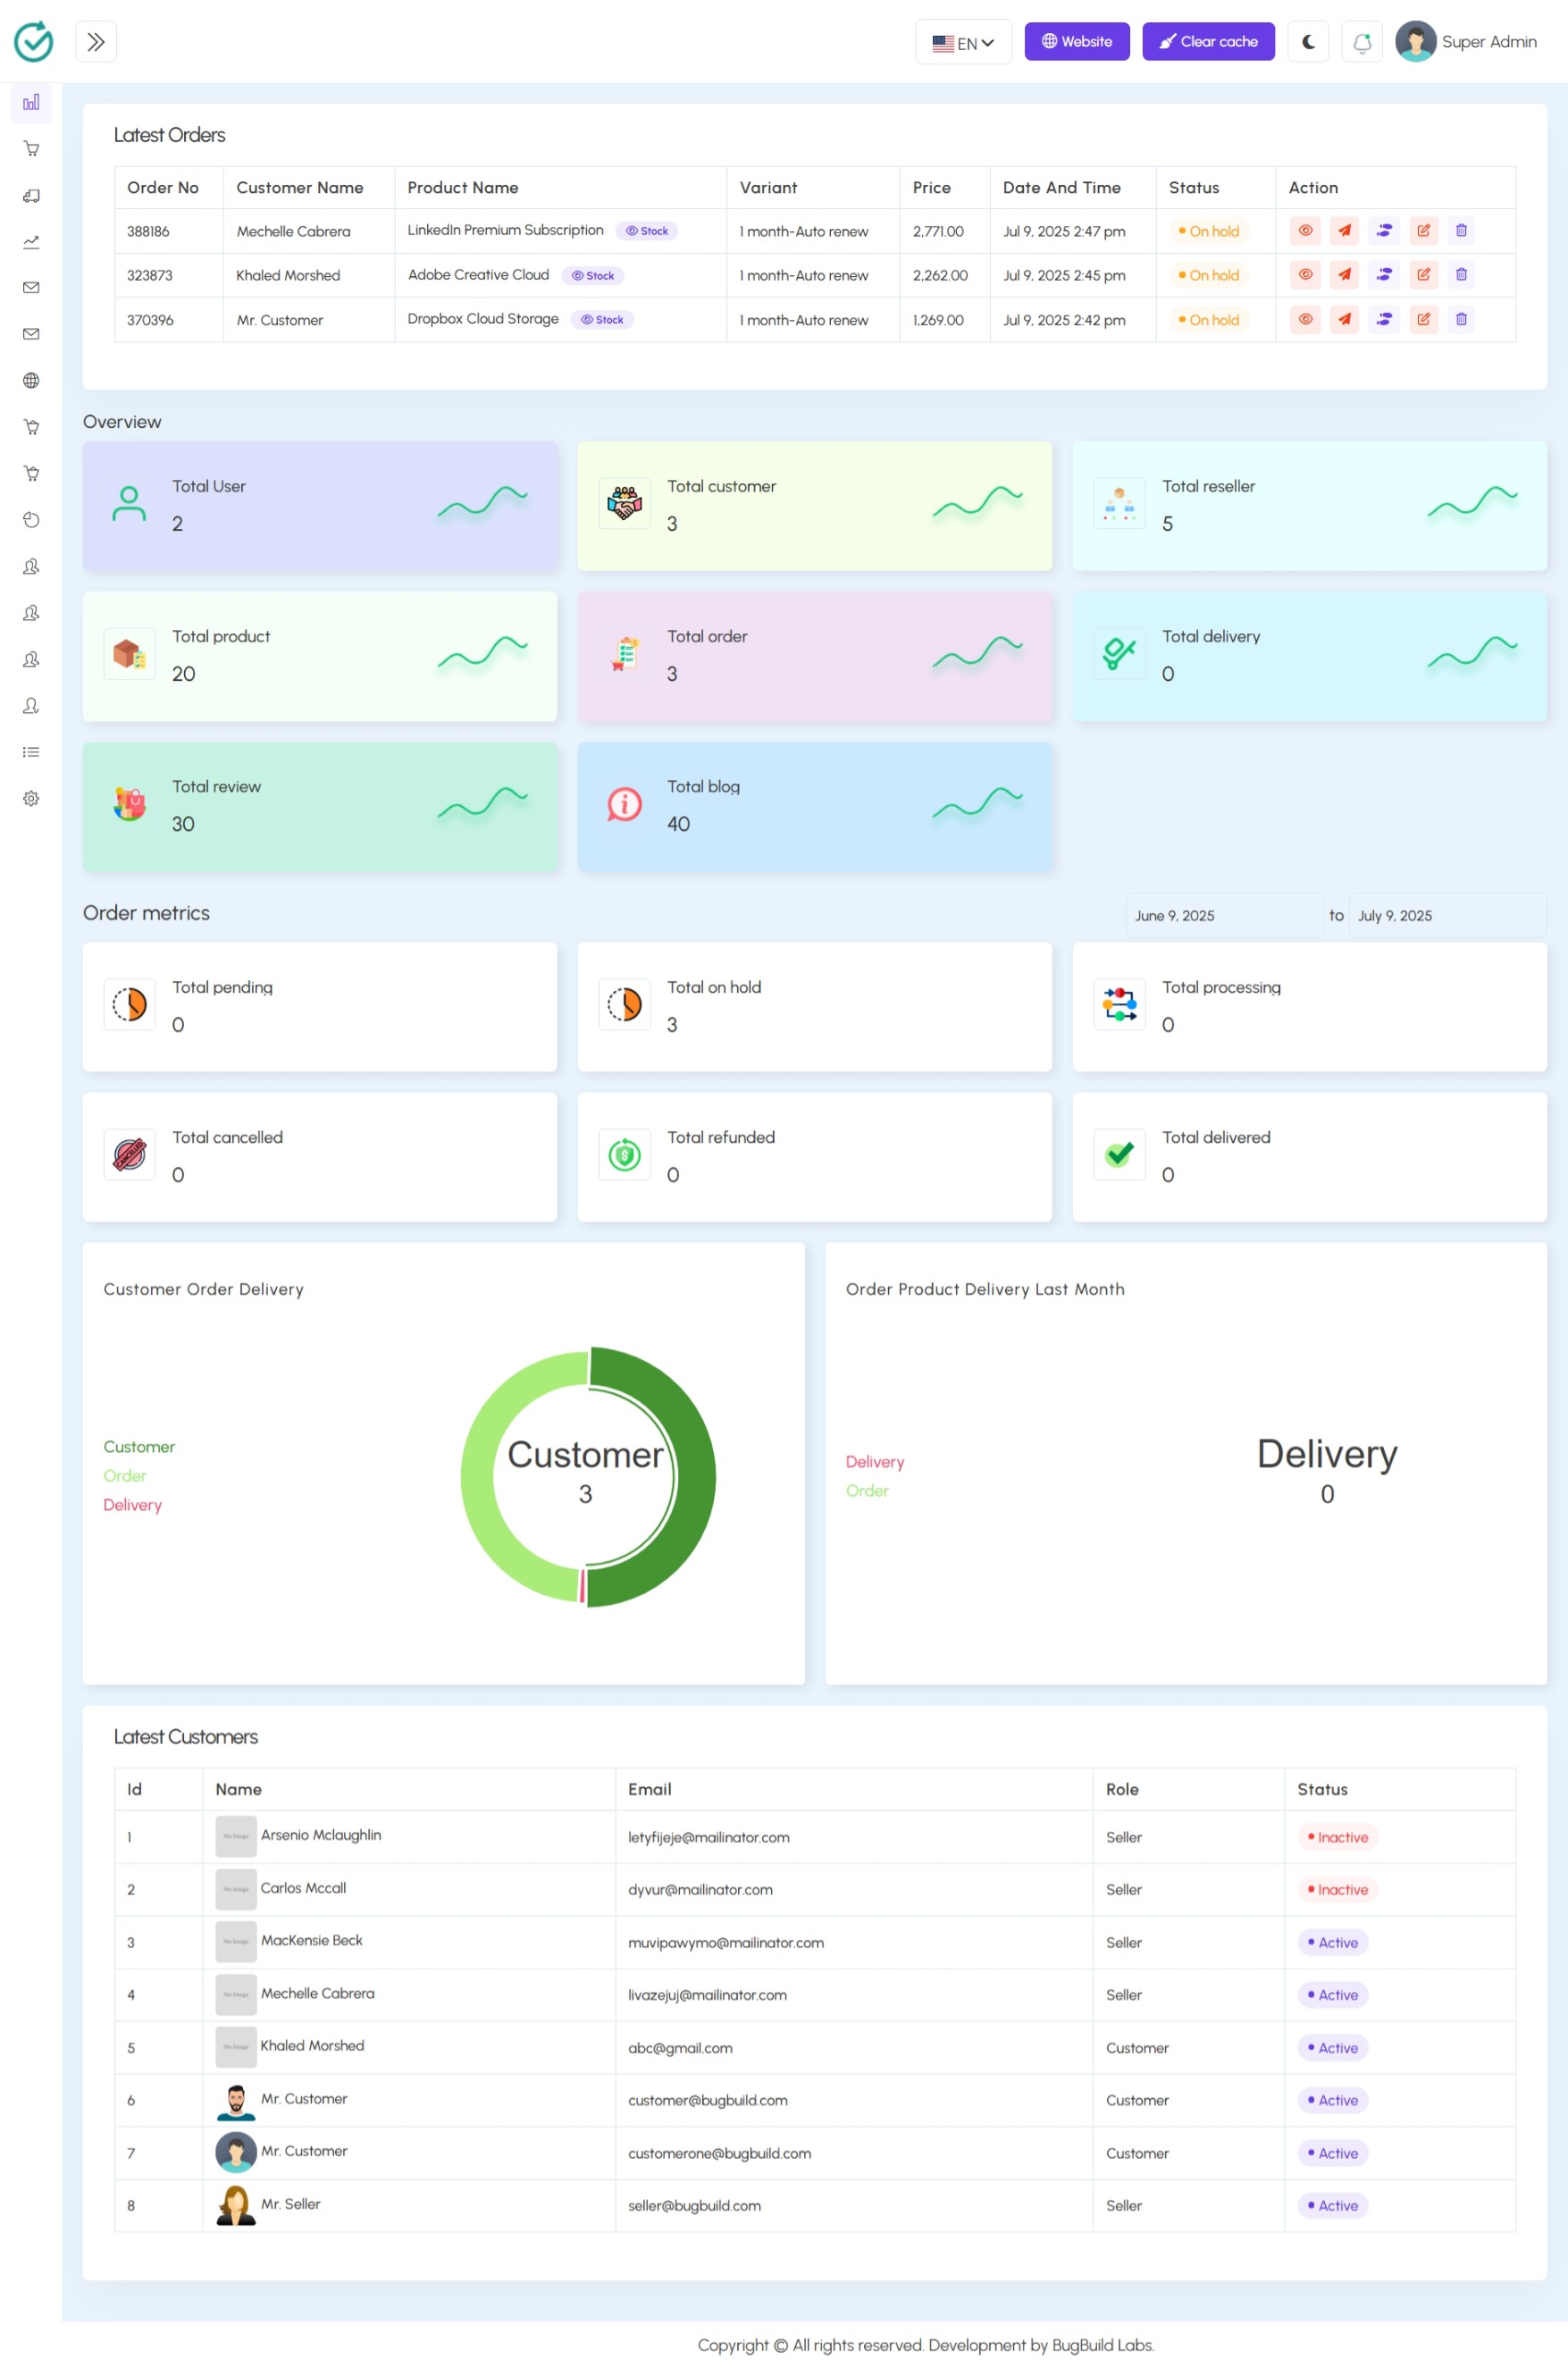
Admin Dashboard
The Admin Dashboard provides a comprehensive overview of key platform metrics and recent activities, enabling administrators to monitor operations in real time. It is divided into functional segments for easier insight and management.
Latest Orders:
Displays a table of recent orders including Order No, Customer Name, Product, Variant, Price, Status, and action buttons for quick management (edit, delete, view).
Overview Panels:
Includes a series of color-coded cards summarizing total counts of key resources, such as:
- Total Users, Customers, and Resellers
- Total Products, Orders, Deliveries
- Reviews and Blogs
Order Metrics:
Visual blocks display live metrics for order processing stages like Pending, On Hold, Cancelled, Refunded, and Delivered.
Analytics Charts:
Graphs show customer order distribution and product delivery stats. These are displayed using visual donut or pie charts for clarity.
Latest Customers:
A detailed table of recently registered users, including ID, Name, Email, Role (Seller/Customer), and their Status (Active/Inactive).
This dashboard is essential for real-time monitoring and maintaining platform health, customer activity, and operational control.
User Role Management
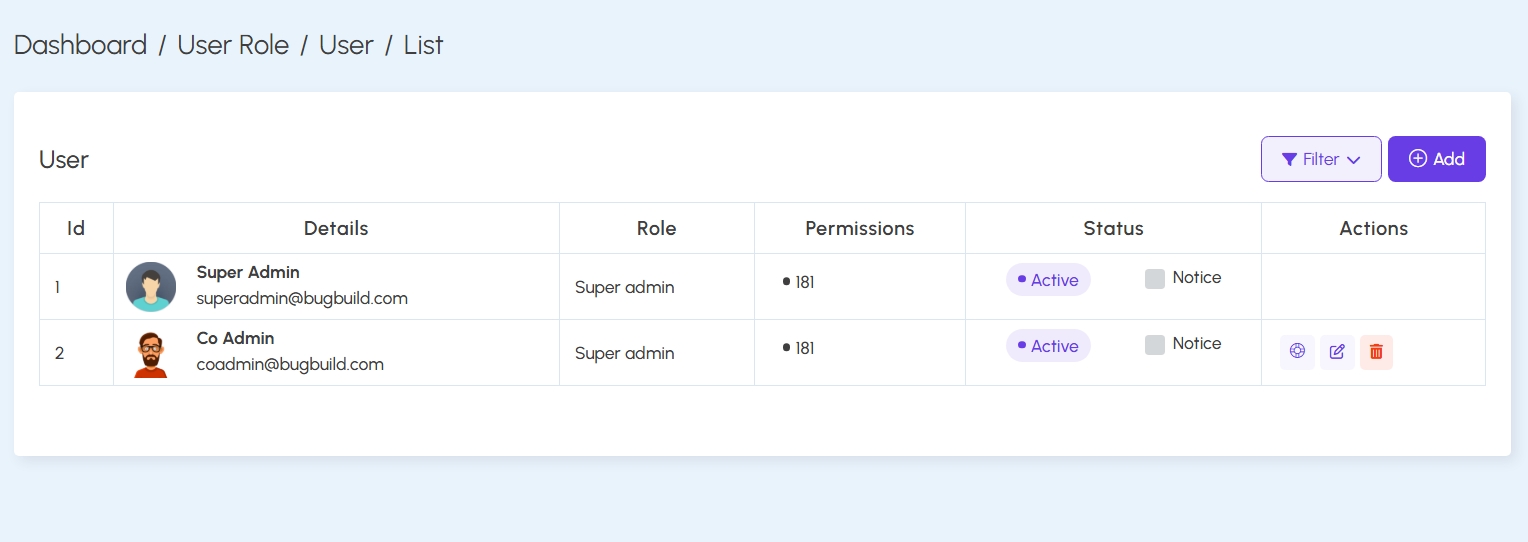
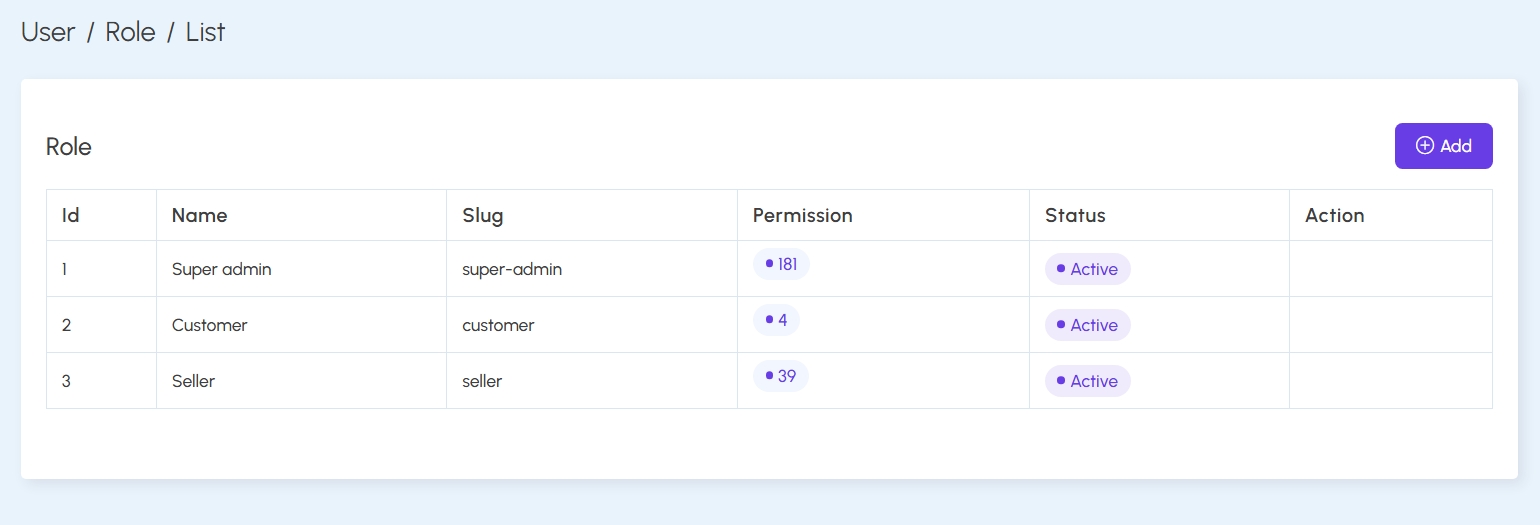
The User Role Management module allows administrators to create and manage user roles, assign users to roles, and define permissions for each role. This ensures that access control is both customizable and secure within the system.
View Users:
The User List page displays all users along with their role, email, permission count, status, and available actions (edit, delete, or configure). Each user entry provides a quick overview of role-based access.
View Roles:
The Role List shows all predefined roles, their slugs, permission counts, and status. Roles like Super Admin, Customer, and Seller are included with clear separation of privileges.
Create User:
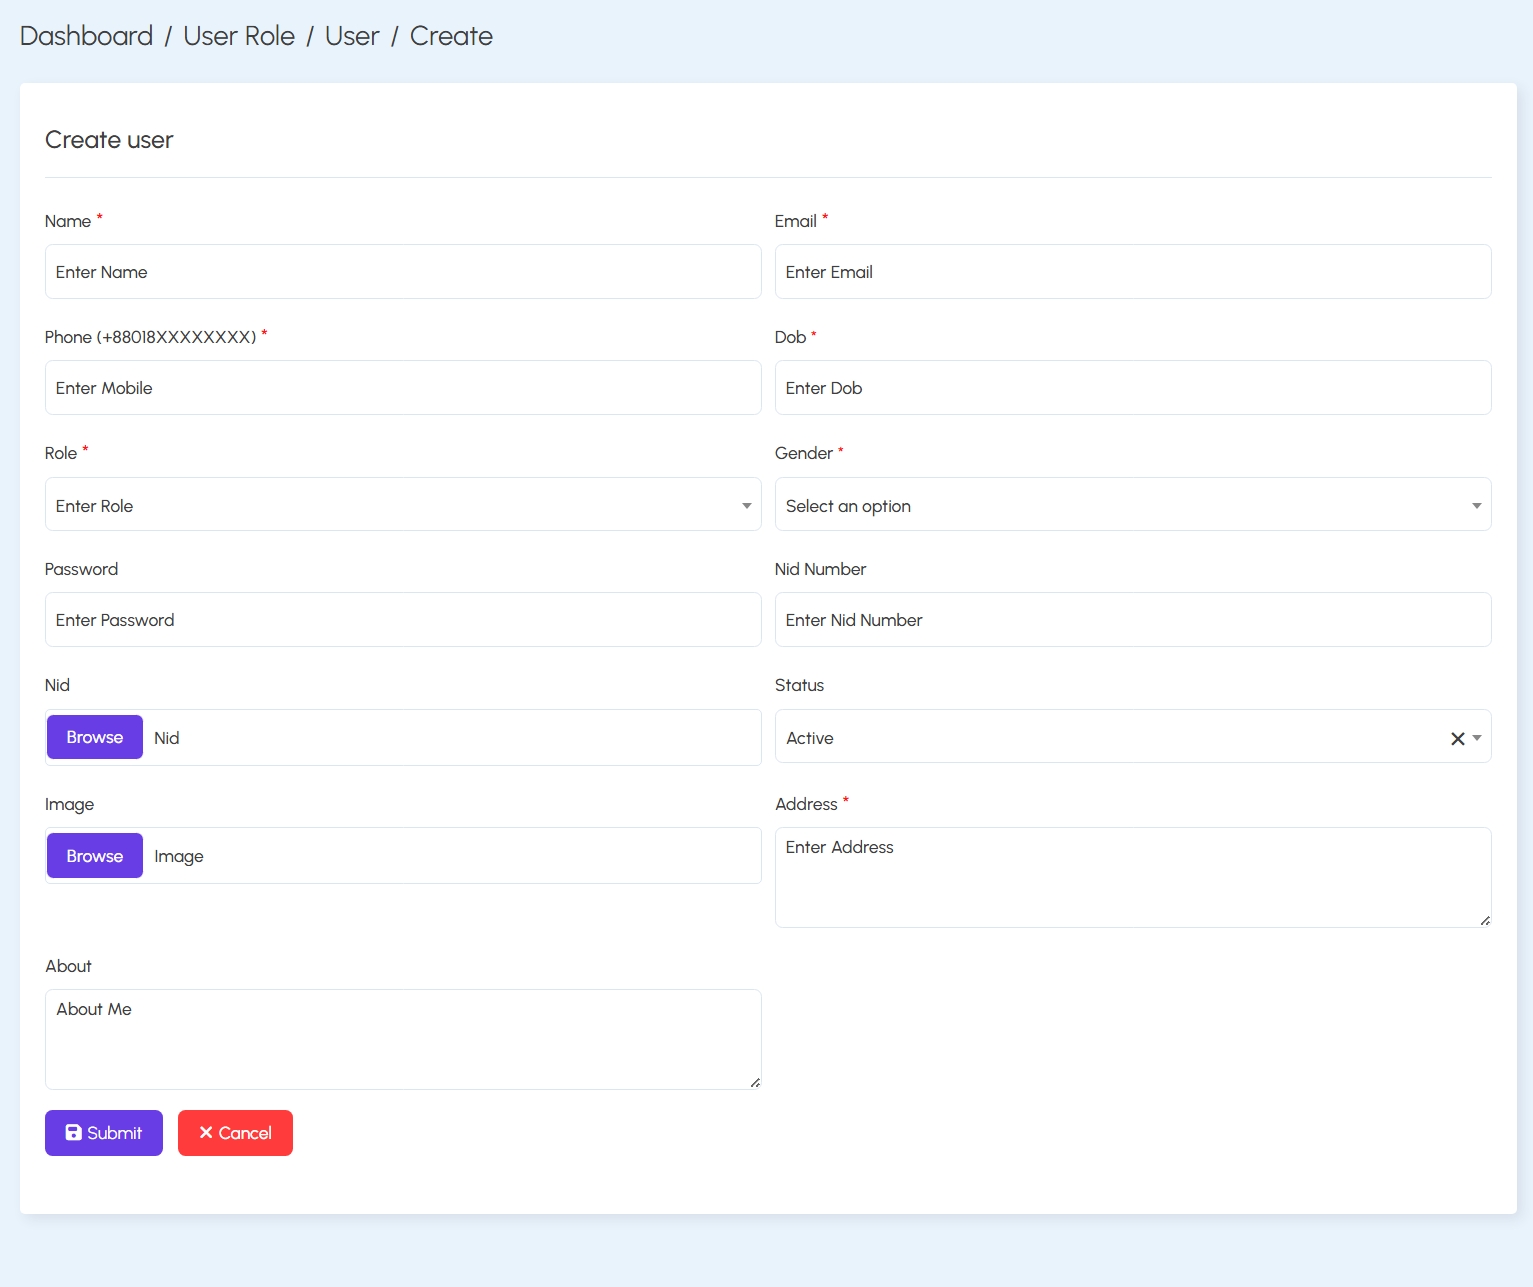
To add a new user, navigate to the Create User form. Fill out personal details (name, email, mobile, DOB, etc.), assign a role, upload NID and profile image, and submit. This ensures user entries are complete and properly categorized.
Assign Permissions:
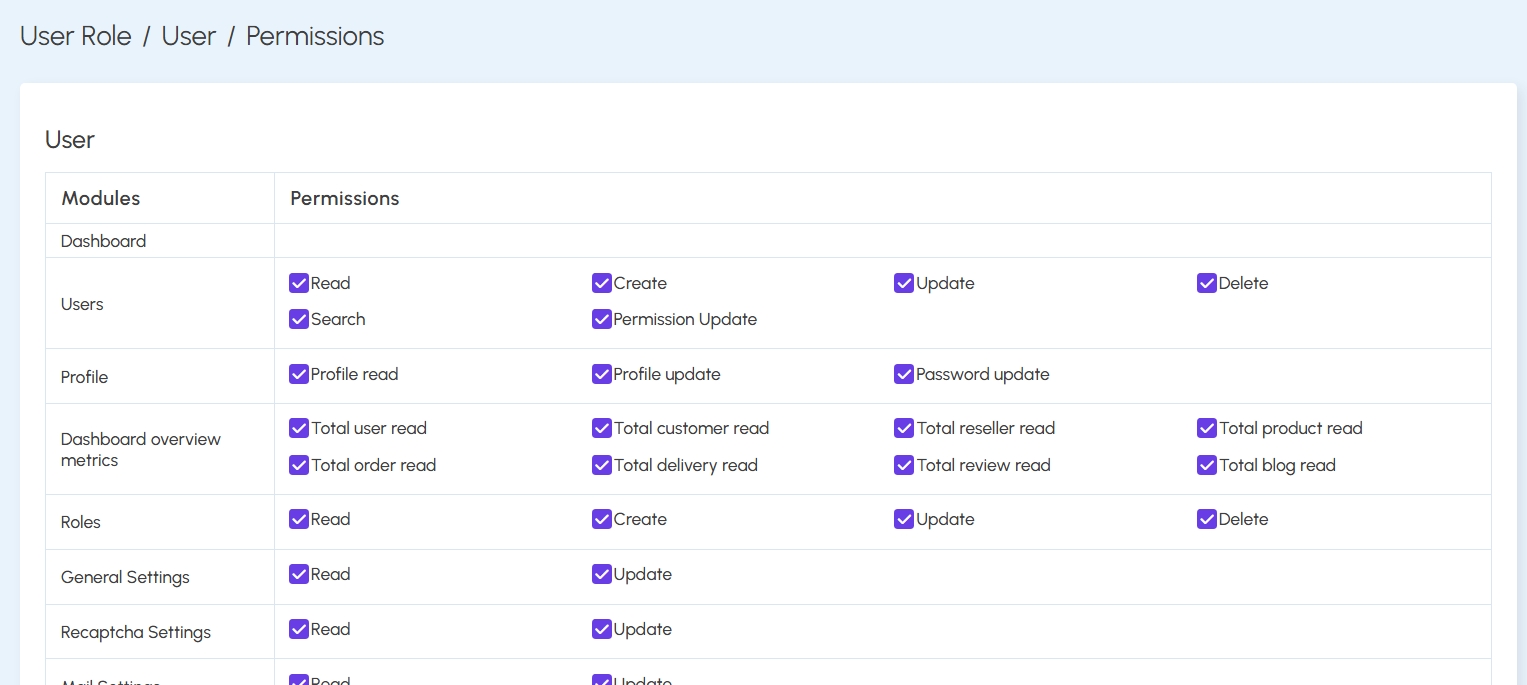
Permission management is module-wise. Admins can assign granular permissions like Read, Create, Update, Delete, and more for specific modules (e.g., Users, Dashboard, Profile, Roles). This allows dynamic control over what a user can or cannot do.
Create Role:
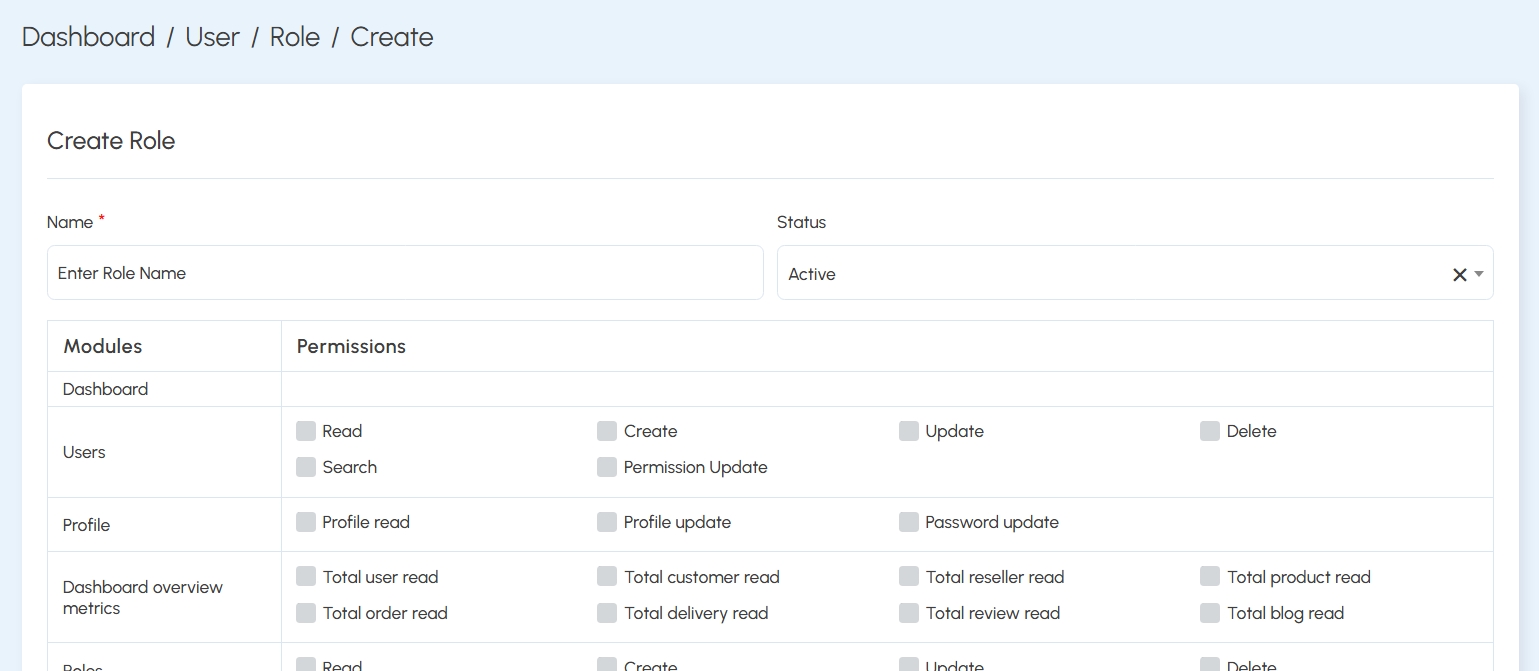
New roles can be created with customized permission sets. Simply enter the role name, choose status (Active/Inactive), and select required module permissions using the provided checkboxes.
Admin Profile Management
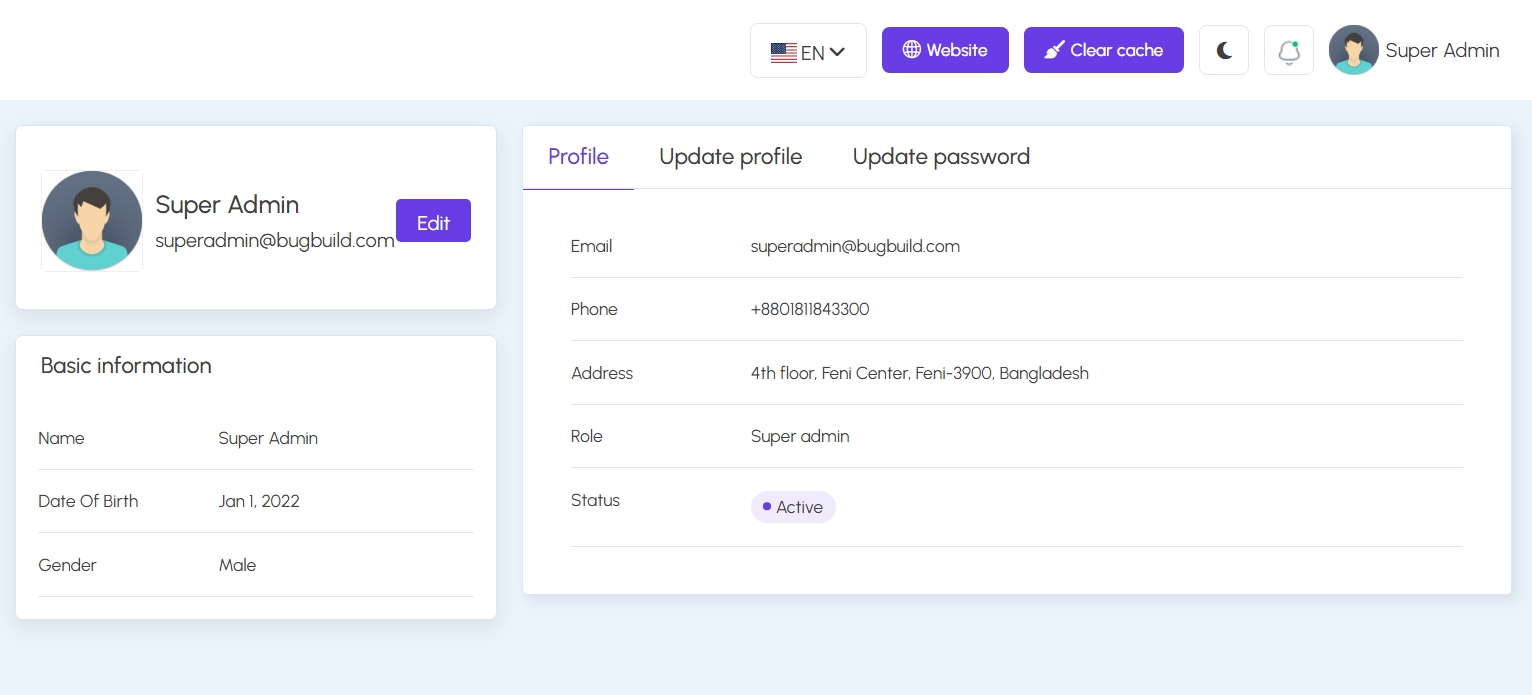
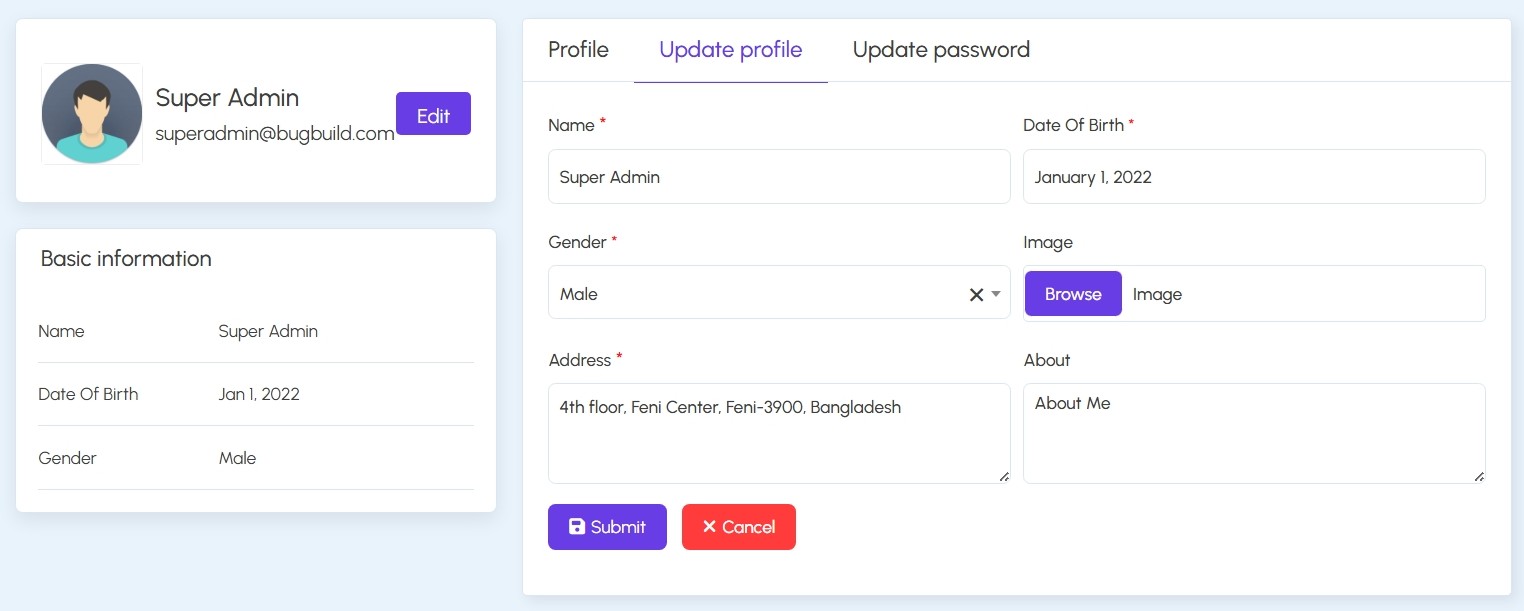
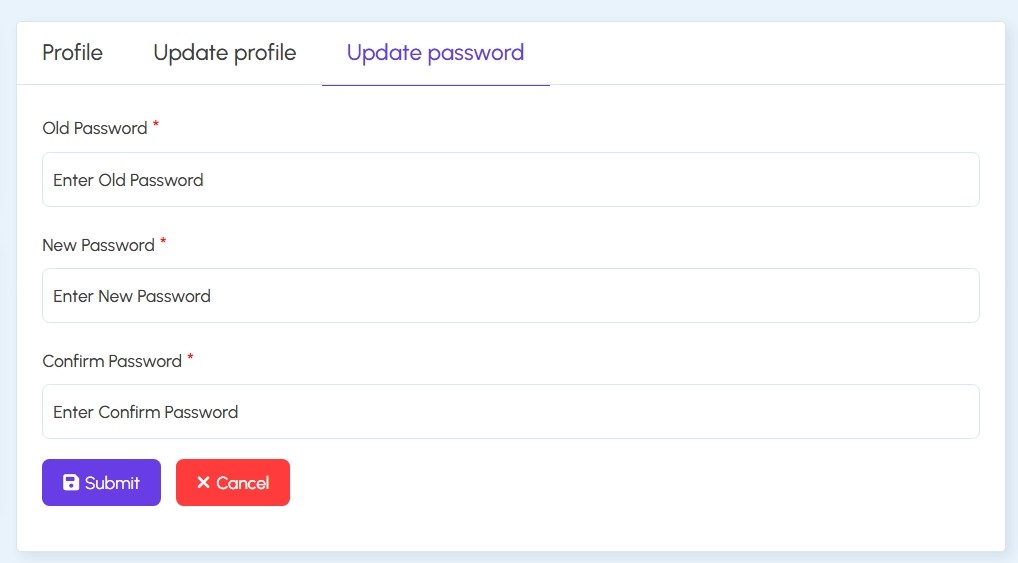
The Admin Profile section allows users with administrative access to manage their account information securely and efficiently. This module includes personal details, editable profile fields, and password management options.
View Profile:
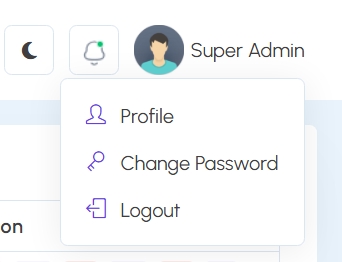
From the top-right dropdown menu, admins can access the Profile page, which displays key details like name, email, phone number, role, status, and address.
Update Profile:
By clicking the Edit button, the admin is redirected to a form where they can update their name, date of birth, gender, address, and optionally upload a new profile image. Changes are saved by clicking the Submit button.
Change Password:
Under the Update Password tab, the admin can securely change their password by providing their old password and confirming the new one. This ensures account-level security.
This section centralizes user profile control, offering intuitive navigation and secure settings to keep admin accounts up-to-date and protected.
Customer Management
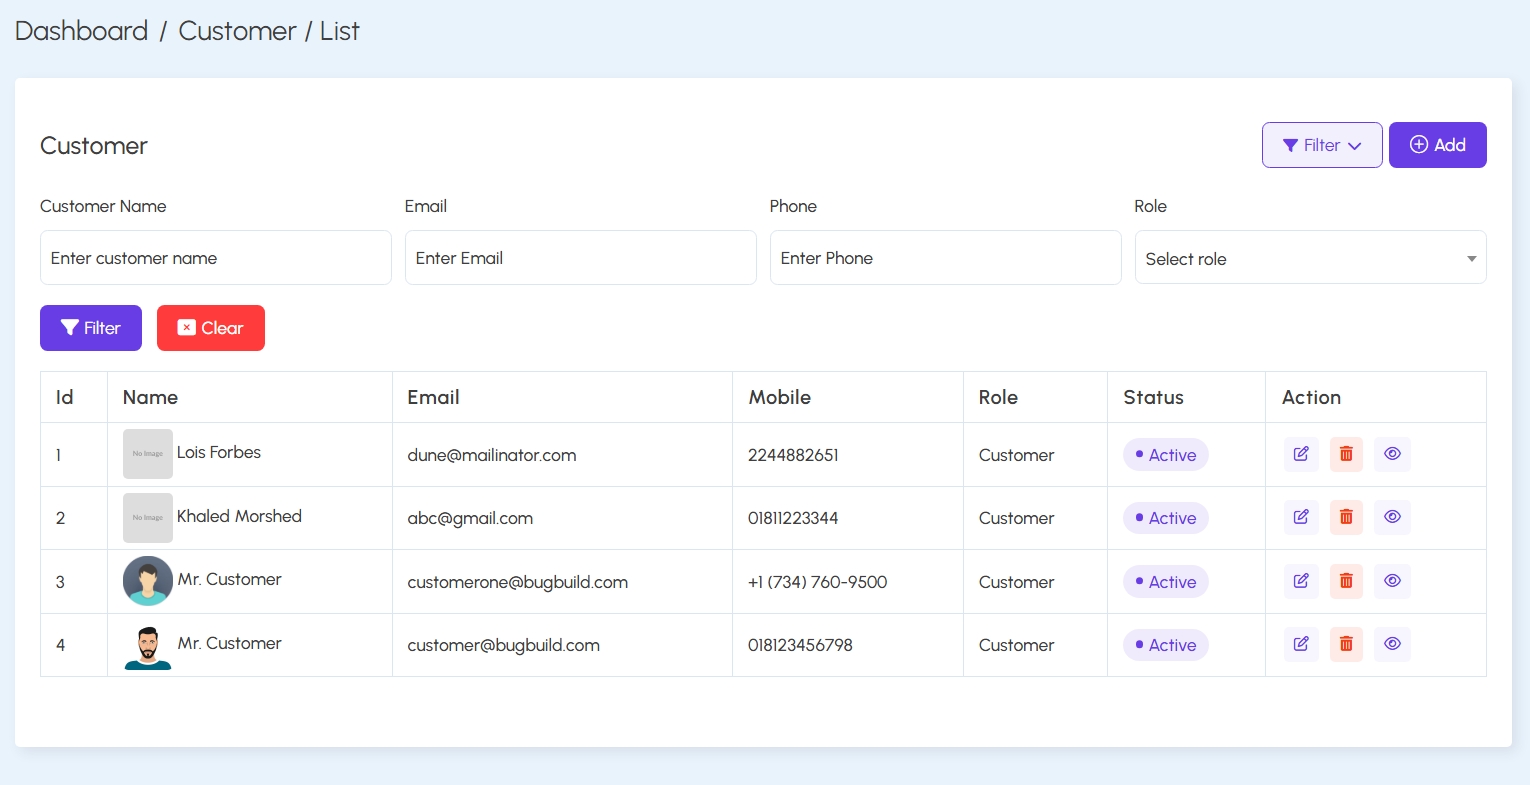
The Customer Management module allows administrators to view, filter, add, and update user profiles. This section plays a critical role in managing access, communication, and roles across the platform.
Customer List:
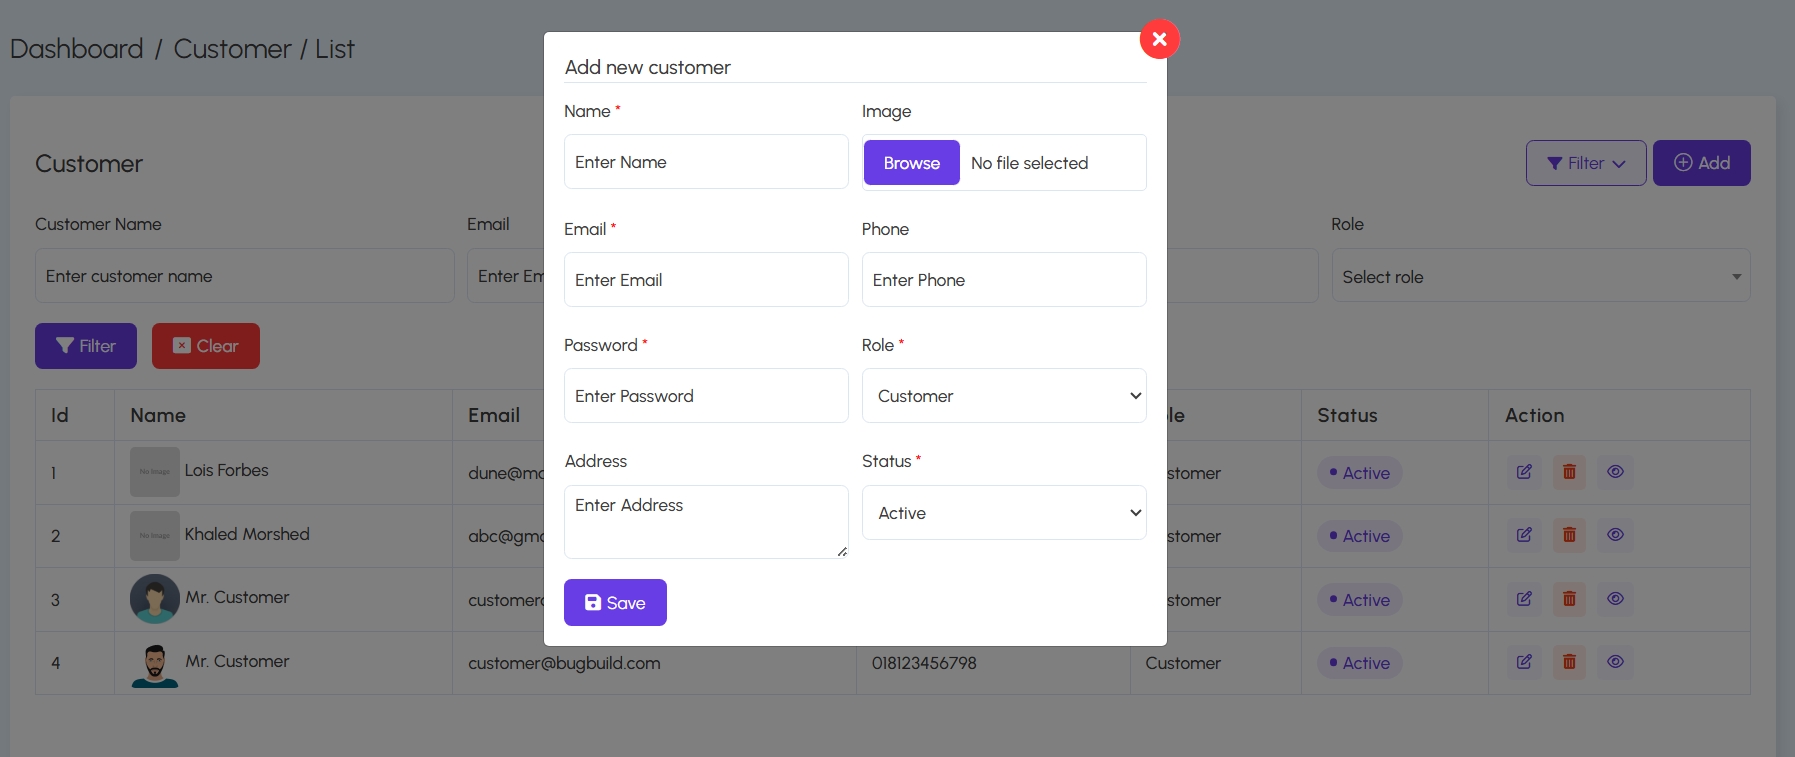
The Customer List displays user data including Name, Email, Mobile, Role, and Status. Admins can use the filter bar to search by name, email, phone number, or user role. Inline actions allow editing, deletion, and detailed view access.
Add New Customer:
Admins can add a new customer using a pop-up form that requires:
- Name, Email, Phone, Password
- Role (default is "Customer")
- Image upload (optional)
- Status toggle for Active/Inactive
- Address for profile enrichment
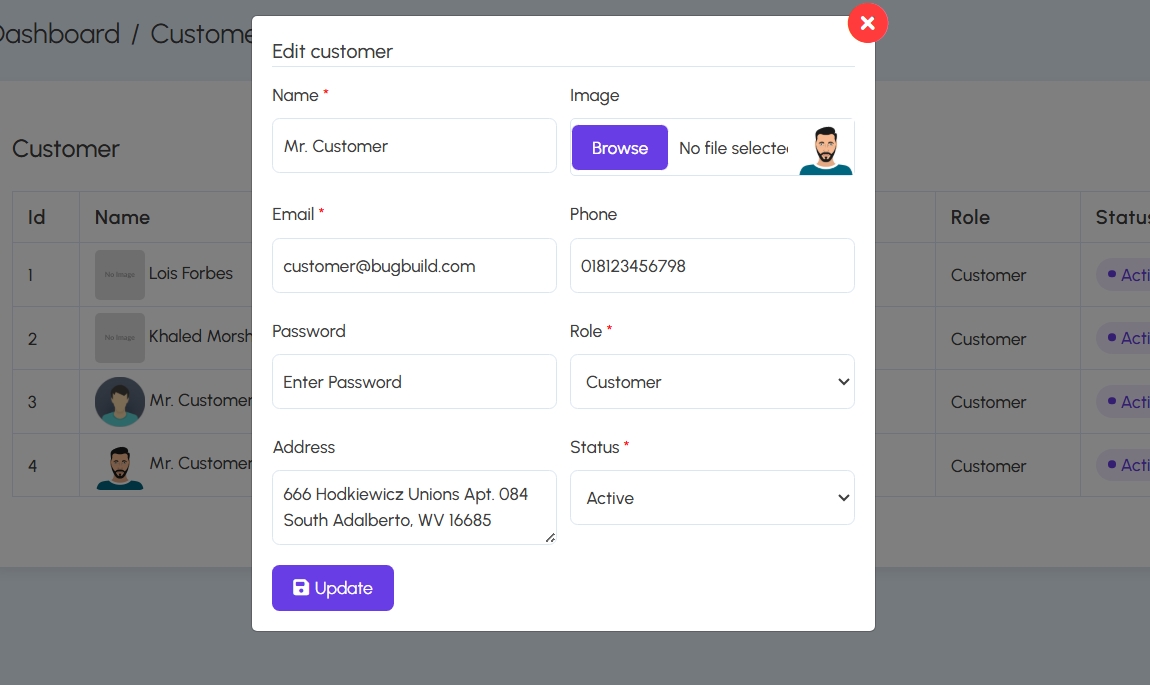
Edit Customer:
Customer profiles can be updated using a similar form, which preloads existing information and allows for modifications. The administrator can change any field including password, image, role, and contact information.
This module ensures that user records remain organized, searchable, and up-to-date, supporting both customer service and internal operations.
Seller Management
The Seller Management module enables platform admins to onboard, view, edit, and manage sellers or vendor accounts. Each seller is tied to a specific shop and can be granted a role such as Seller or Super Admin.
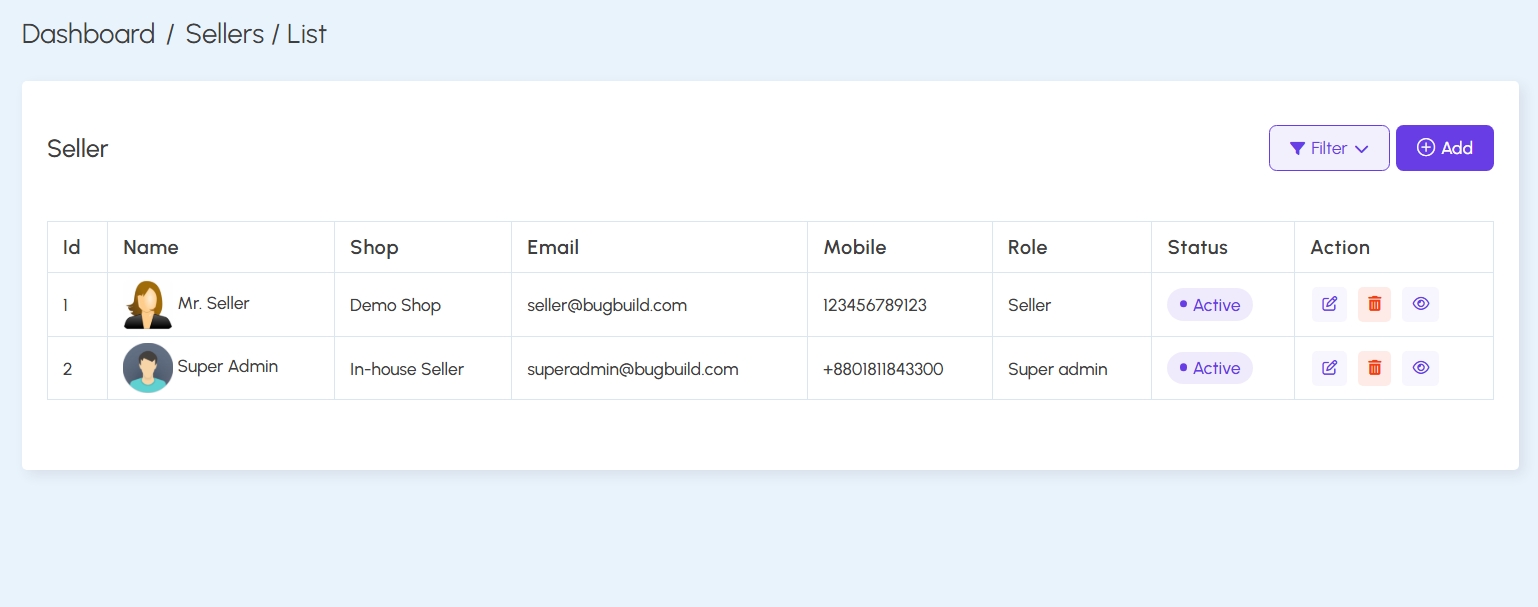
Seller List:
The Seller List provides an overview of all registered sellers. It includes their Name, Shop, Email, Mobile, Role, and Status. Admins can filter the list and use the inline action buttons to edit, delete, or view seller profiles.
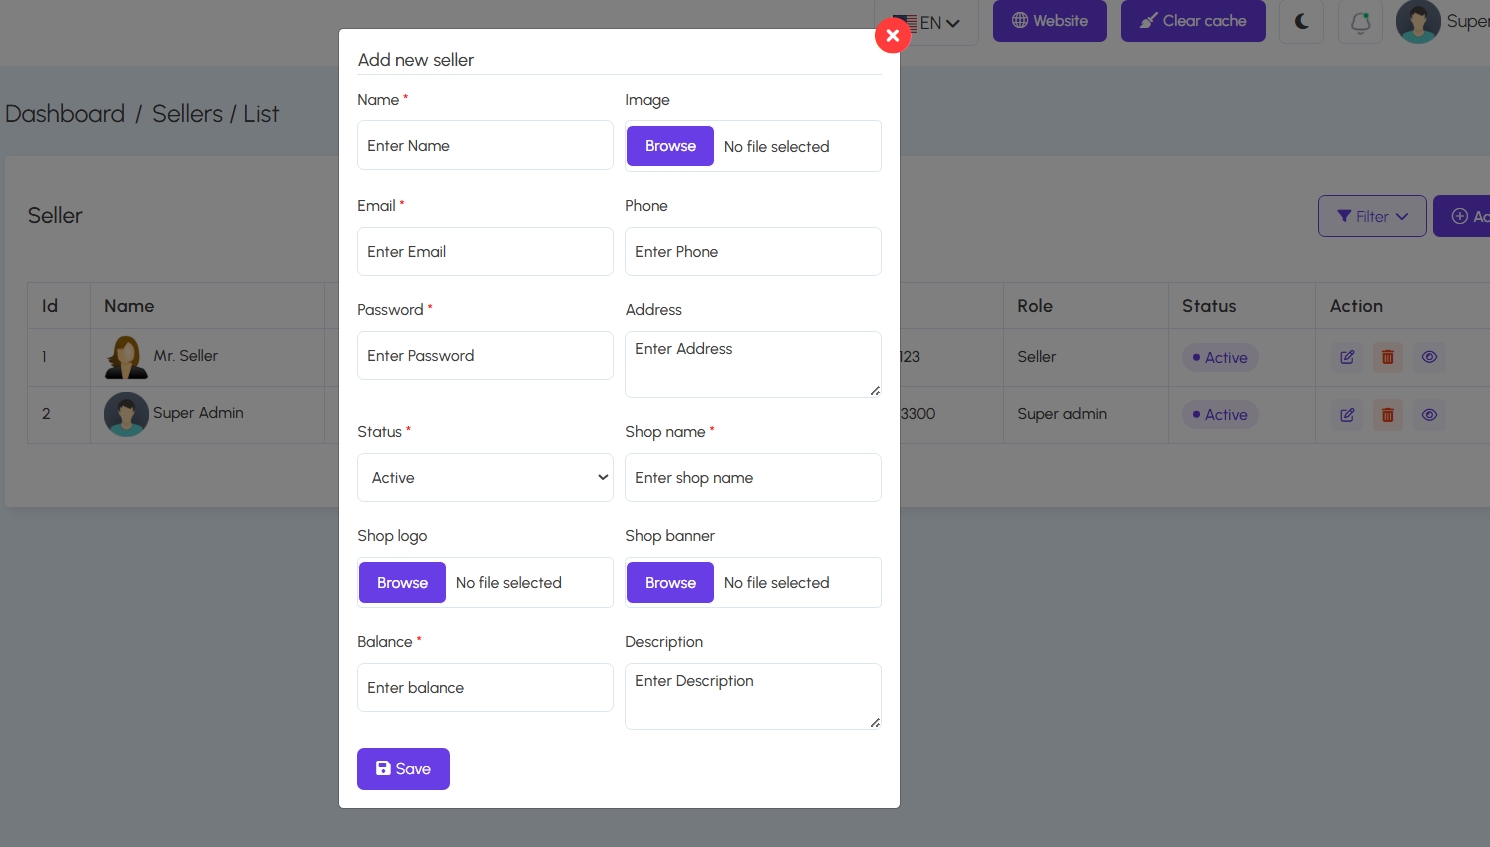
Add Seller:
A modal form is used to register new sellers. Required fields include:
- Name, Email, Password,
, and Role - Shop Details: Name, Logo, Banner, Description
- Status and Balance
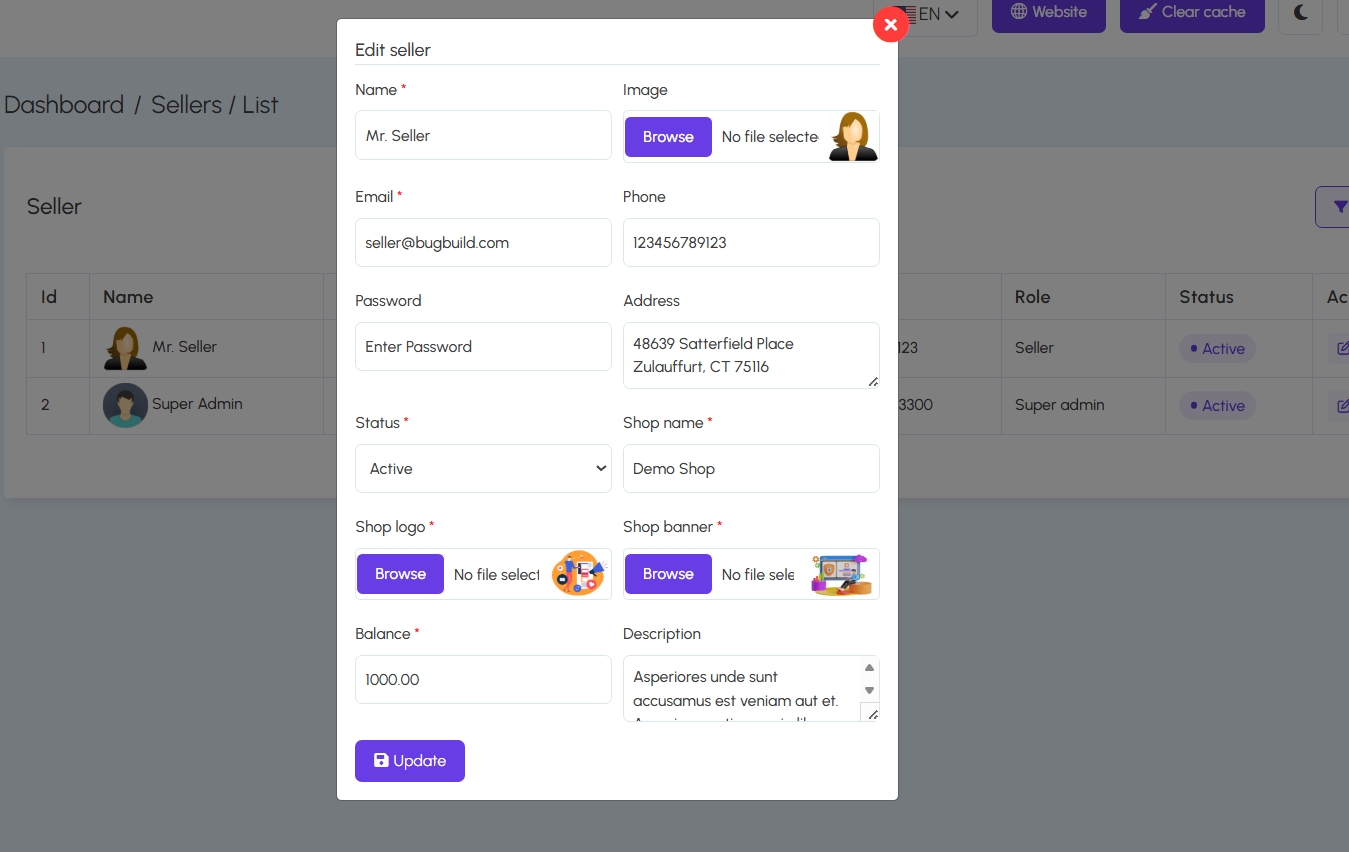
Edit Seller:
Admins can modify seller information using the Edit Seller form. This allows updates to contact details, shop info, balance, images, and login credentials.
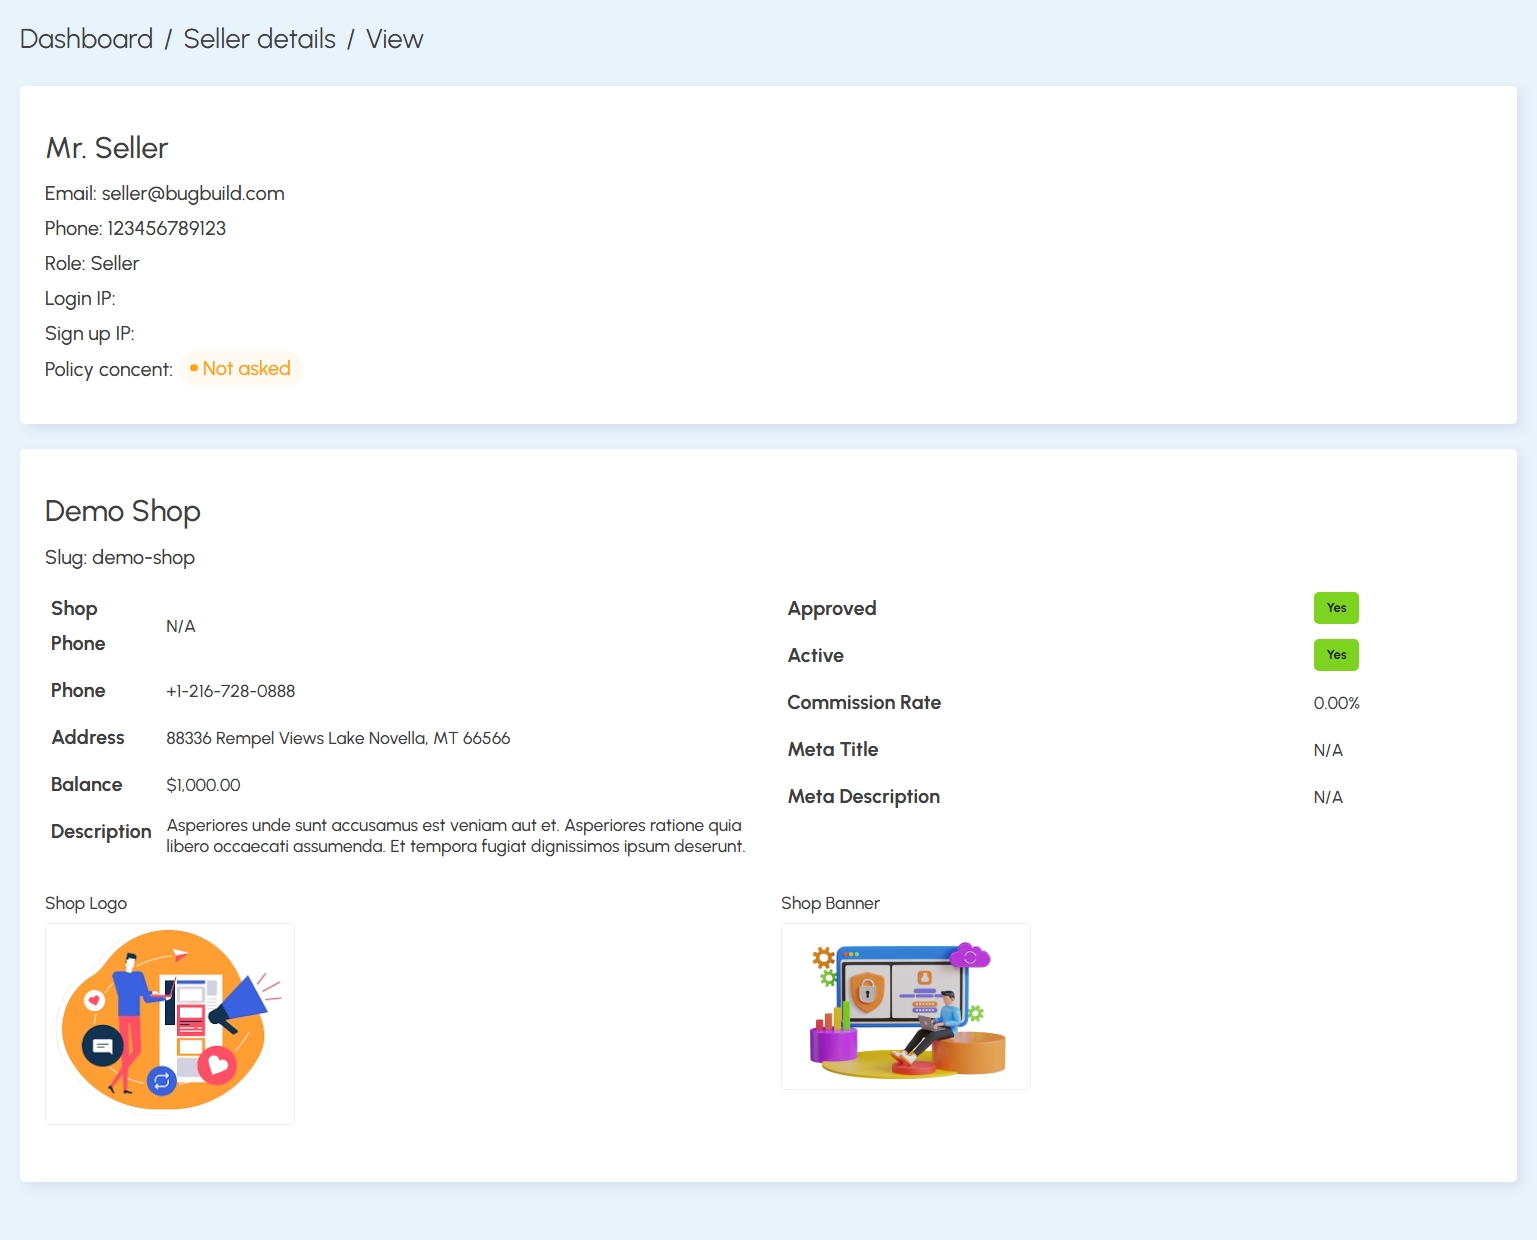
Seller Profile View:
The detailed view of a seller includes account details (email, phone, role, login info) and shop metadata like balance, address, approval status, and uploaded images. This centralized display helps with audits and seller support.
Seller Commission Settings
The platform supports flexible commission configurations to manage seller earnings and admin fees. These settings allow defining default and custom commission rates on a per-seller or category basis.
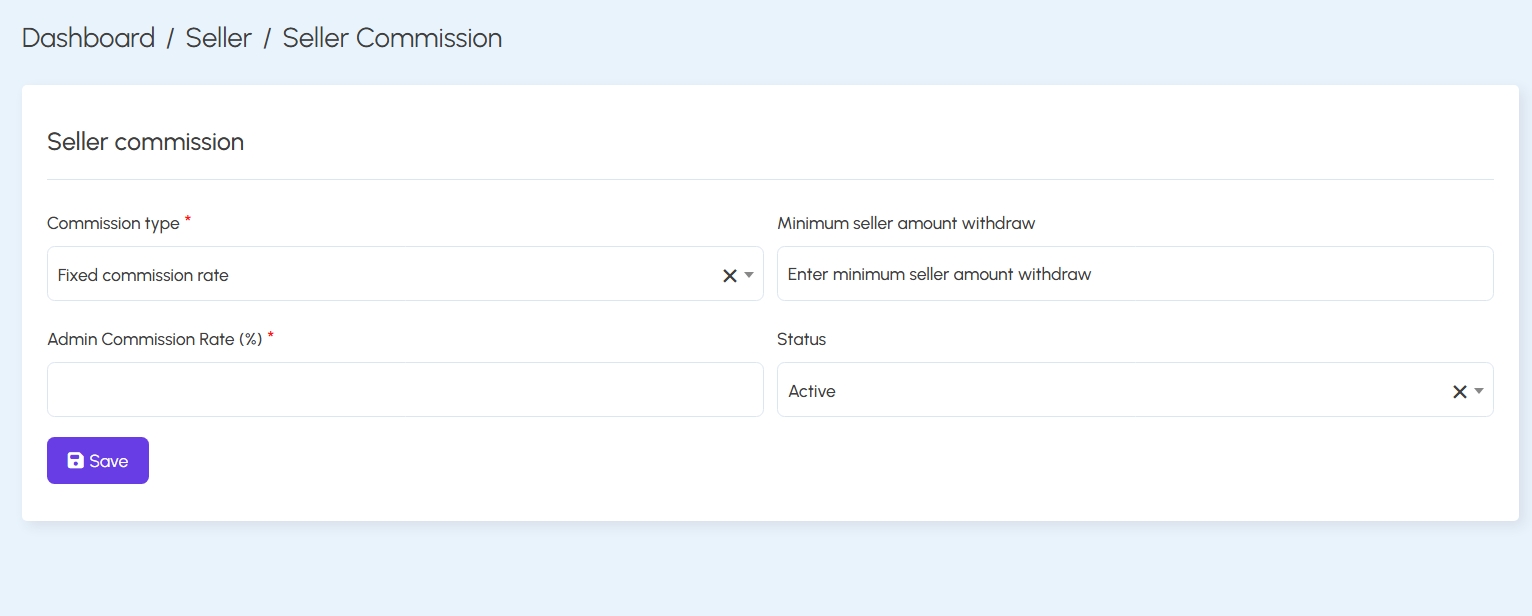
General Commission Settings:
Admins can set a Fixed Commission Rate for all sellers globally, along with a Minimum Seller Withdrawal Amount. These global rules apply unless overridden per seller or category. The form also includes a toggle for activation.
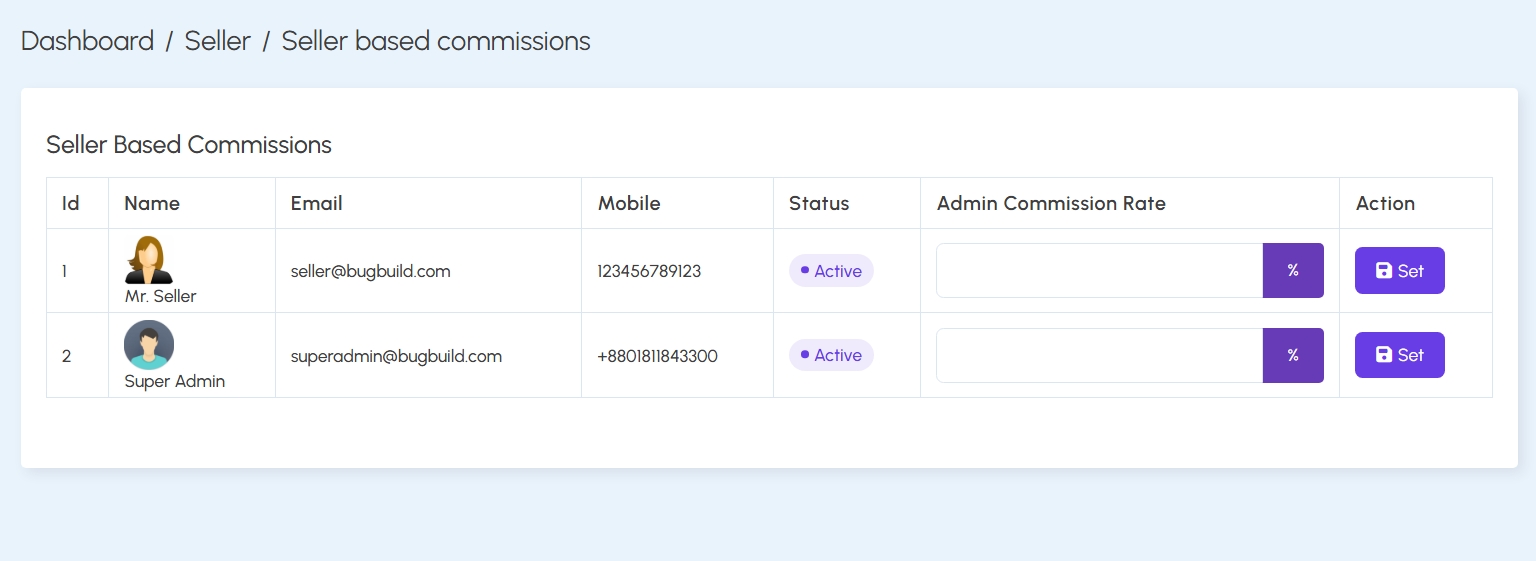
Seller-Based Commission:
Specific commission rates can be defined for individual sellers. Admins can input a custom percentage rate and click Set to apply. This allows flexibility in handling high-volume or special sellers.
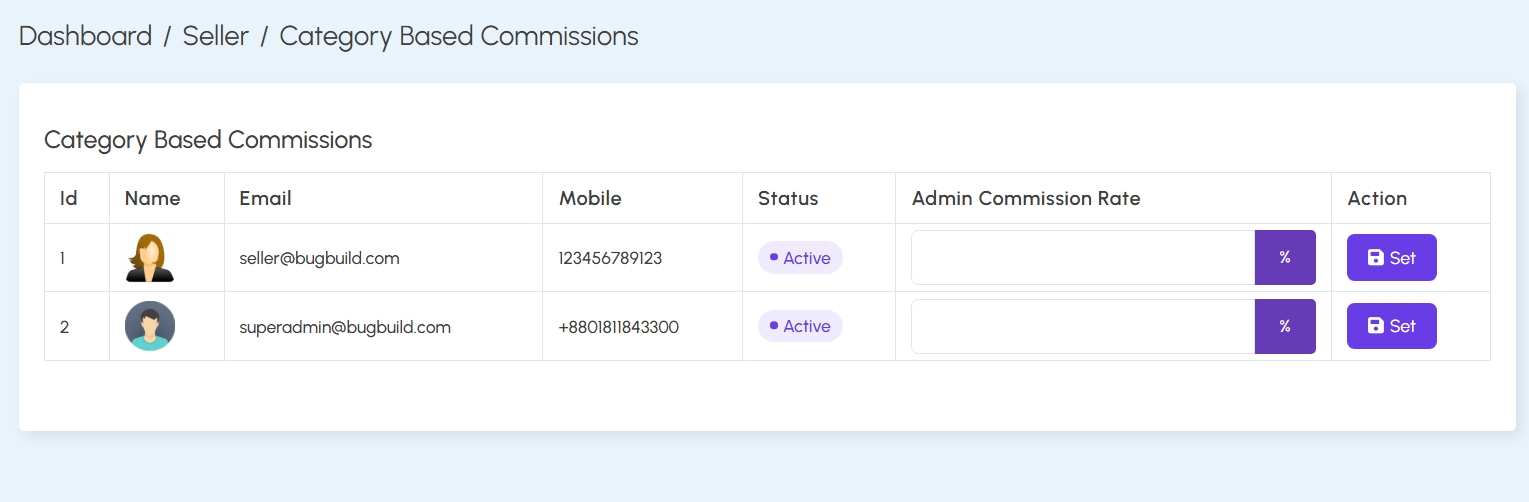
Category-Based Commission:
This feature lets the admin define commissions per seller based on product categories. This is especially useful in marketplaces where different categories carry different margins.
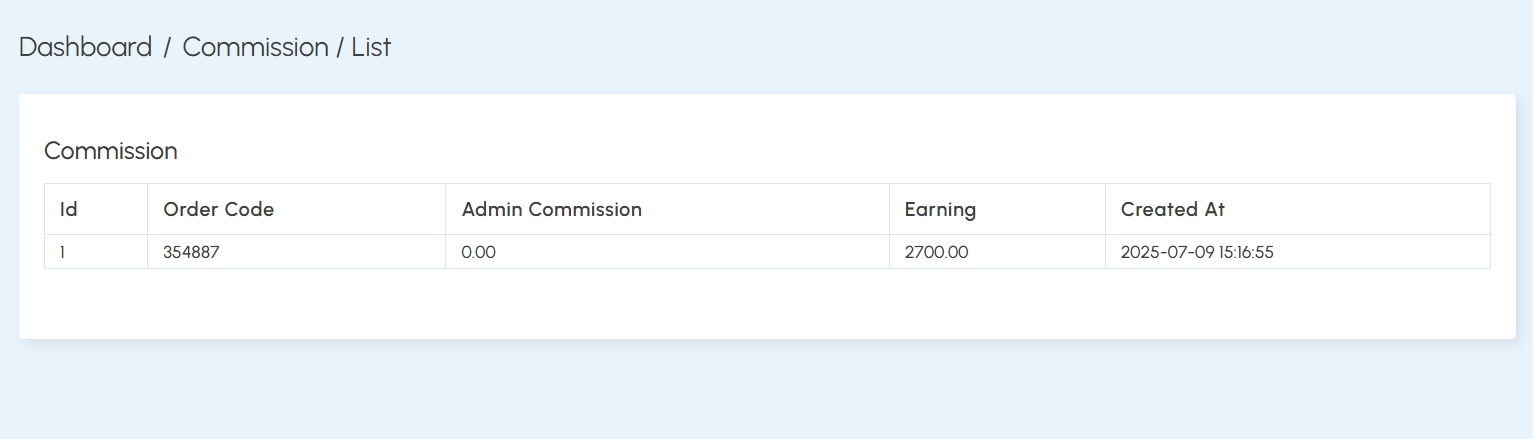
Commission History:
The commission report lists admin earnings by order code, along with seller earnings and timestamps. This historical view aids in transparency and financial audits.
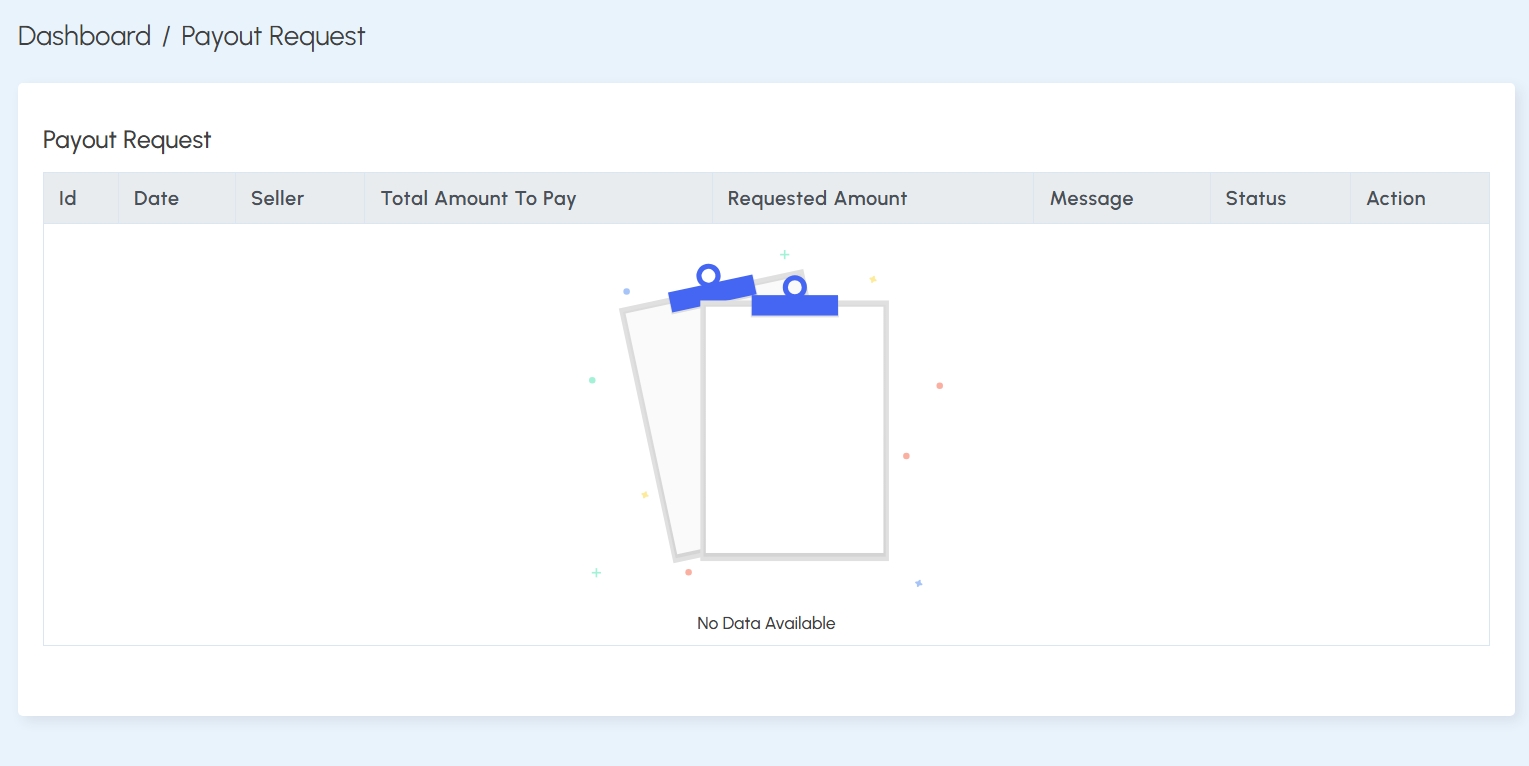
Payout Requests:
Sellers can request payouts once their balance exceeds the configured minimum. The Payout Request screen lists requests with columns for amount, message, status, and available actions. If no requests exist, the view displays an informative placeholder.
Product Catalog Management
The Product Catalog module allows admins to organize subscription products into hierarchical structures such as Categories and Subcategories, enriched with detailed Attributes and their respective Values. This modular system improves user navigation and enhances product filtering and customization.
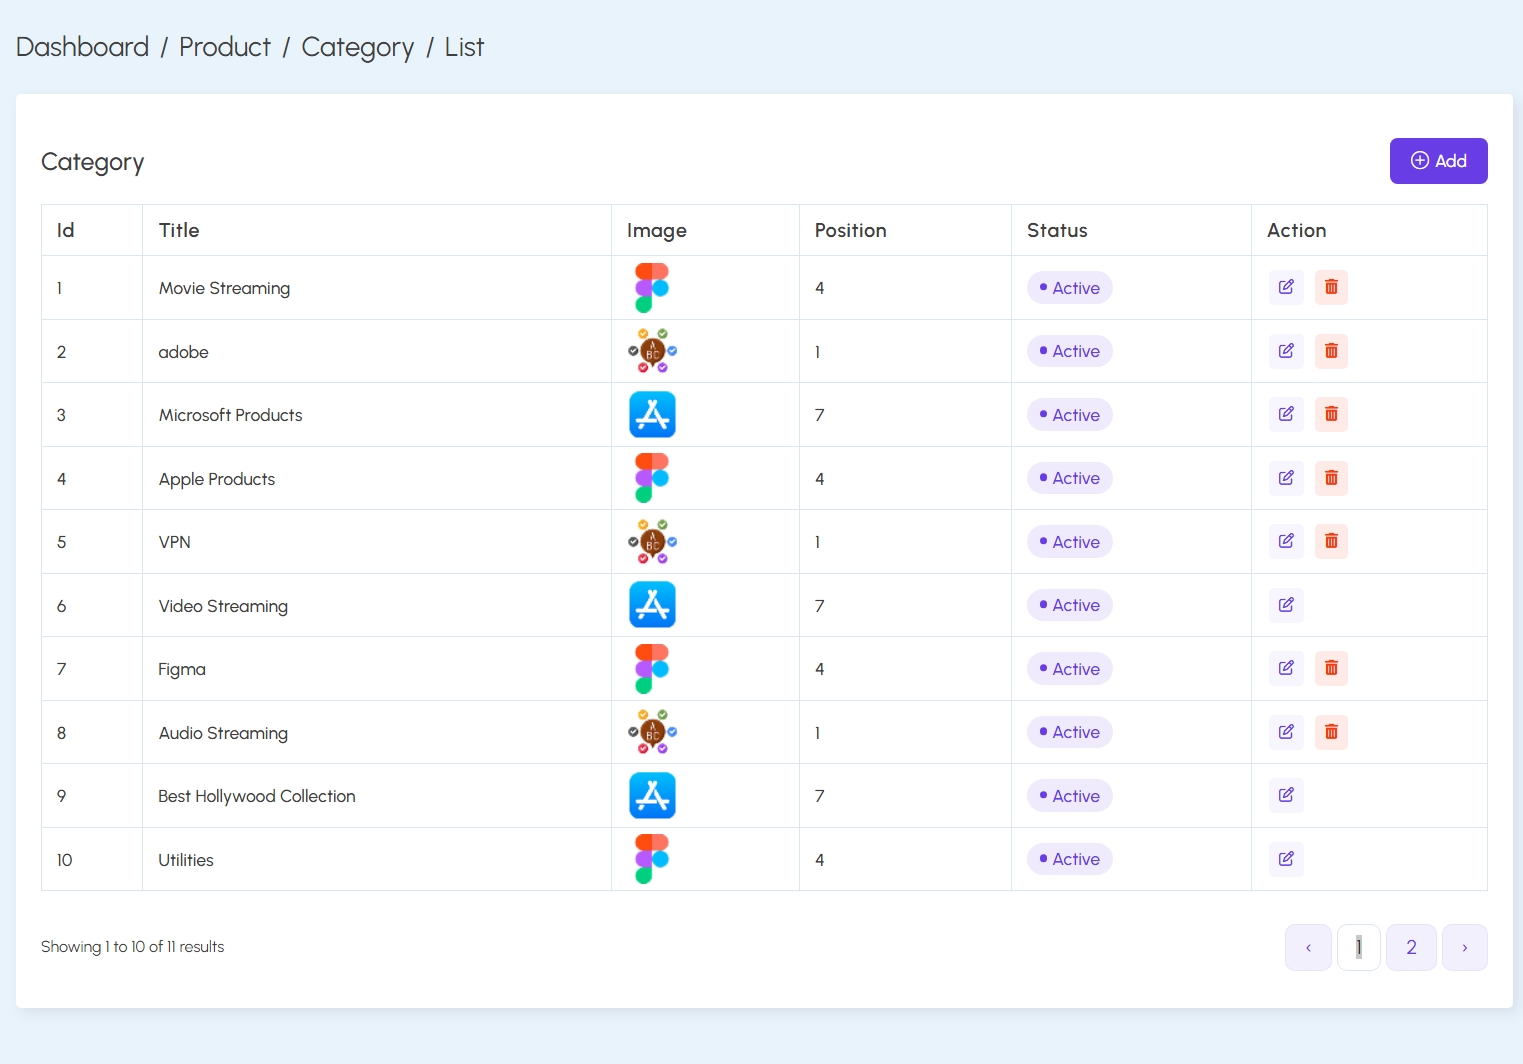
Category Management:
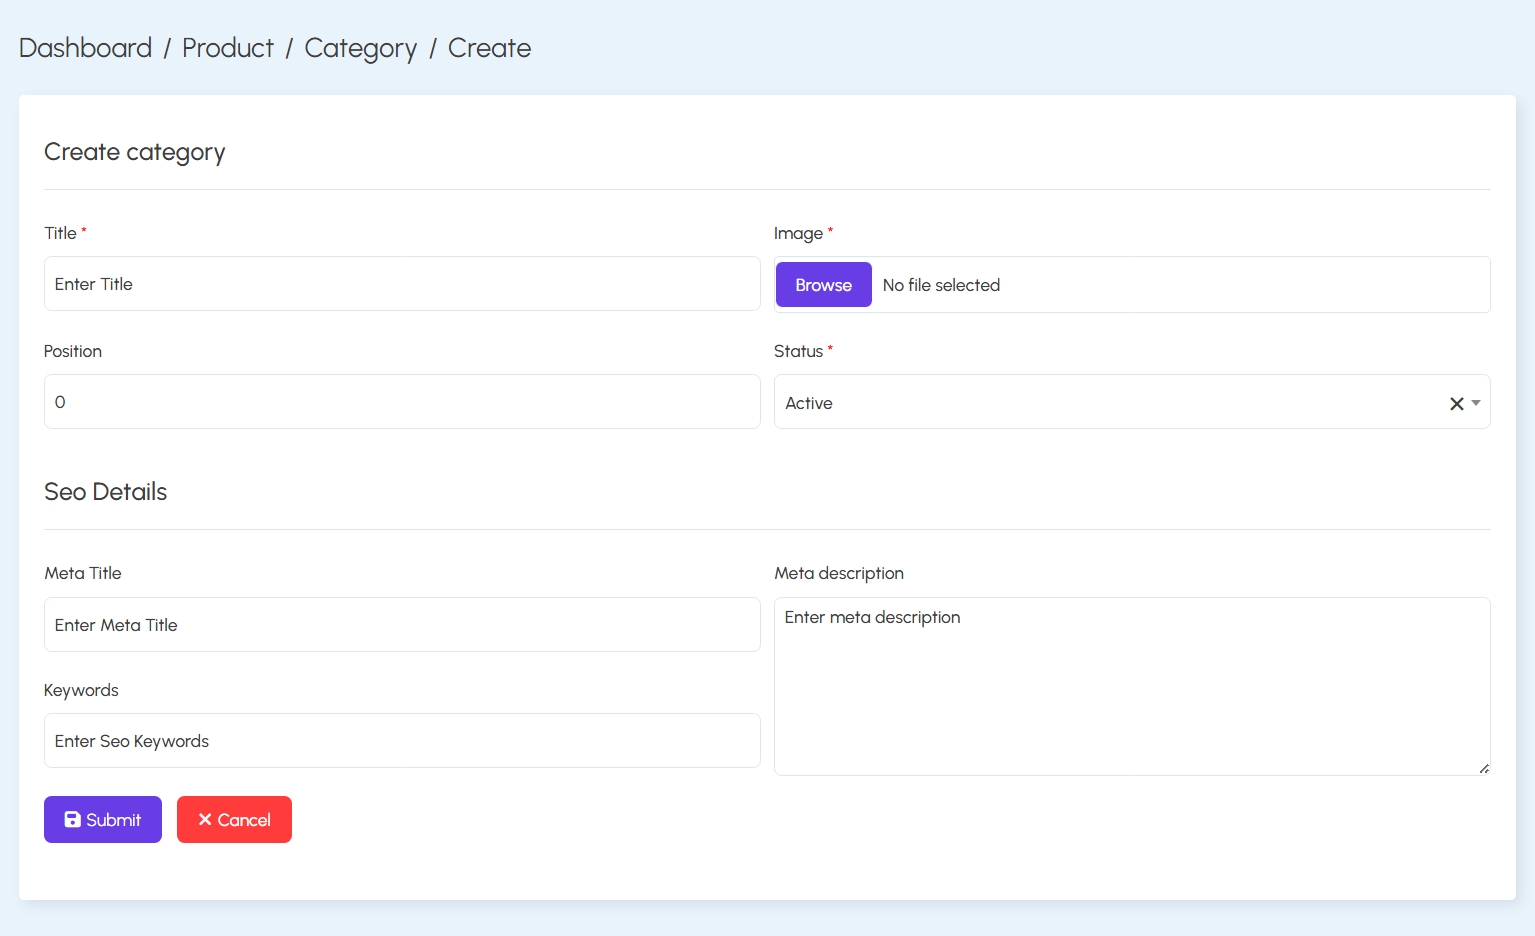
Categories serve as the primary grouping level for products. Admins can list, create, edit, or delete categories. Each category includes fields such as Title, Image, Position (for sorting), Status, and SEO metadata like Meta Title, Description, and Keywords.
Subcategory Management:
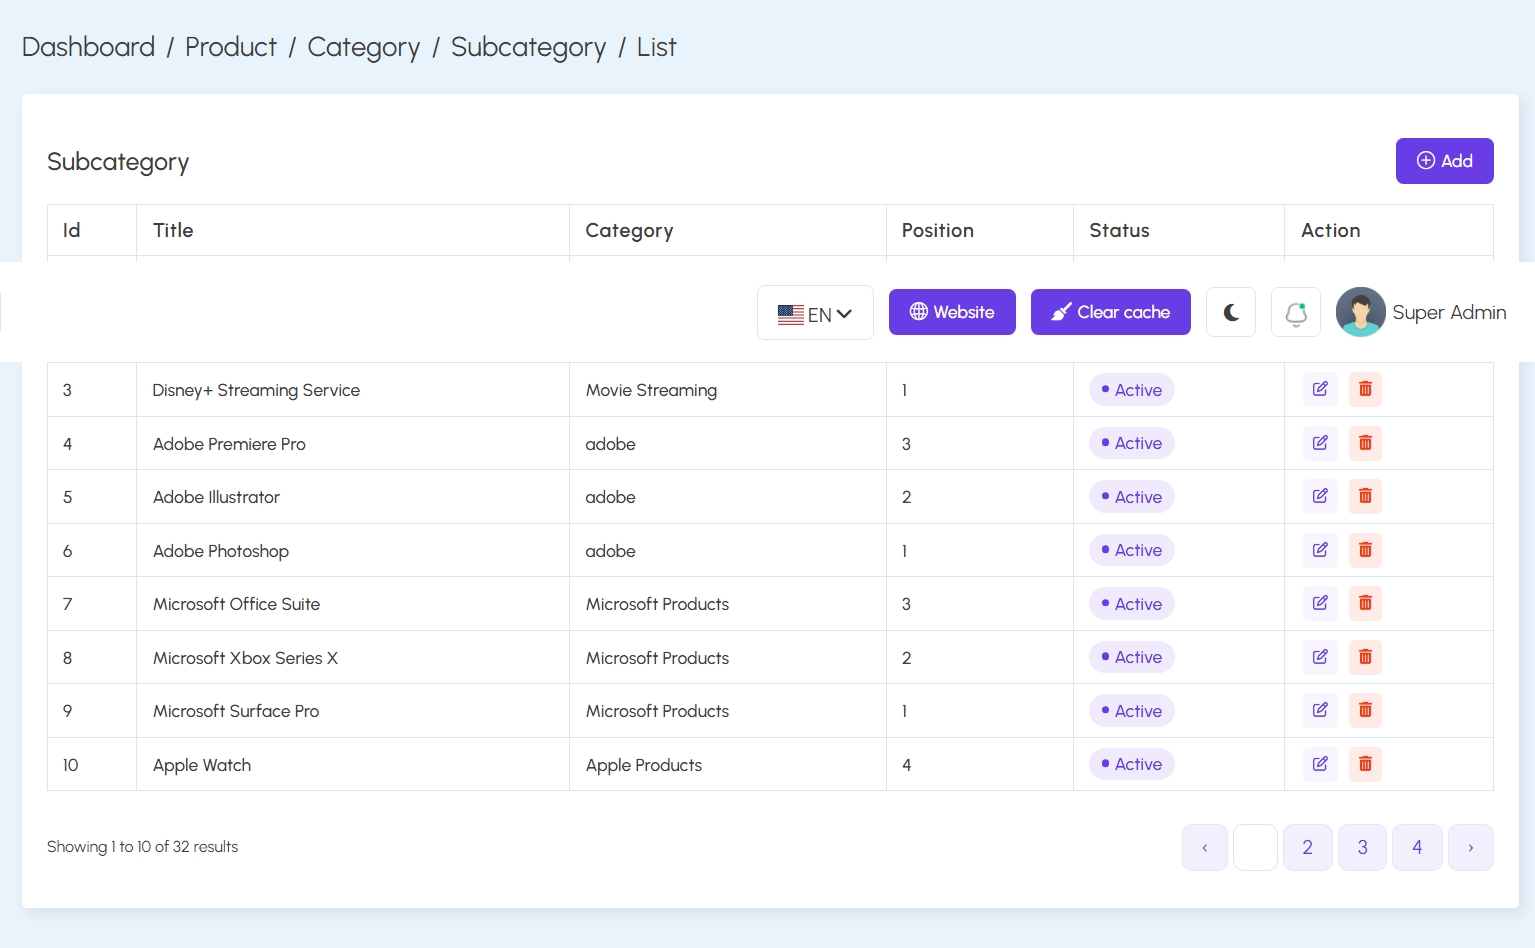
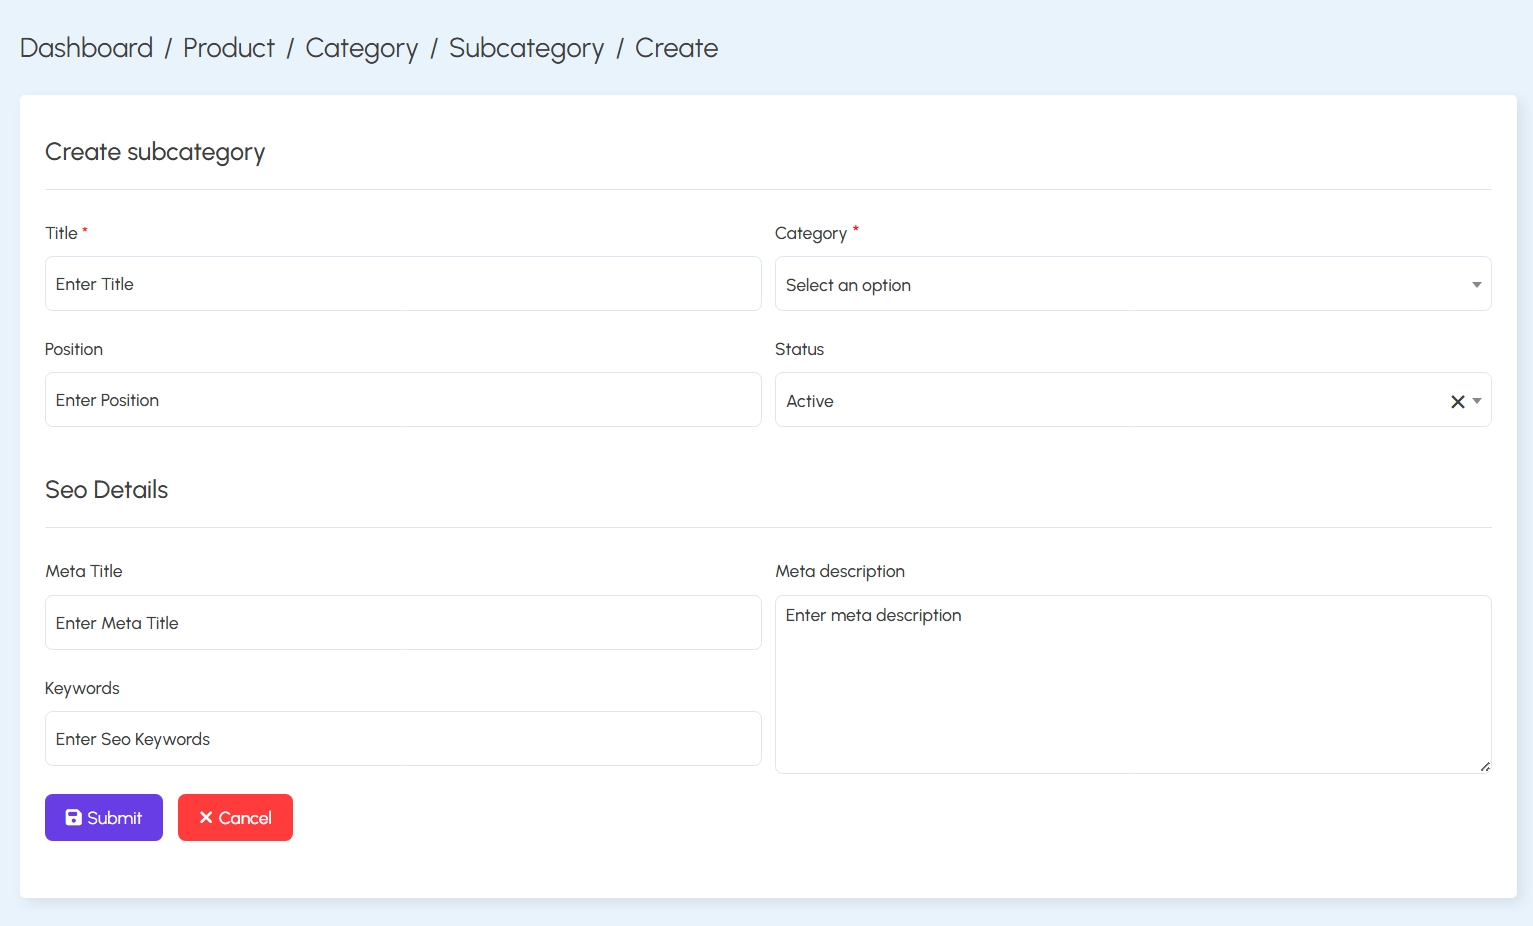
Subcategories further refine product organization under each Category. The Subcategory table displays the Title, Parent Category, Position, and Status. Admins can use the action icons to edit or delete any entry.
Attribute & Value Management:
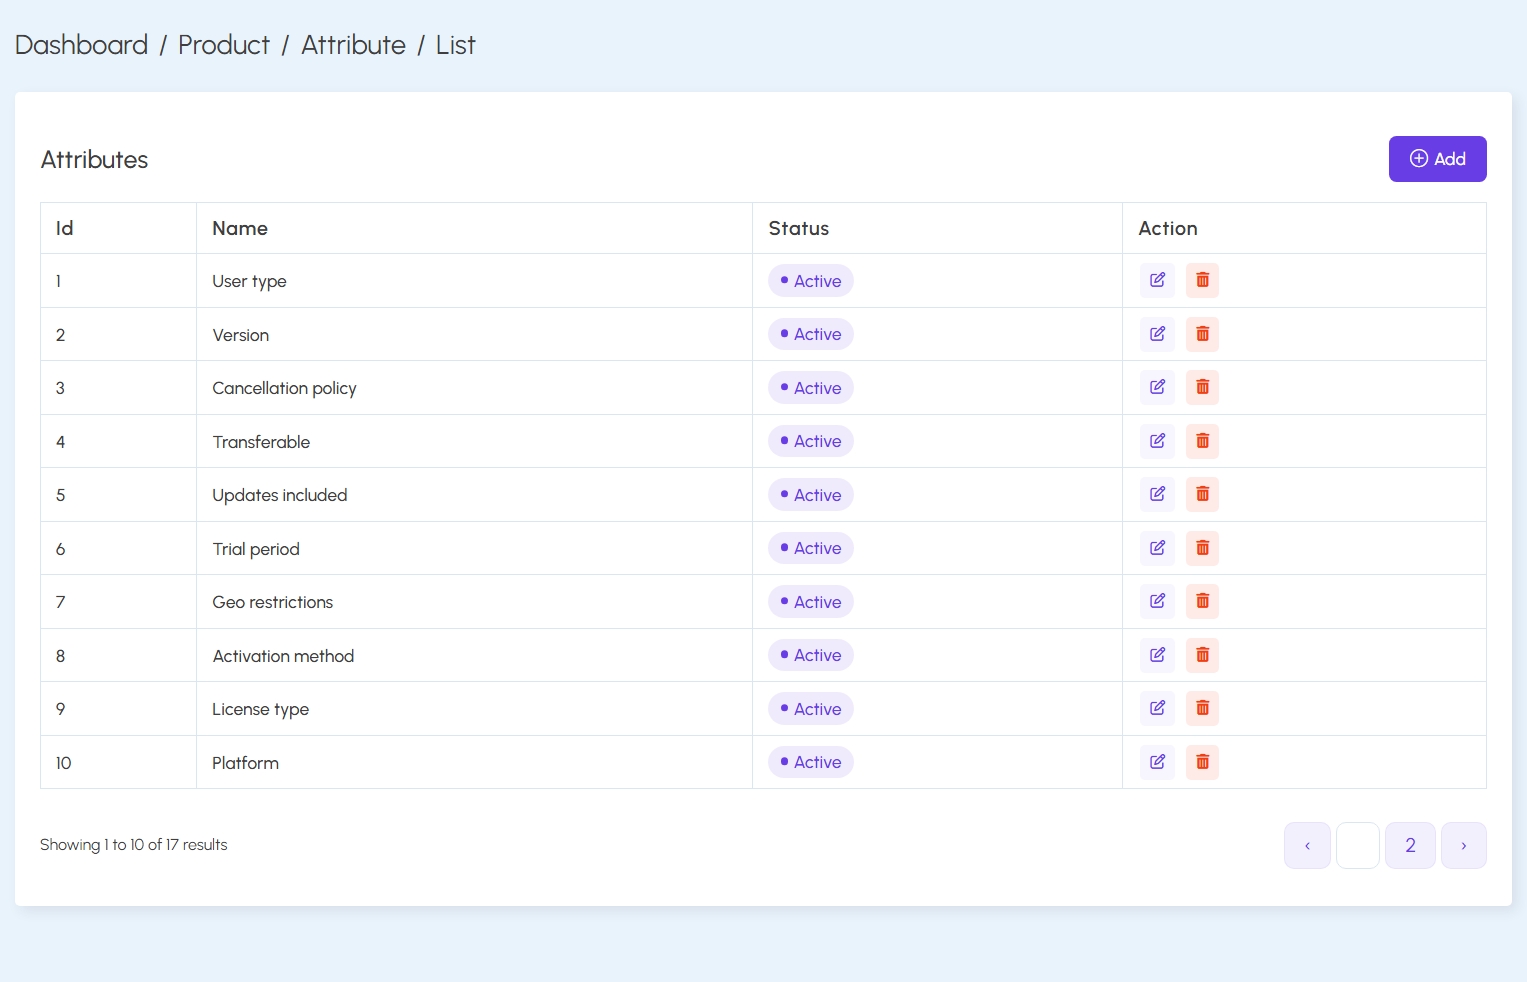
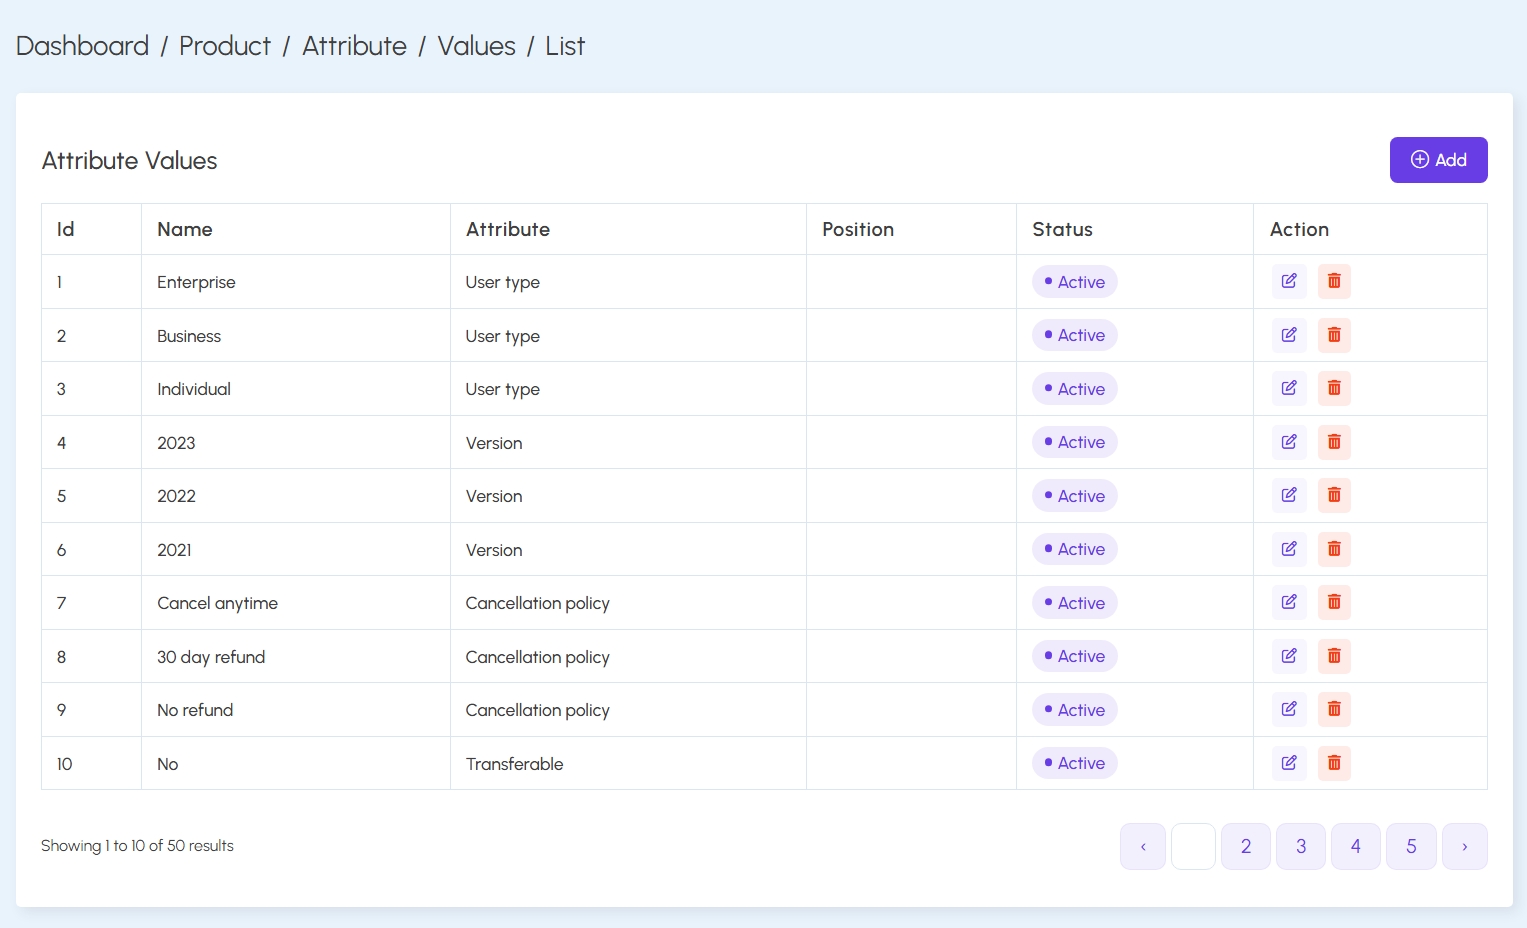
Attributes define characteristics such as User type, Version, or Cancellation Policy. Each attribute can hold multiple values, visible in a dedicated list view. Attributes and their values can be toggled active or inactive, and rearranged via the Position field.
These features provide a flexible way to structure product offerings, support advanced filtering, and streamline catalog customization.
Product Management
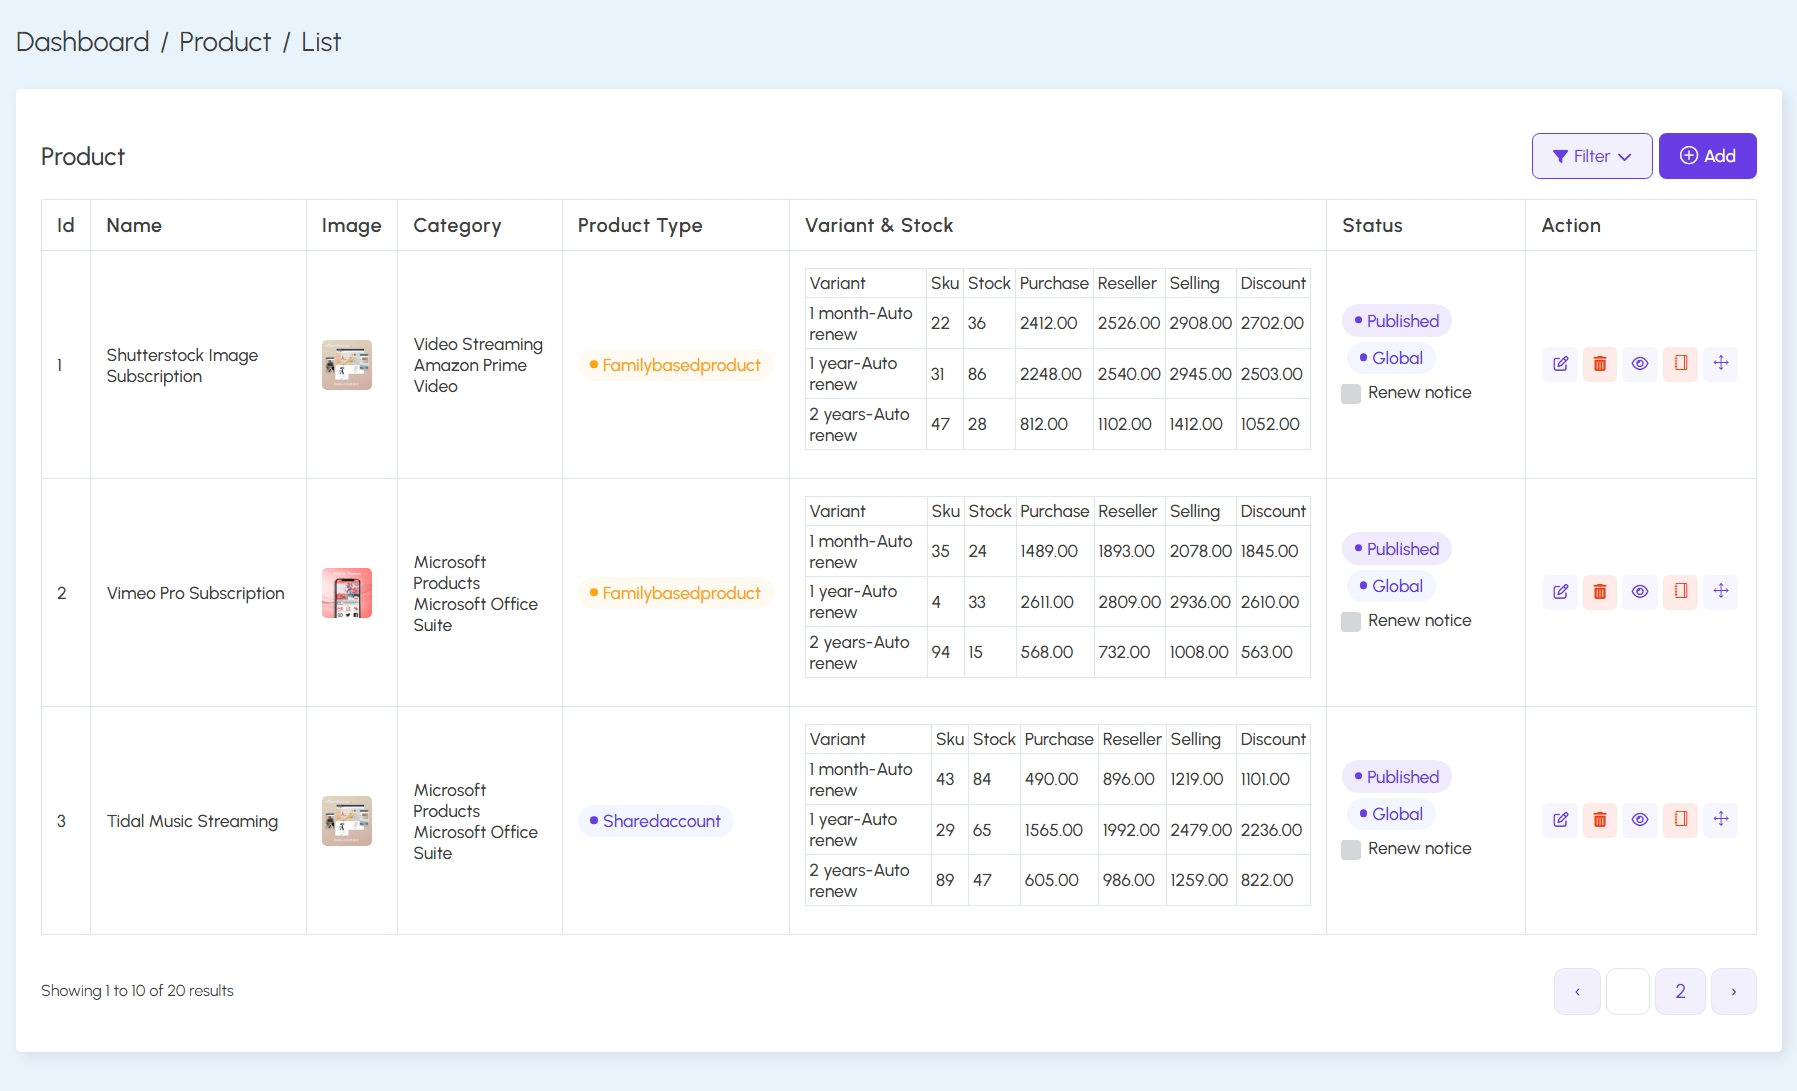
The Product Management module allows administrators to manage all subscription-based products. This includes assigning categories, setting pricing, configuring visibility, and defining stock variants. Each product can be created with comprehensive metadata, including SEO fields, variant pricing, and seller information.
Product Listing:
The Product List displays each product with its image, category, product type (e.g., Family-based, Shared Account), and detailed stock/variant data. Action buttons allow for quick editing, duplication, or visibility toggling.
Create/Edit Product:
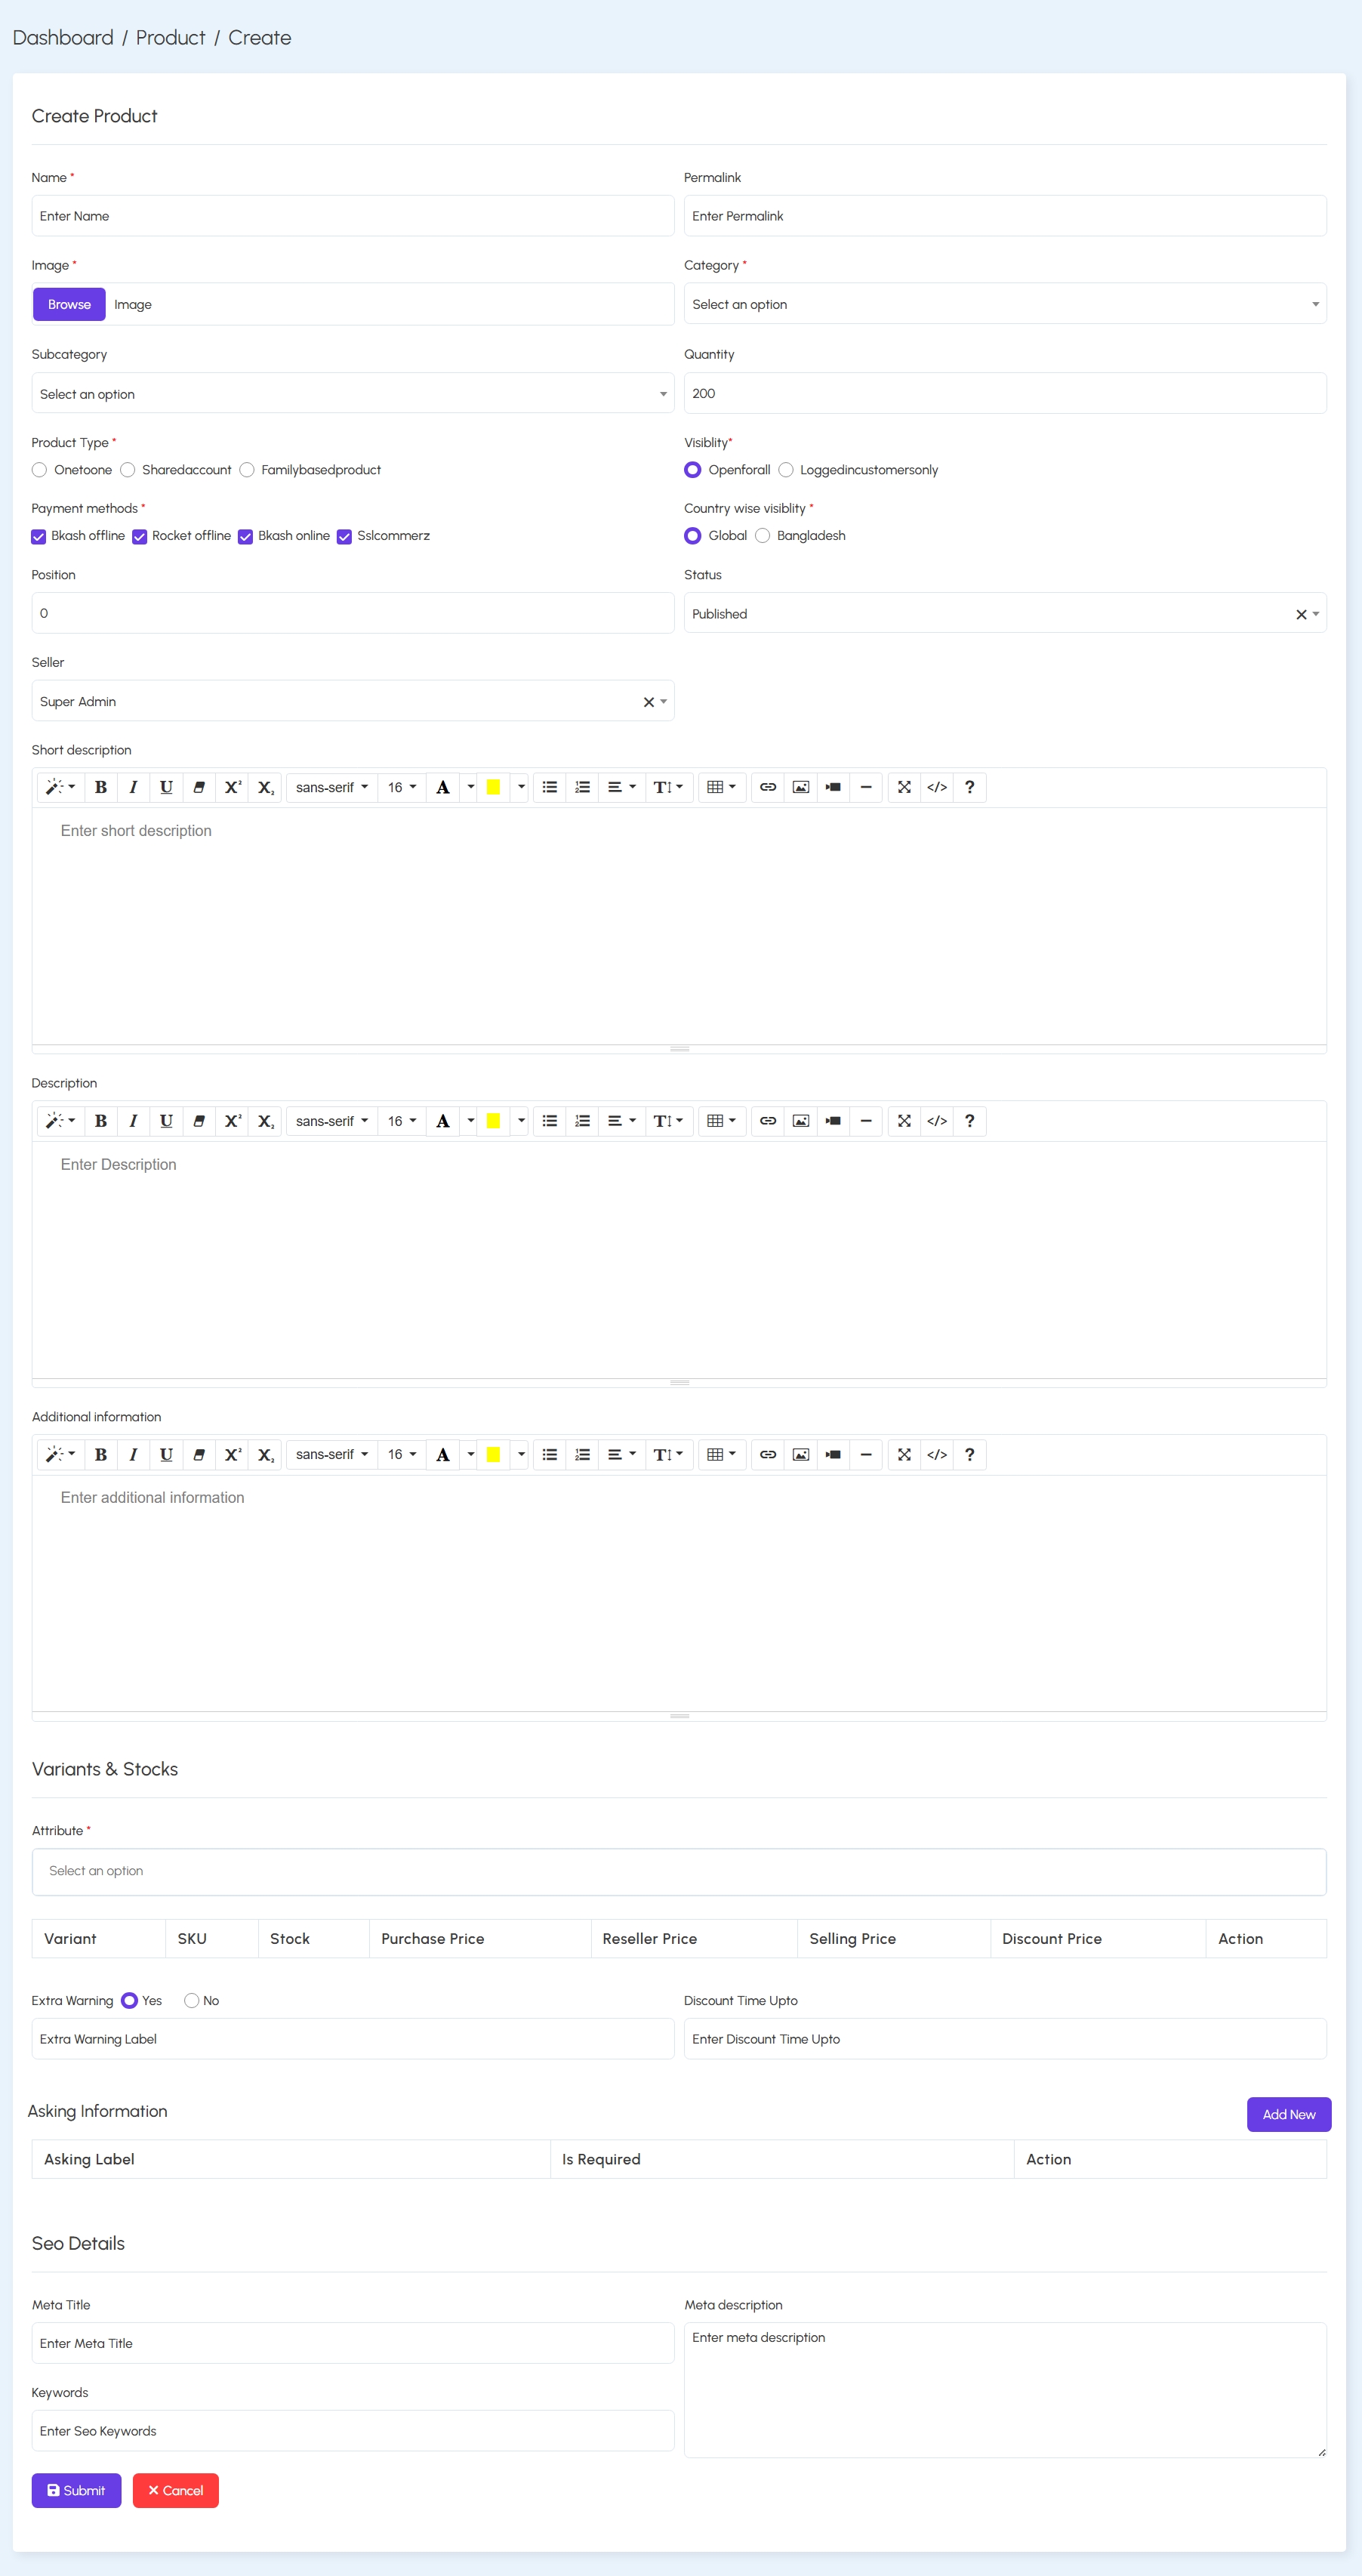
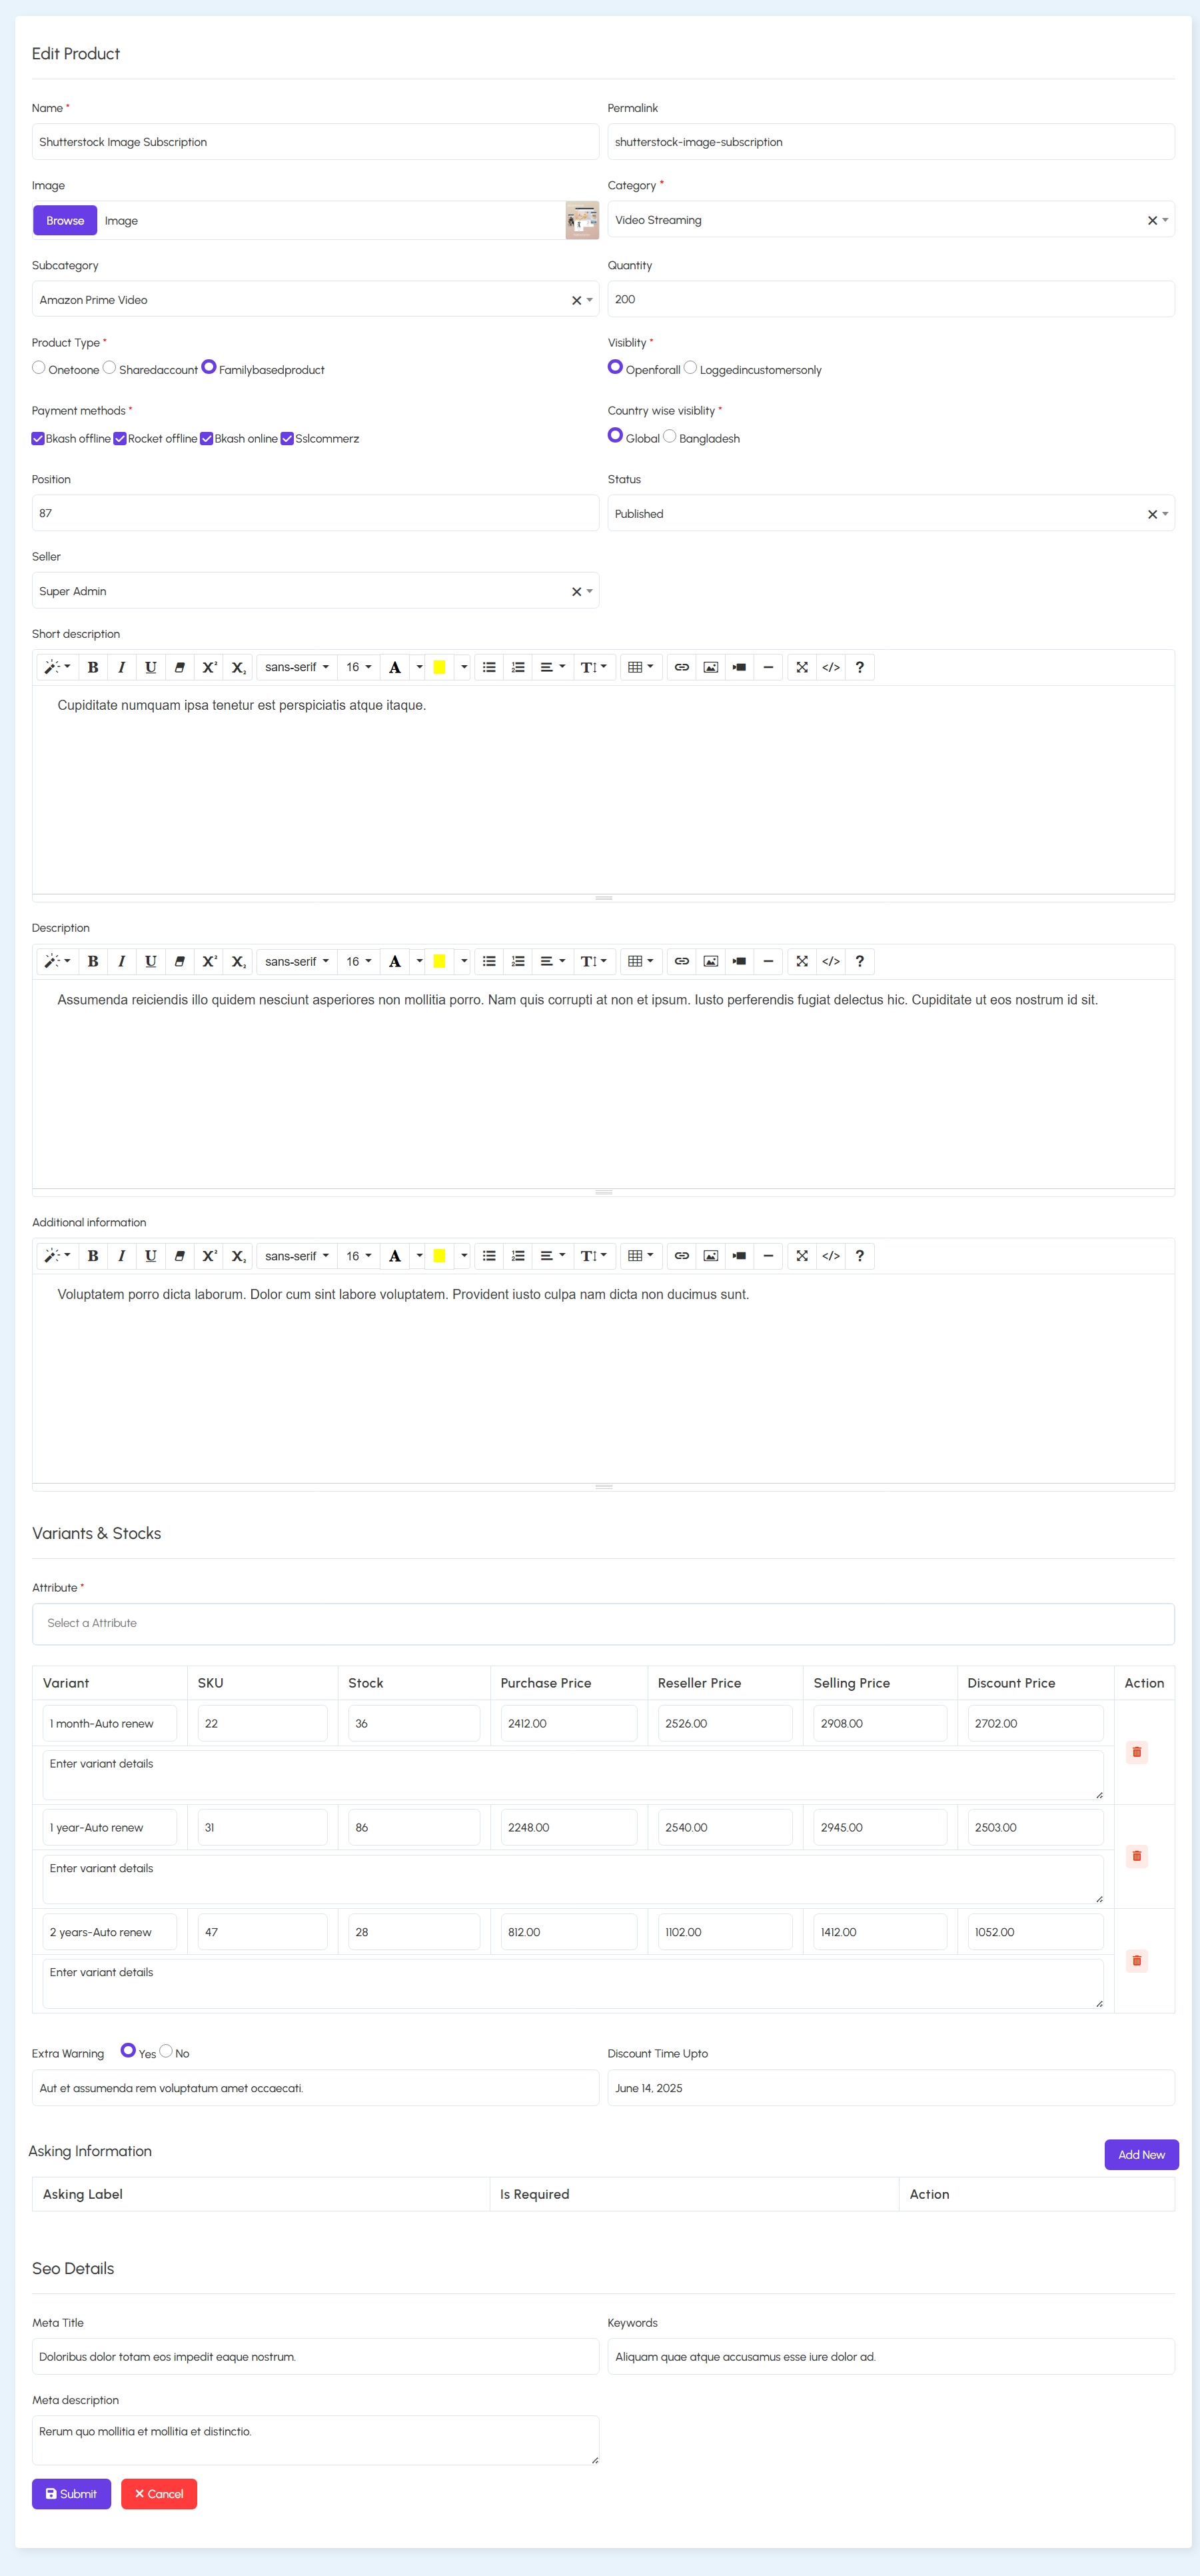
The Create Product and Edit Product forms allow administrators to configure:
- Basic Details – Name, image, permalink, quantity, category, subcategory, and position
- Product Type – Onetime, Shared Account, or Family-based
- Visibility Settings – Public or logged-in users only, and global/country-specific access
- Seller & Descriptions – Short and full product descriptions, with rich text support
- Variants & Stocks – Custom SKU, purchase/reseller/selling prices, and stock per variant
- Extra Warnings – Label & expiry date for limited offers
- SEO Fields – Meta title, keywords, and descriptions to improve product discoverability
This module supports advanced stock handling and flexible publishing workflows, allowing granular control over each product’s visibility, pricing, and metadata.
Product FAQs & Blogs
The Product FAQ and Blog Management module allows platform administrators to associate frequently asked questions and blog posts with individual products. This improves customer self-service and reduces support overhead.
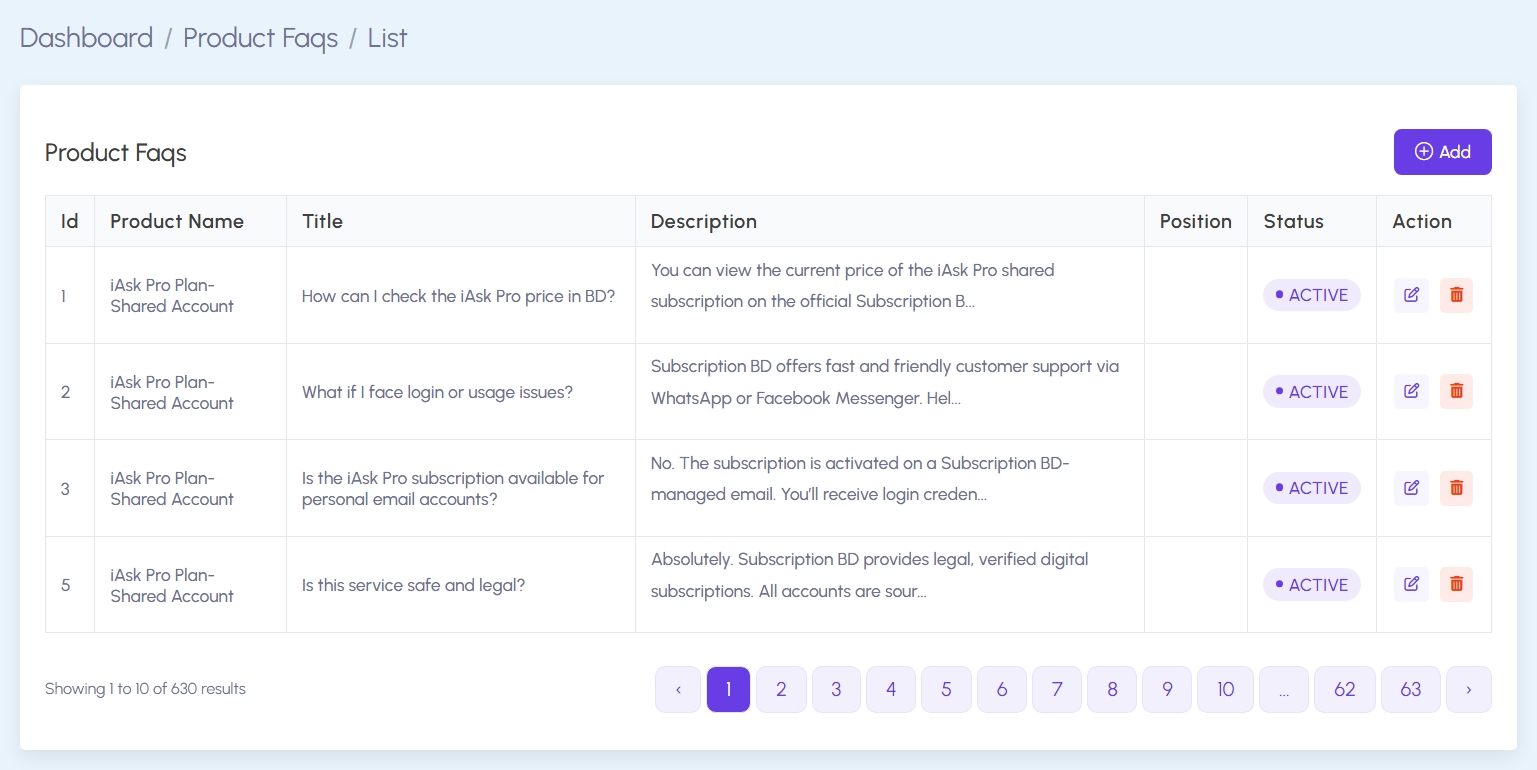
Product FAQs:
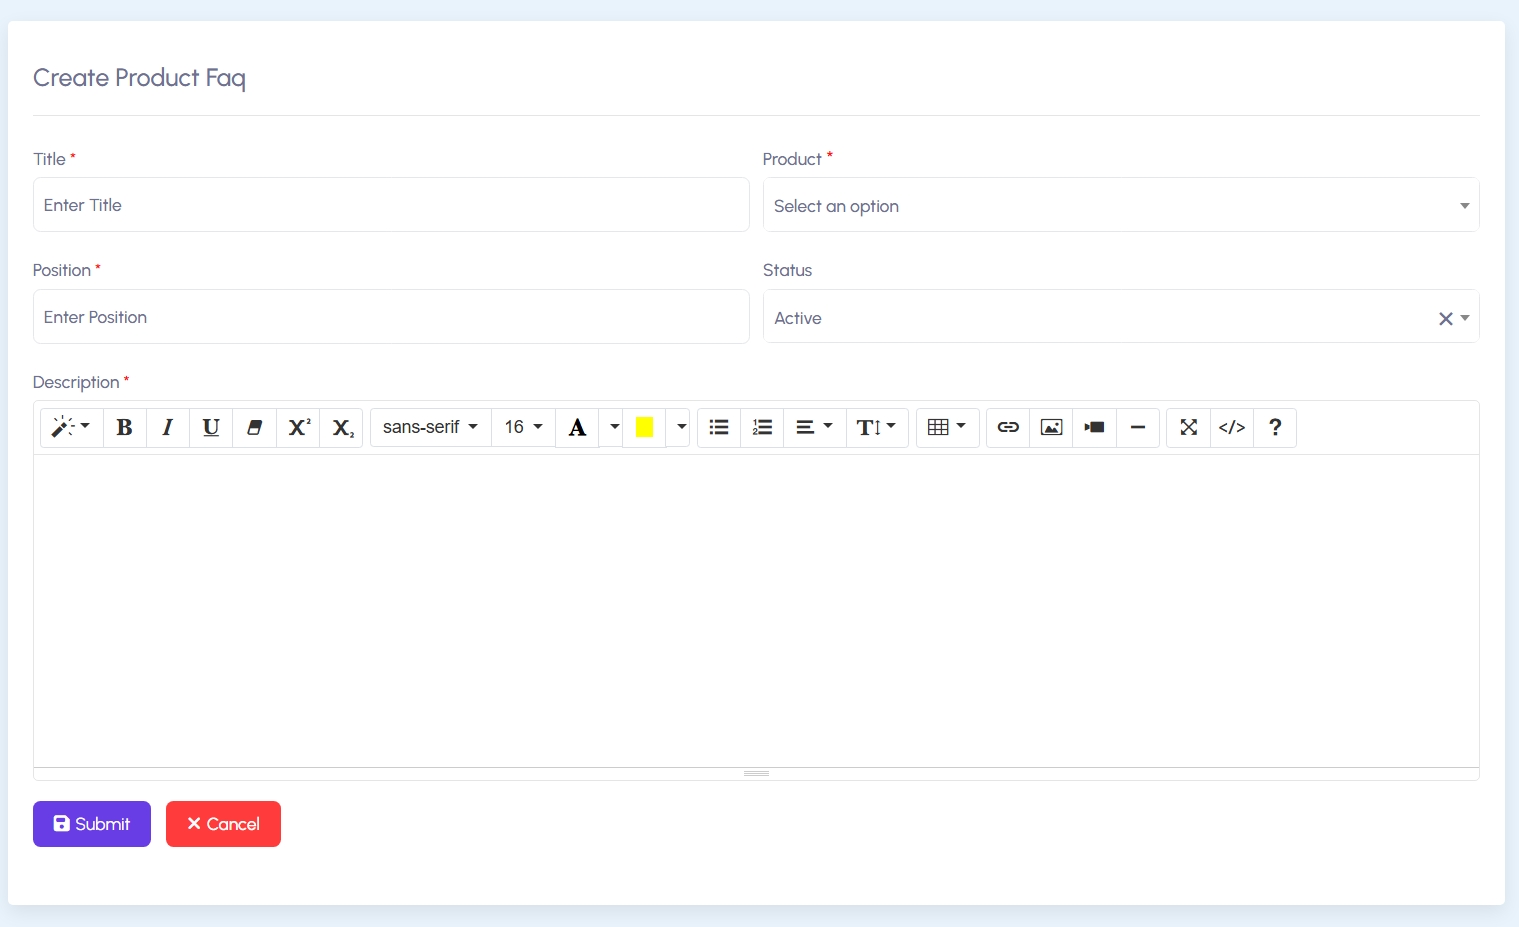
The FAQ List displays questions related to specific products, with columns for Product Name, Title, Description, Status, and Position. Admins can add FAQs using a simple form that captures the title, related product, detailed answer, status toggle, and sort position.
Create FAQ:
In the Create FAQ form, admins input the FAQ question (title), select the associated product, provide a rich text answer, and set display order and status. The rich text editor supports formatting, links, and media.
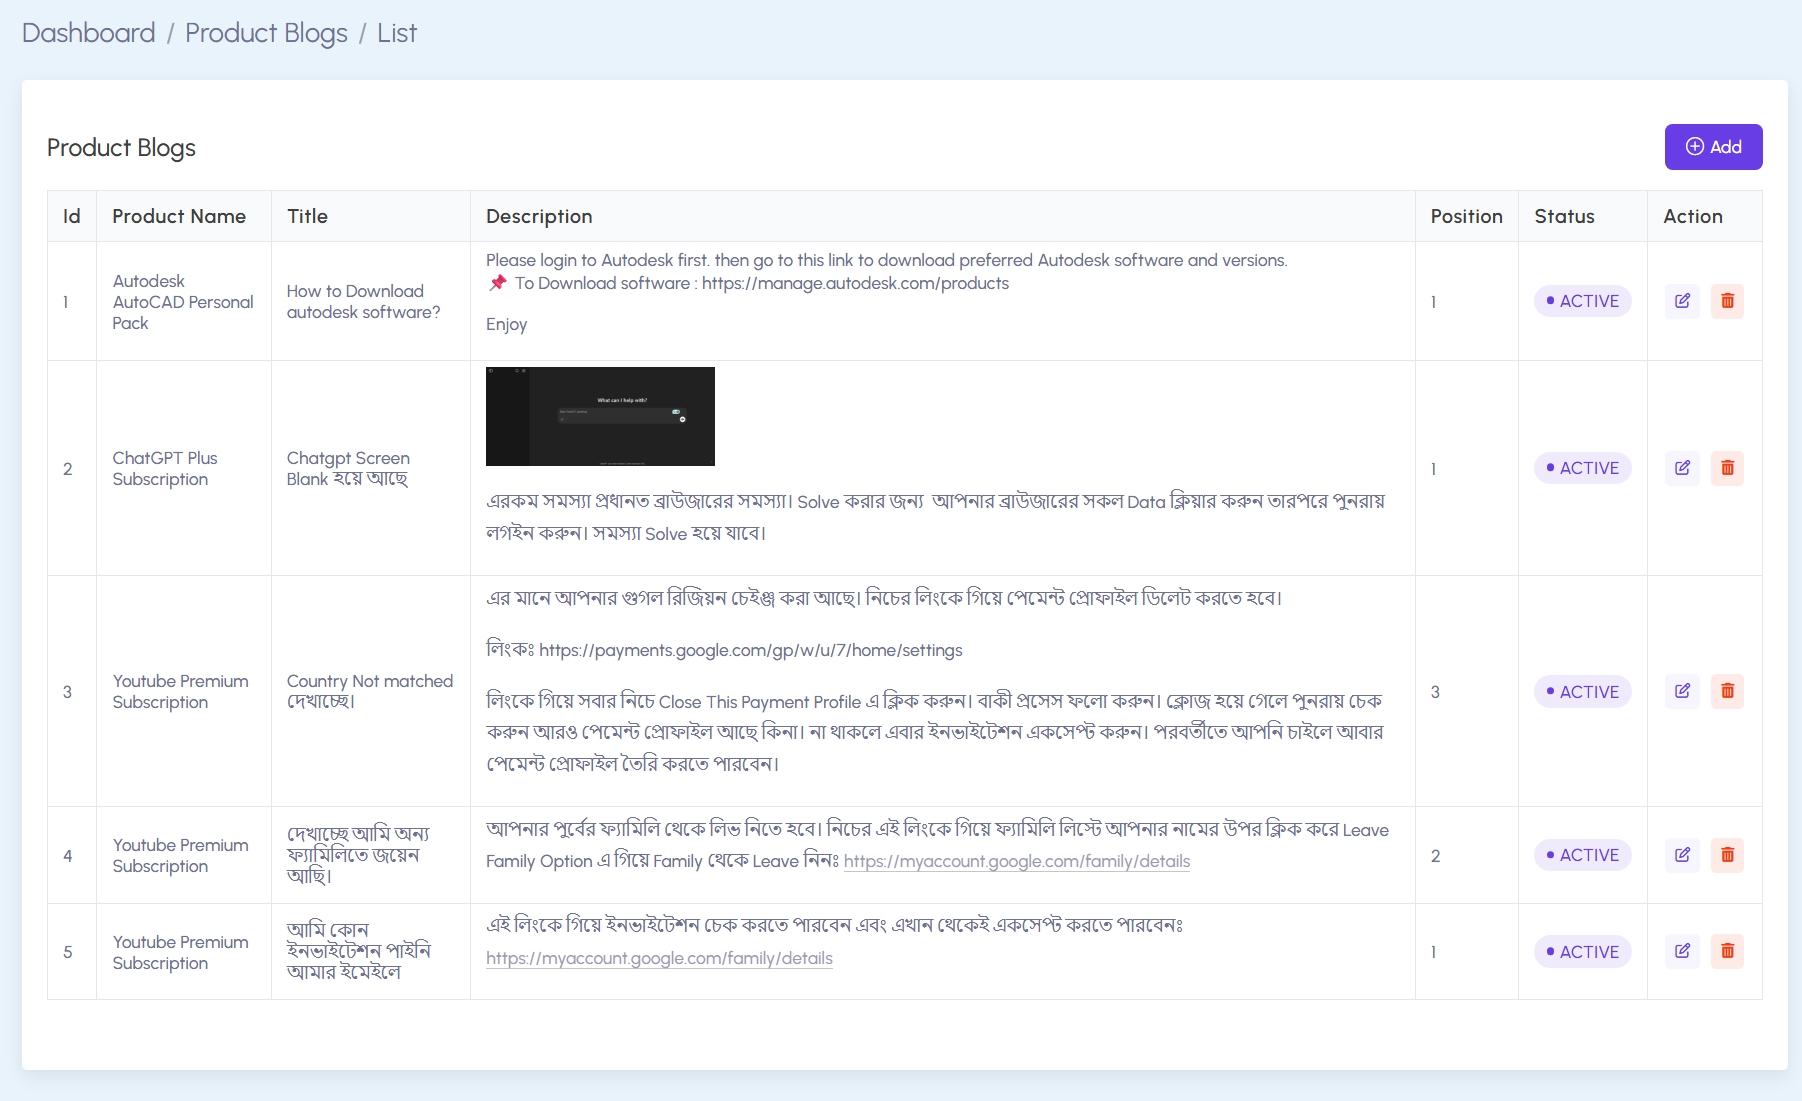
Product Blogs:
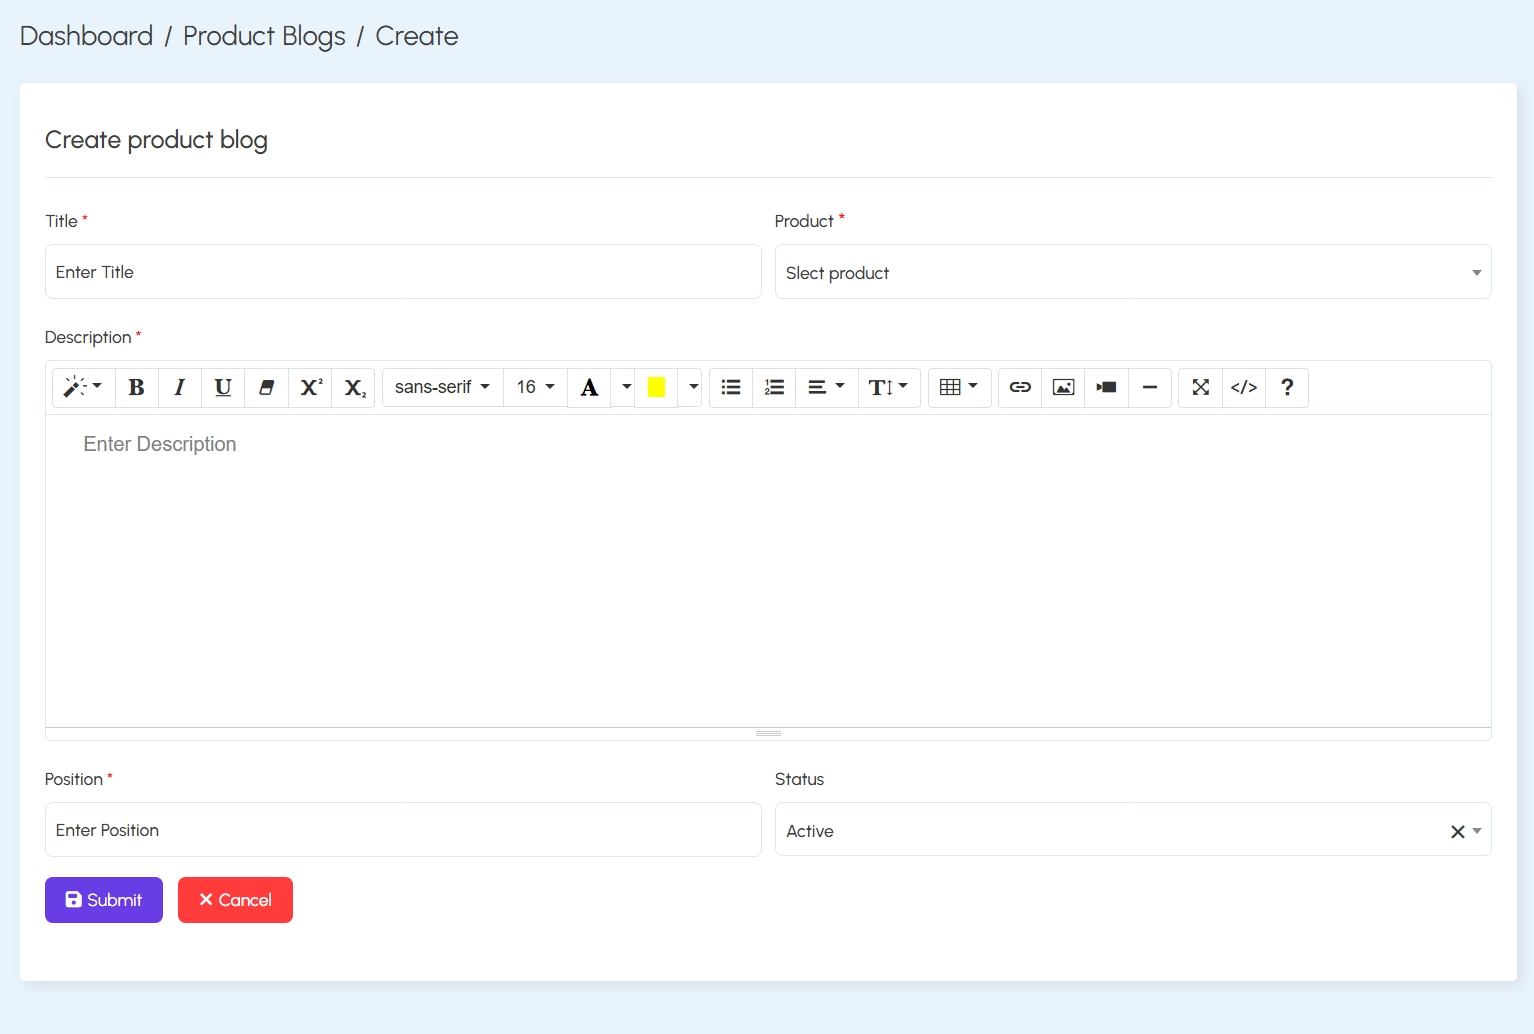
Product Blogs allow for publishing guides, troubleshooting steps, or announcements. Each blog post includes a Title, Description, associated Product, Status, and Position. Posts support rich formatting and embedded links or images.
Admins can manage posts via the Blog List, and new entries can be created using the Create Product Blog form.
Stock Management & Product Delivery
The Stock Management module in Subsify allows the admin to manage product availability and link stock to individual customer orders. It provides tools to create, categorize, and deliver digital product variants such as subscriptions, memberships, and streaming accounts.
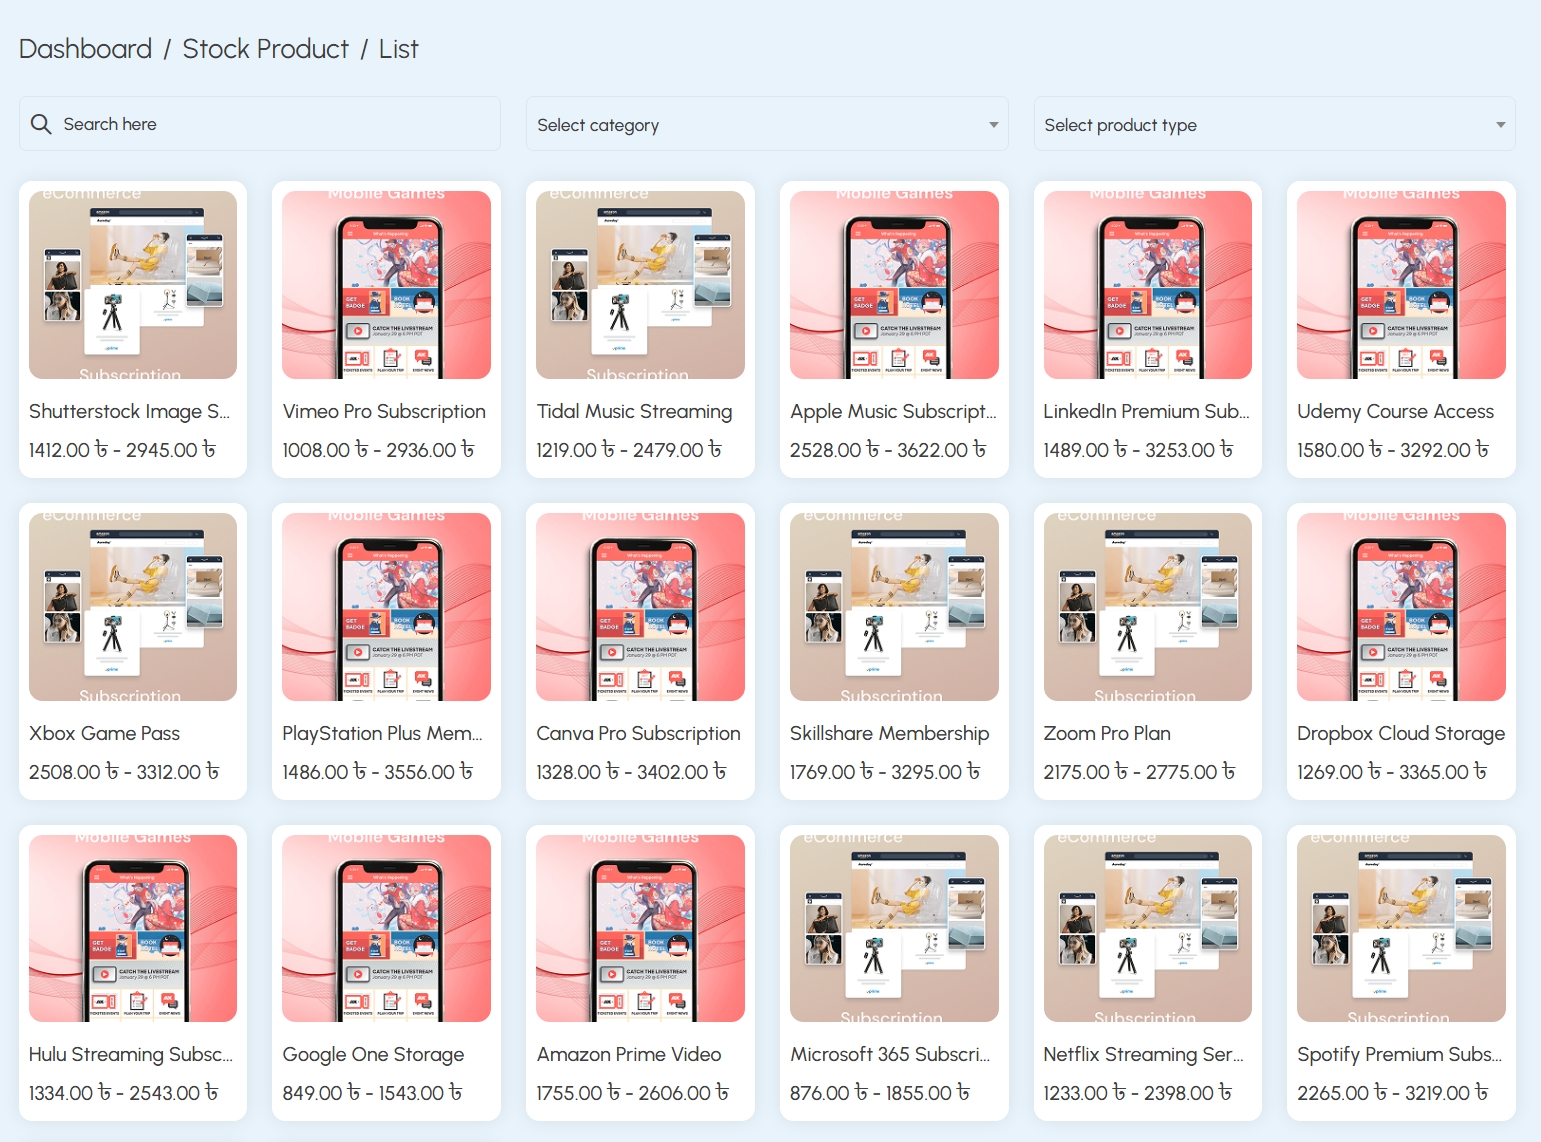
Product Stock Listing:
All stock products are listed with filtering options by category and product type. Each card displays pricing ranges and a visual preview to assist admins in tracking inventory quickly.
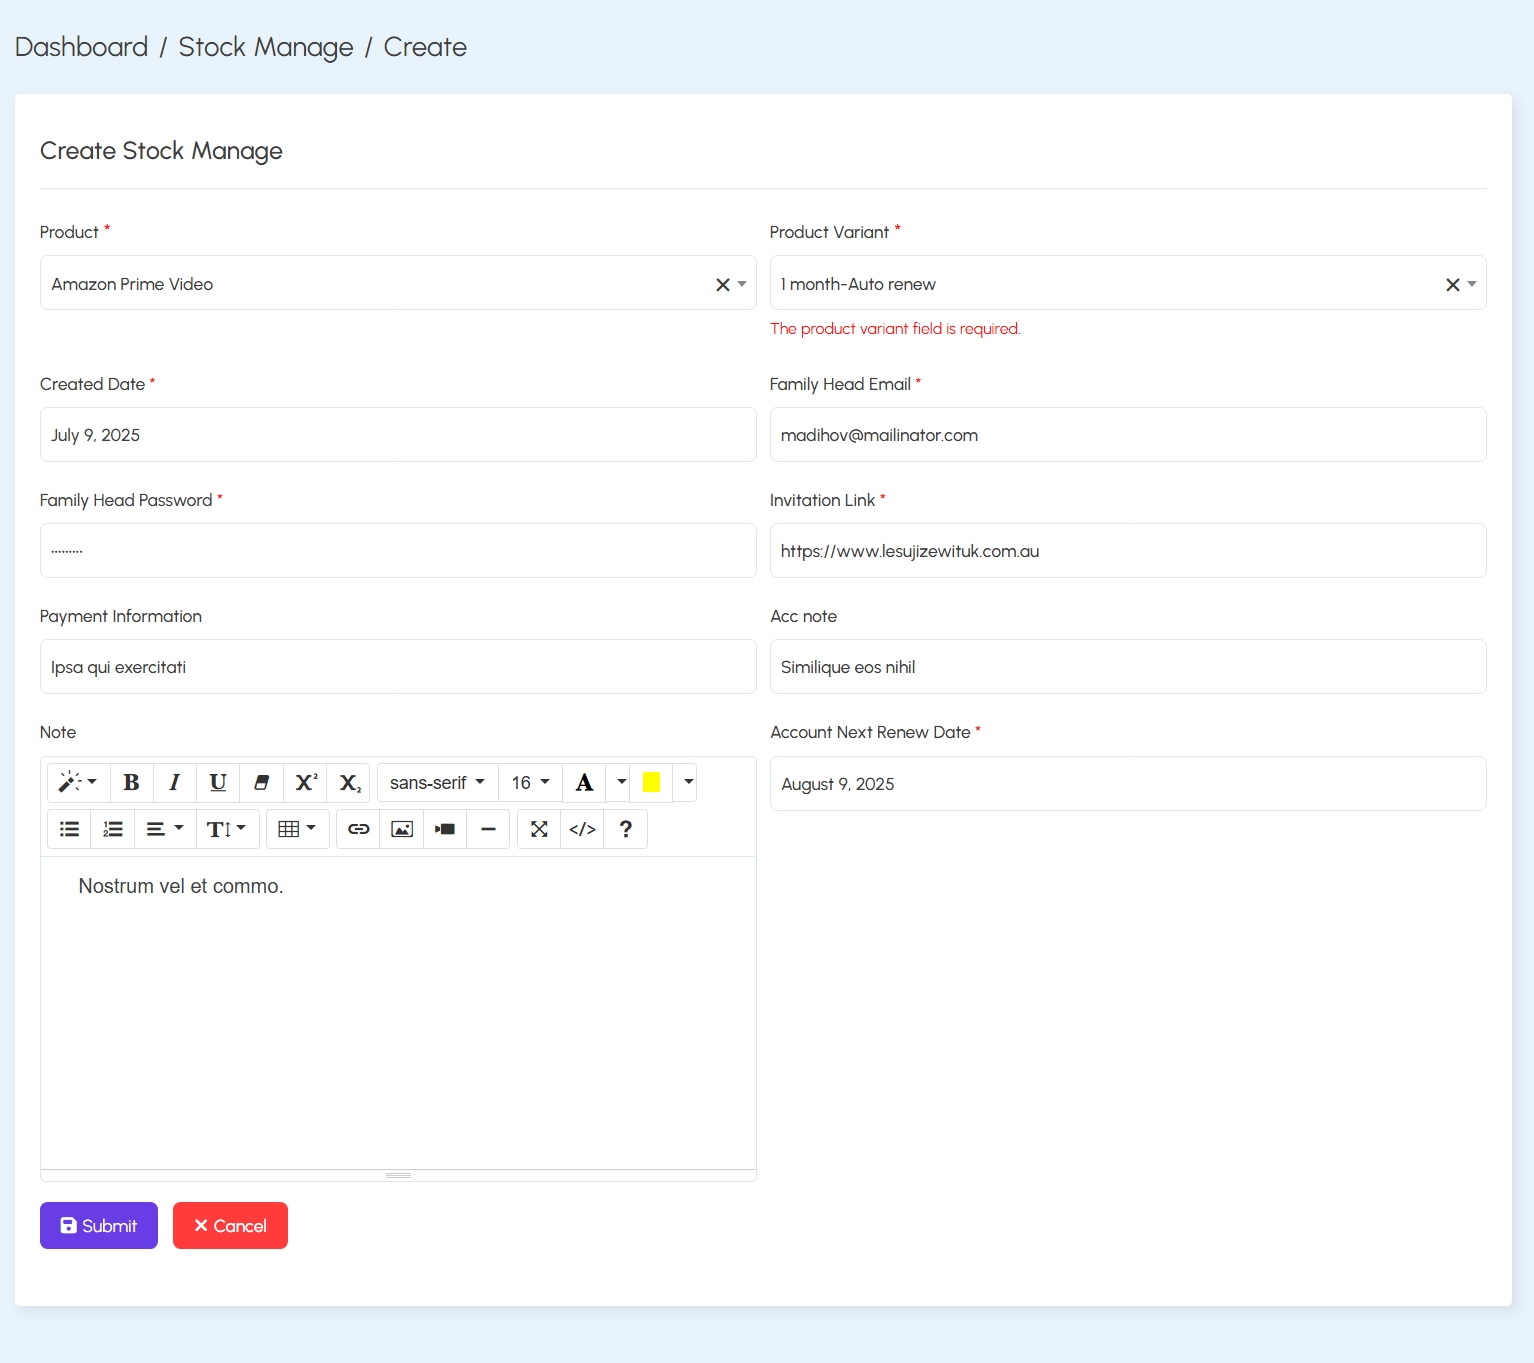
Create Stock Entry:
Admins can create new stock entries by selecting the product, variant, and inputting customer credentials like family email, password, payment info, and next renewal date. Fields like notes and invitation links ensure full details are recorded.
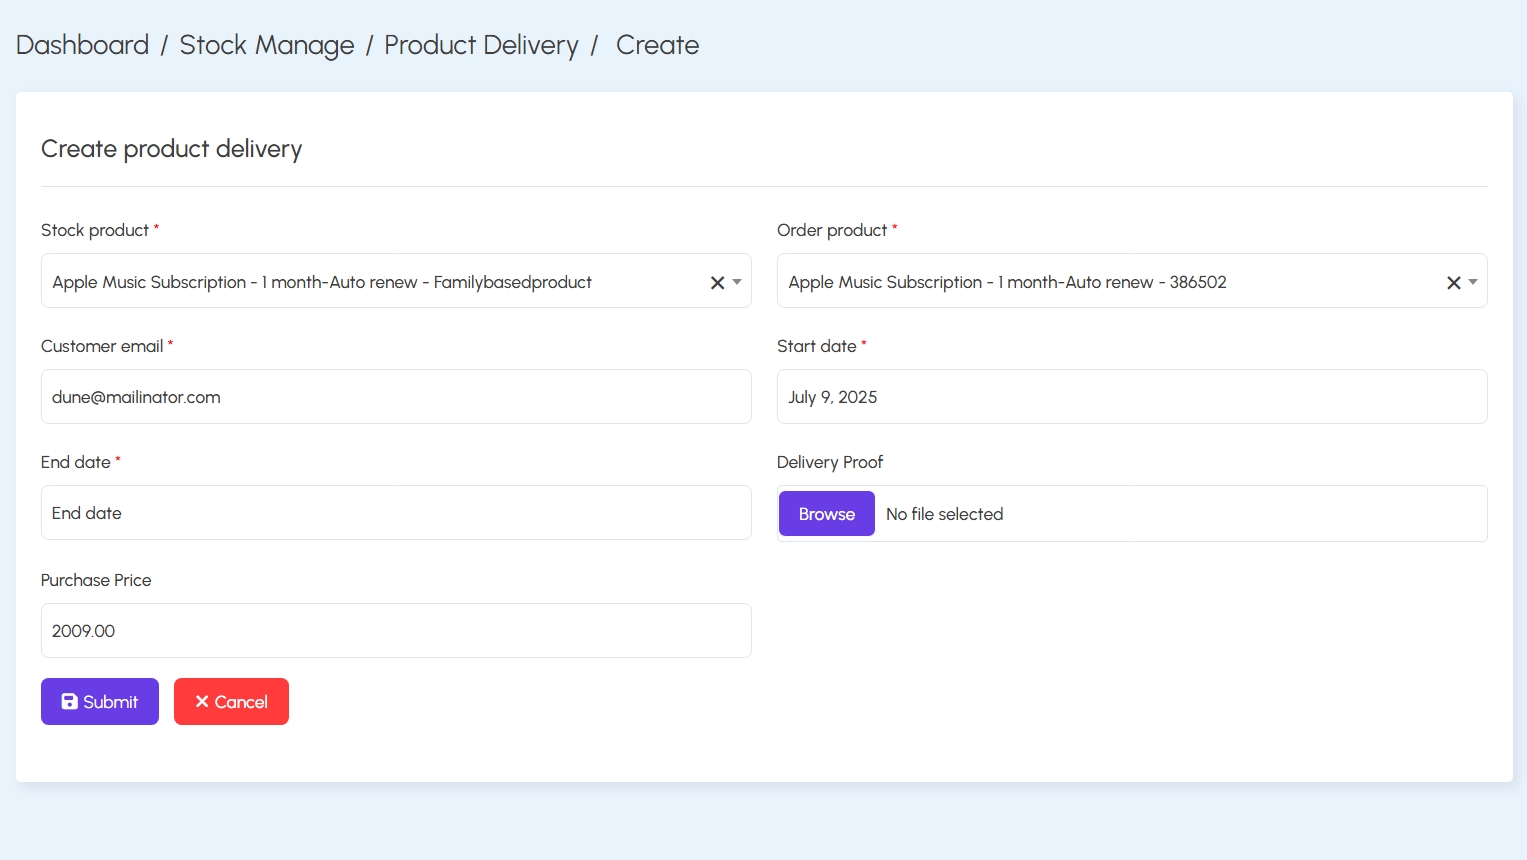
Create Product Delivery:
Once a stock is available, it can be assigned to a customer through a delivery form. The admin selects a stock-product pair, enters customer email, start/end dates, and optional proof of delivery. This links the stock to the order record.
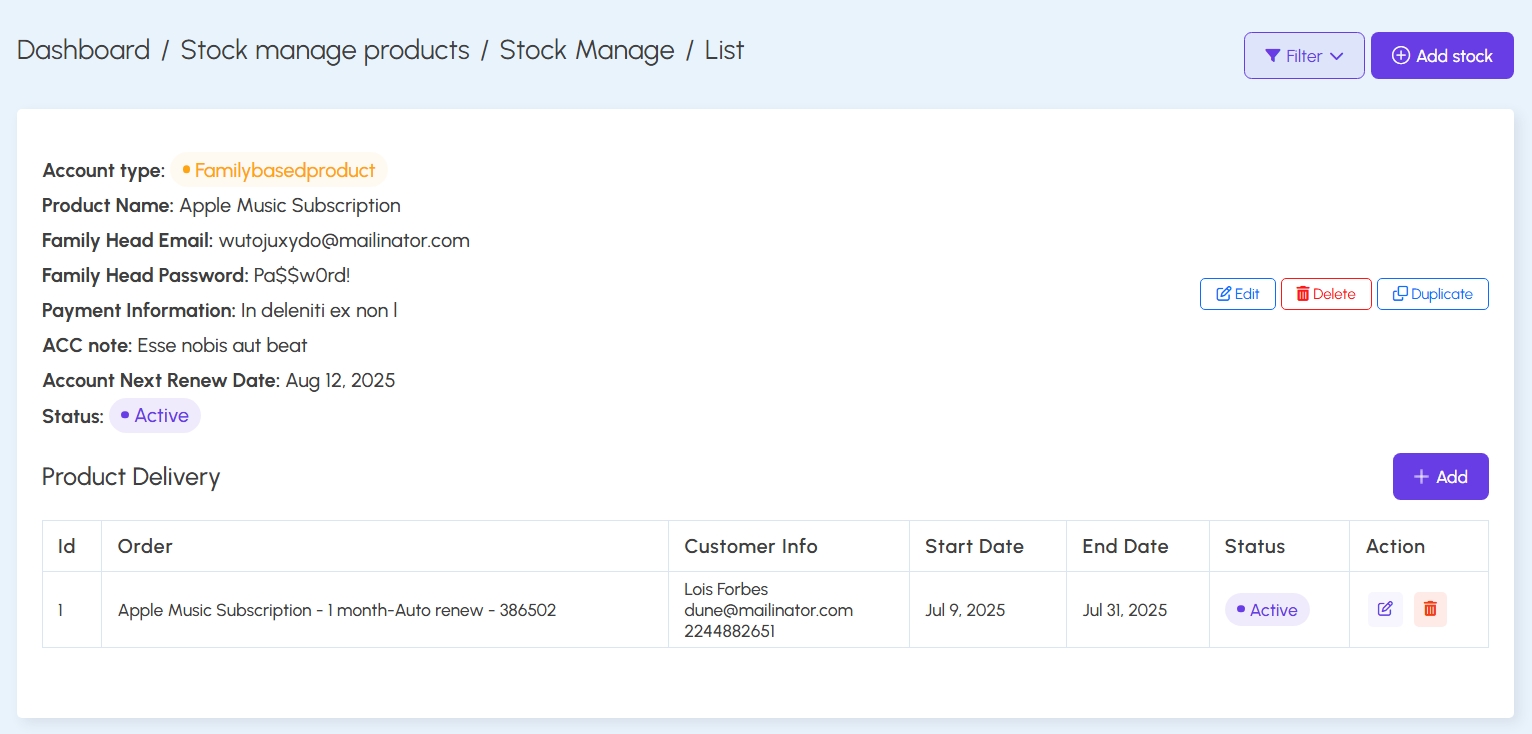
Manage Product Delivery:
All deliveries appear under the respective stock details. Admins can edit or delete any delivery, ensuring accurate handoffs and timely subscription management.
Guest Order Delivery
The Guest Order Delivery flow is designed to securely deliver subscription credentials to users who place orders without creating an account. It ensures one-time secure access while maintaining simplicity and ease of use.
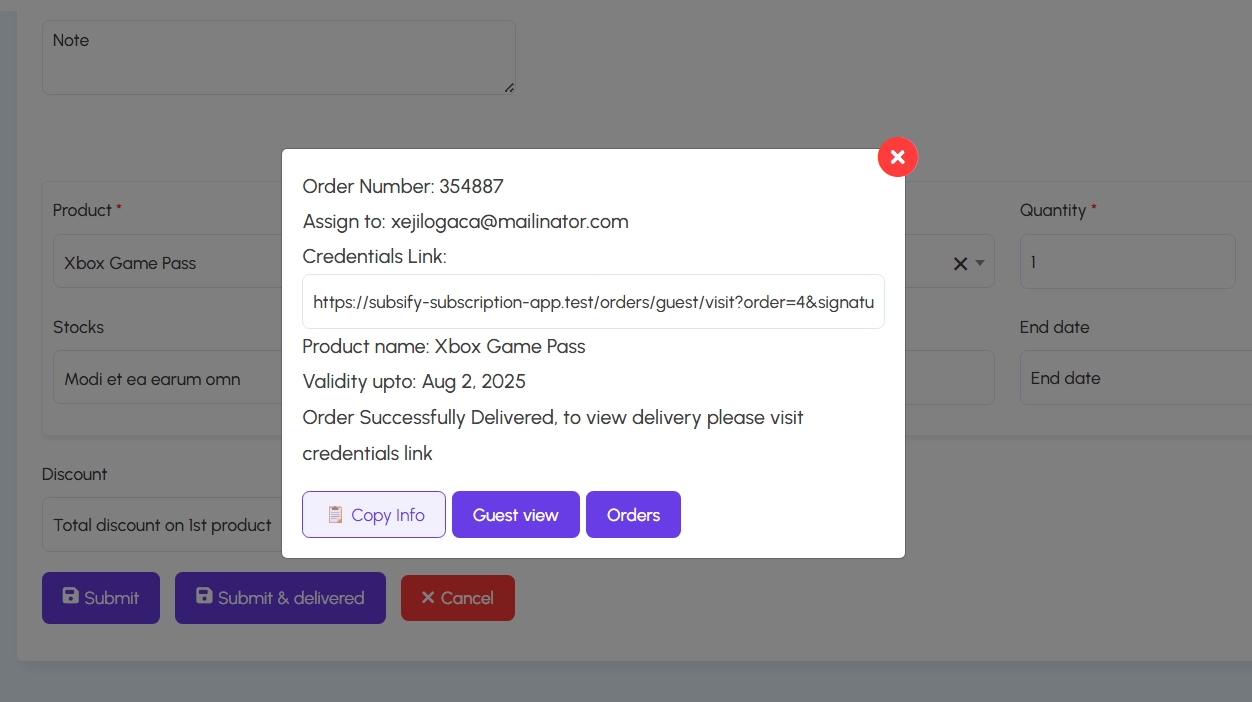
Step 1 – Delivery Summary Popup:
Once an admin submits a guest order and marks it as delivered, a summary popup is shown. It includes the order number, email recipient, delivery link, product name, and validity details. Admins can choose to copy the info, visit the guest view, or return to orders.
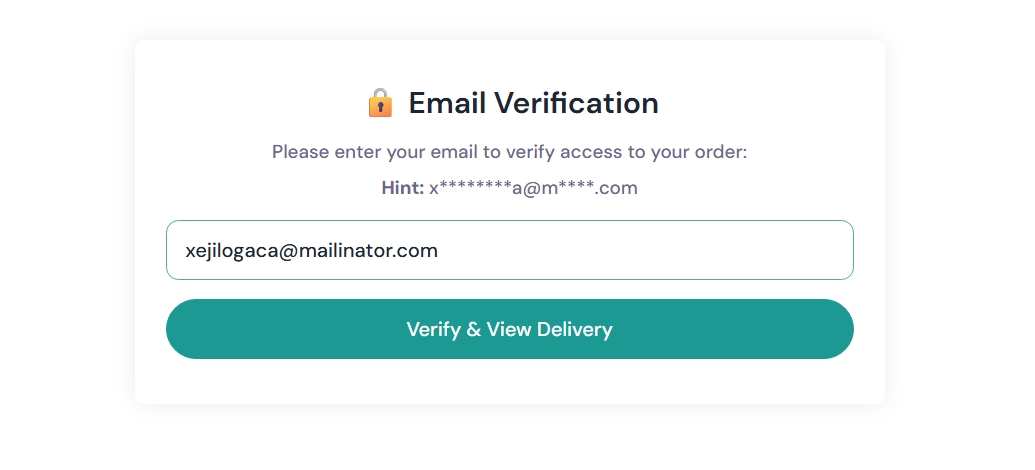
Step 2 – Email Verification:
When a guest accesses their delivery link, they must verify their email first. The system provides a hint of the registered email address to ensure it's only accessible to the right person.
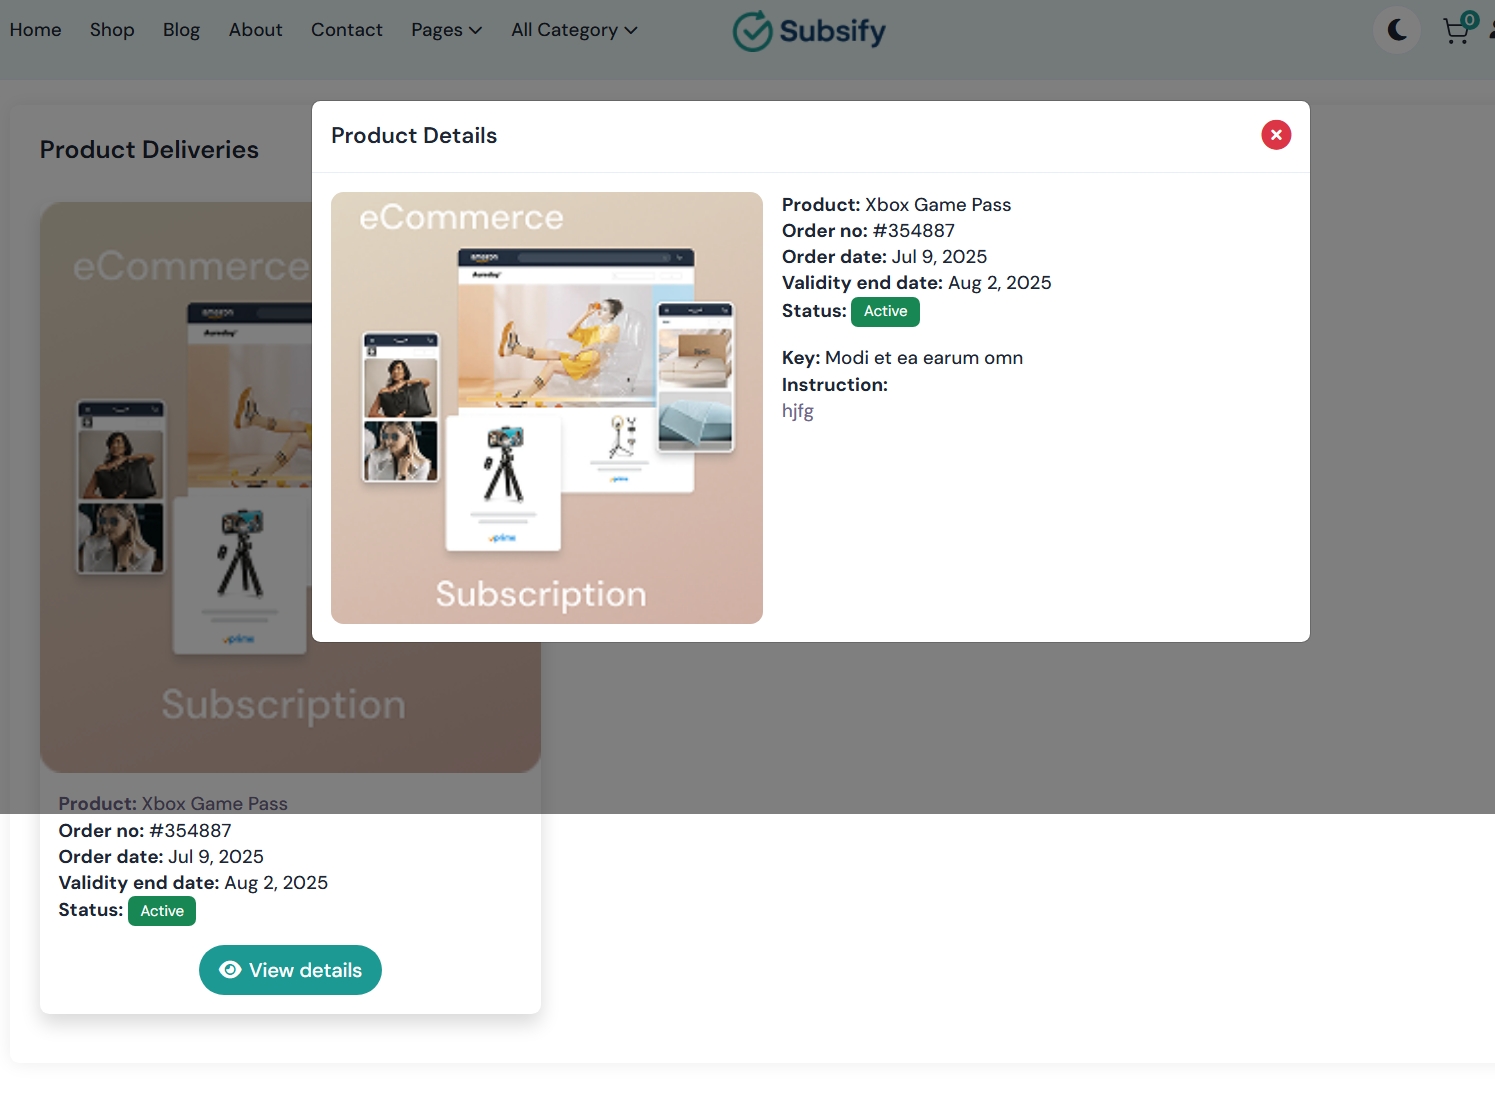
Step 3 – Delivery Access (Guest View):
After successful email verification, the guest user is shown the order’s delivery details including the subscription key, instructions, expiration date, and status. The experience is designed to feel trustworthy, even for one-time users.
This delivery mechanism balances user convenience and digital product security, making it ideal for marketplaces offering guest checkout options.
Order Management
The Order Management section enables administrators and sellers to handle subscription orders efficiently. Orders are grouped and accessible via separate panels such as seller orders, admin orders, and in-house orders.
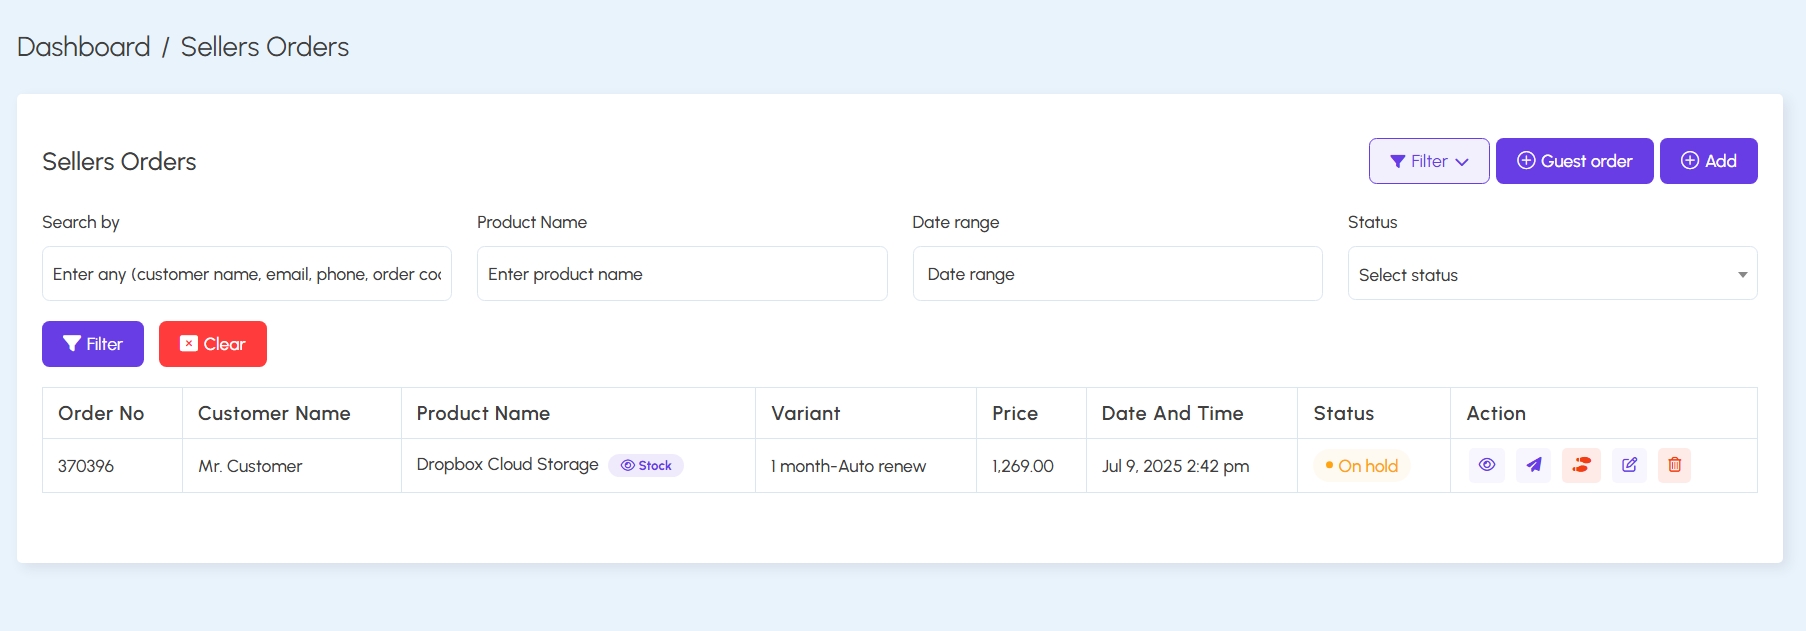
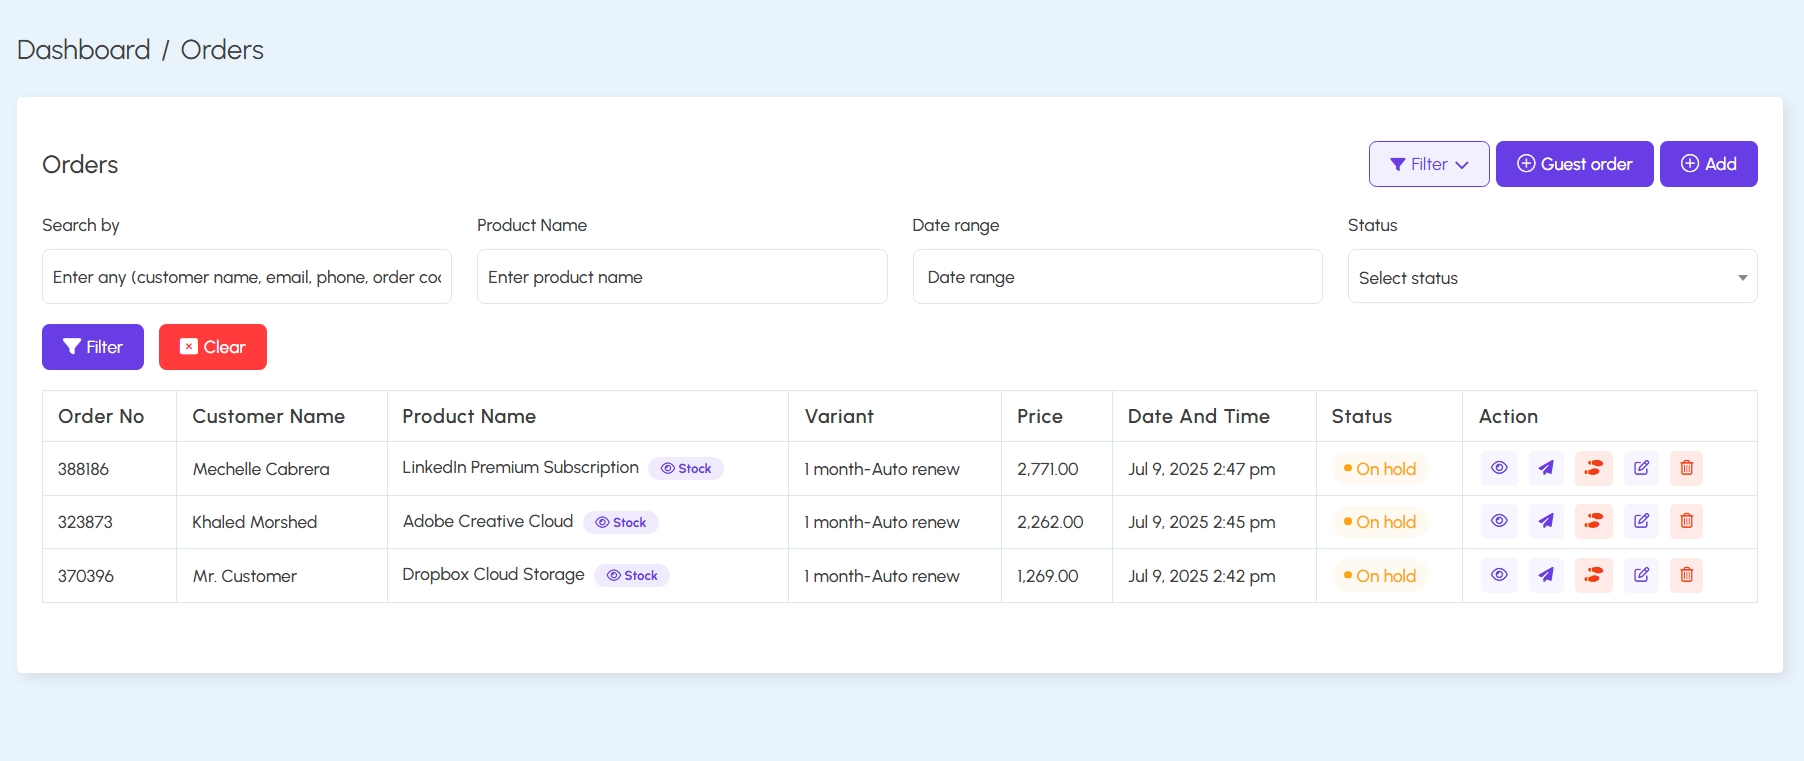
1. Order Listings:
Orders can be filtered by customer name, email, date range, or status. Each row displays the order number, customer, product, price, and current status. Quick actions (view, request review, track, edit, delete) are available.
2. Order Detail View:
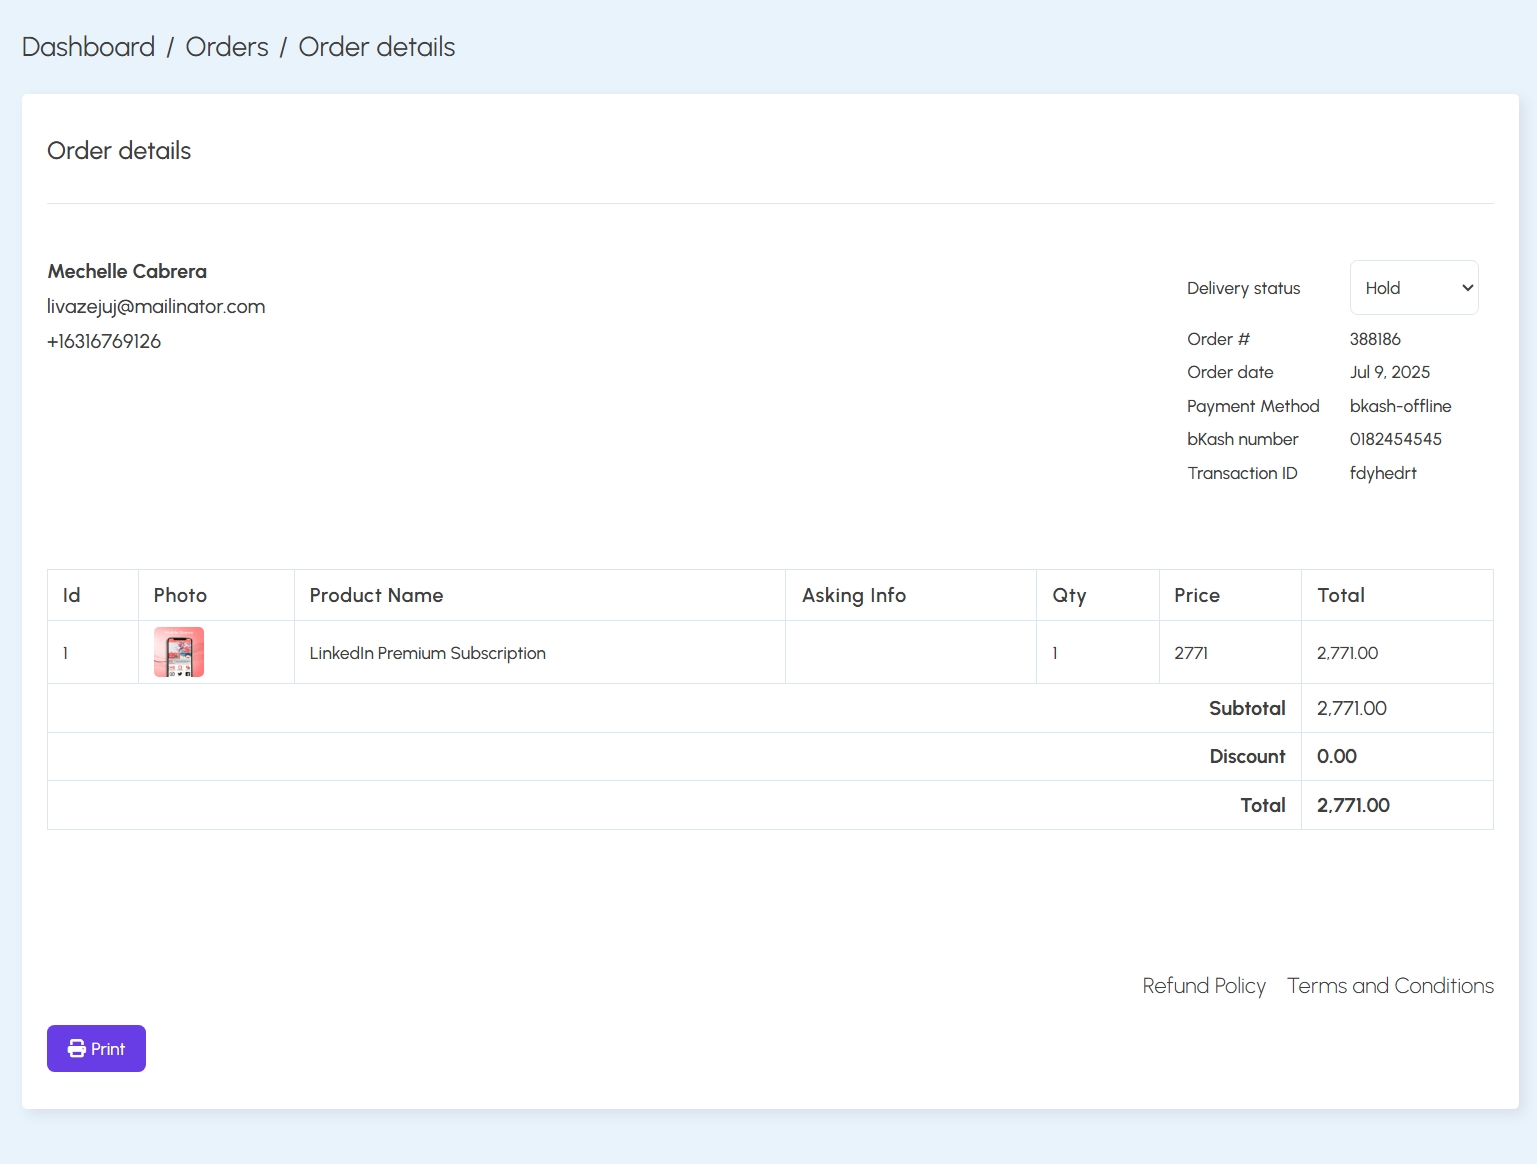
Clicking on the view icon opens a detailed order invoice. It shows the product, pricing breakdown, payment method, transaction ID, and delivery status. There's also a print option and policy links at the bottom.
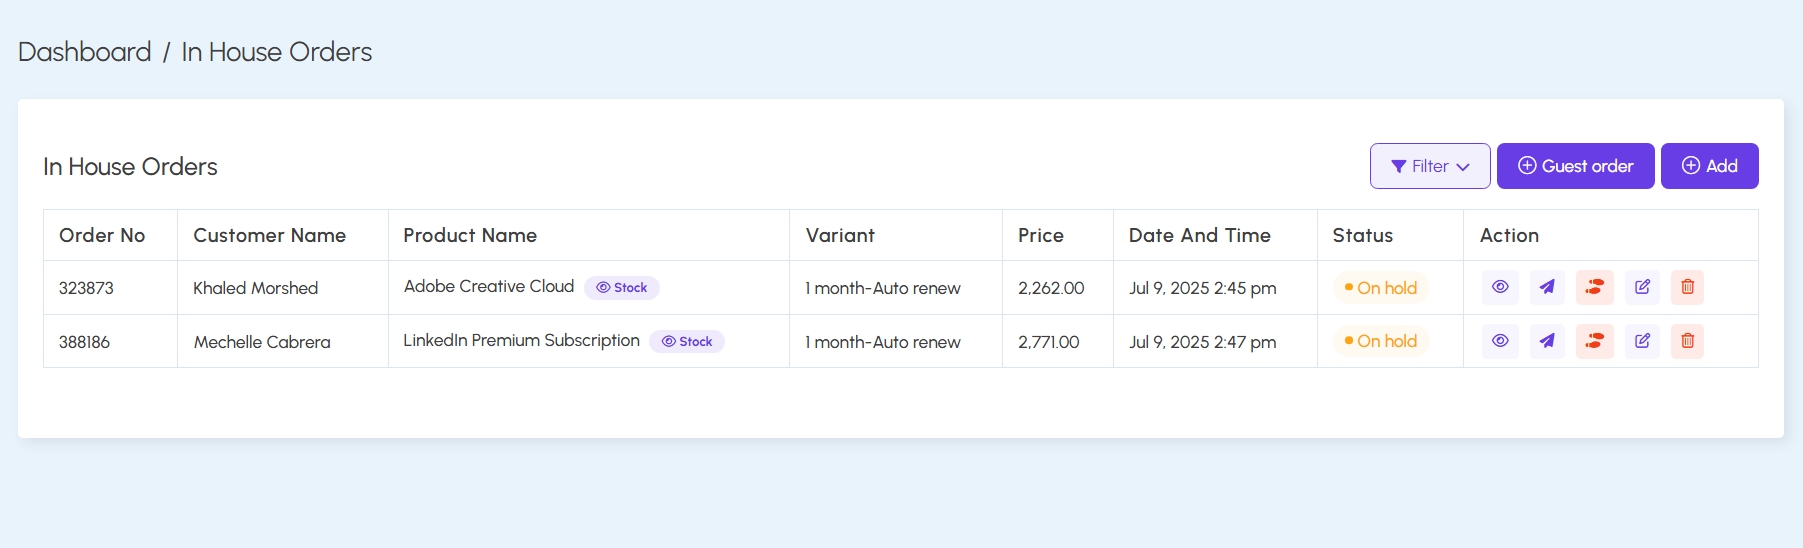
3. Types of Orders:
- Admin Orders: All platform orders.
- Seller Orders: Filtered to the current seller.
- In-House Orders: Orders processed internally (not tied to external sellers).
4. Create Orders:
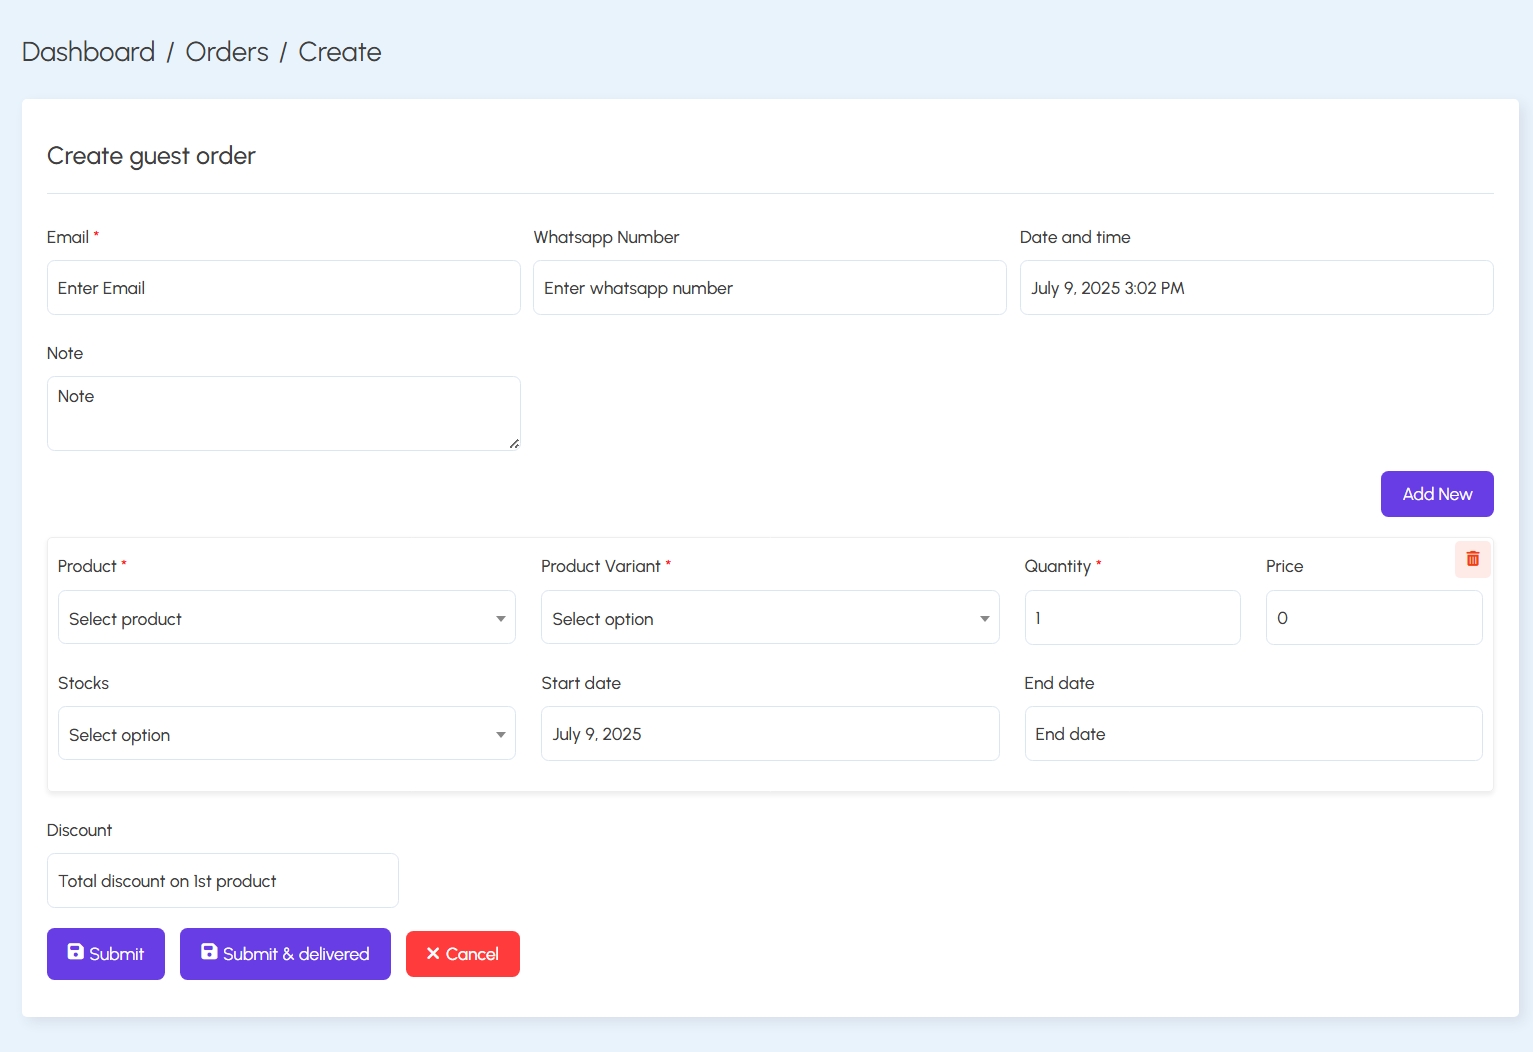
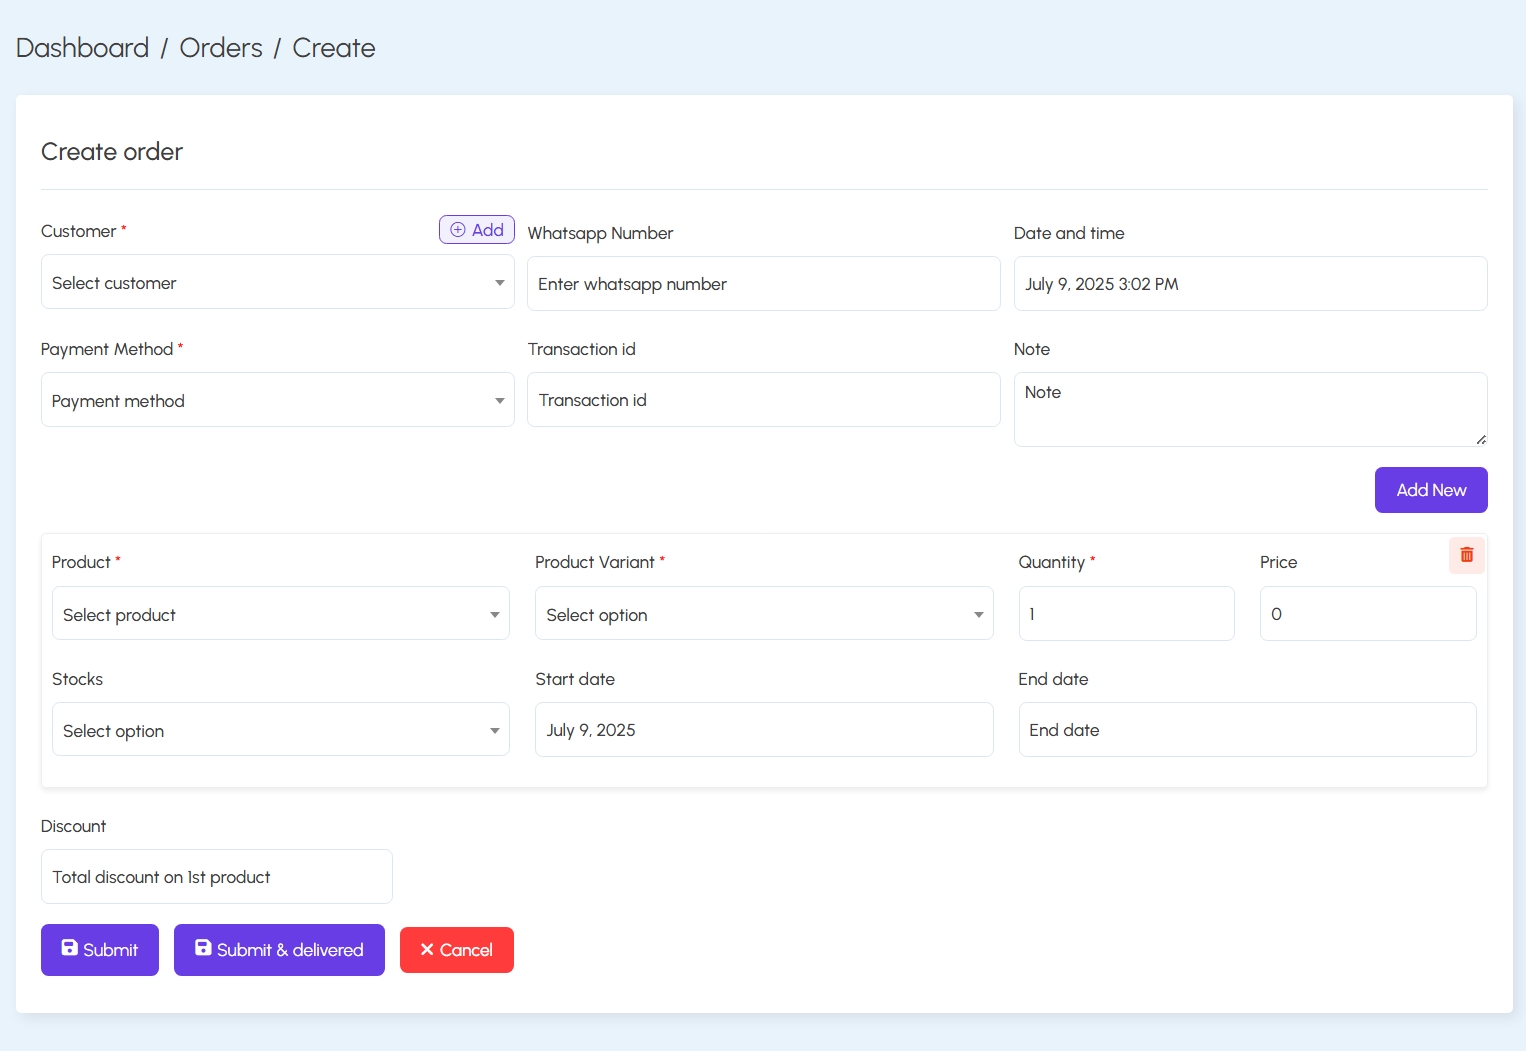
You can create a new order for an existing customer or a guest. Required inputs include product, variant, price, payment method, contact info, and date. You can also apply discounts and mark orders as delivered immediately.
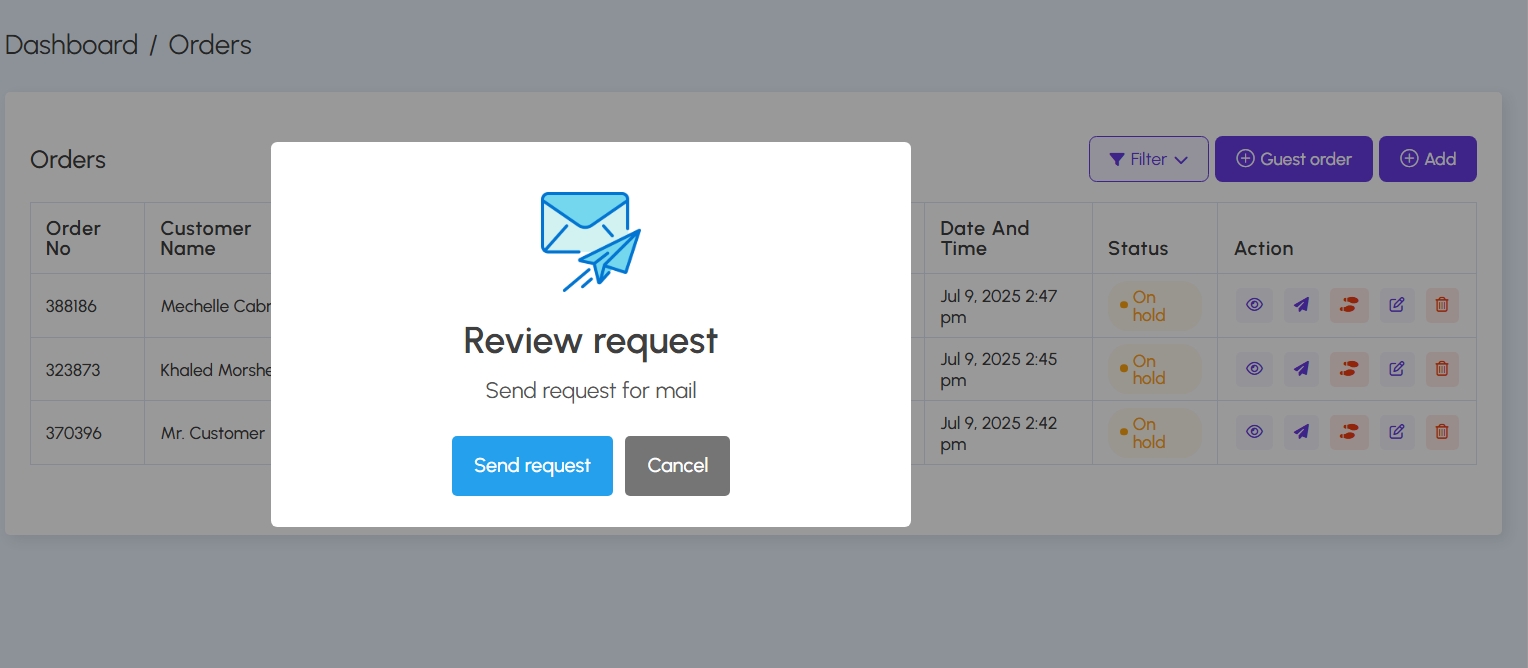
5. Review Request:
An action button opens a modal to send an email review request for the associated order.
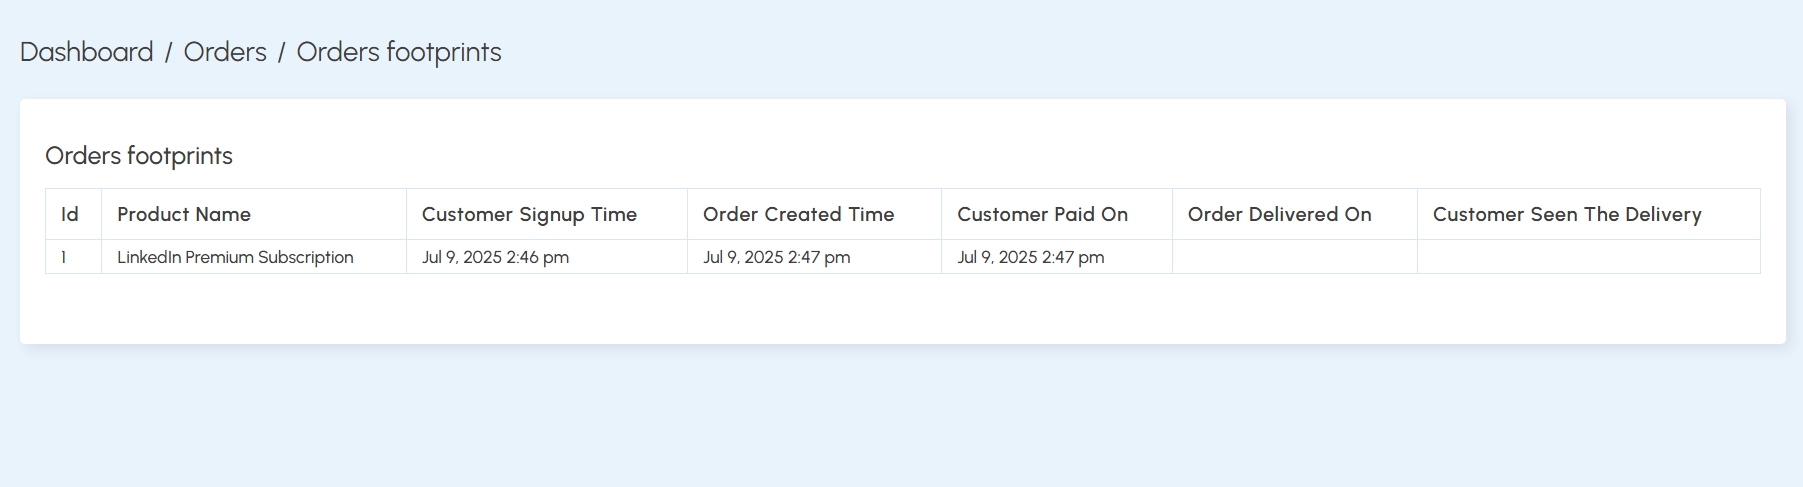
6. Order Footprints:
Displays the full order journey, including when the customer signed up, paid, and if they've viewed the delivery.
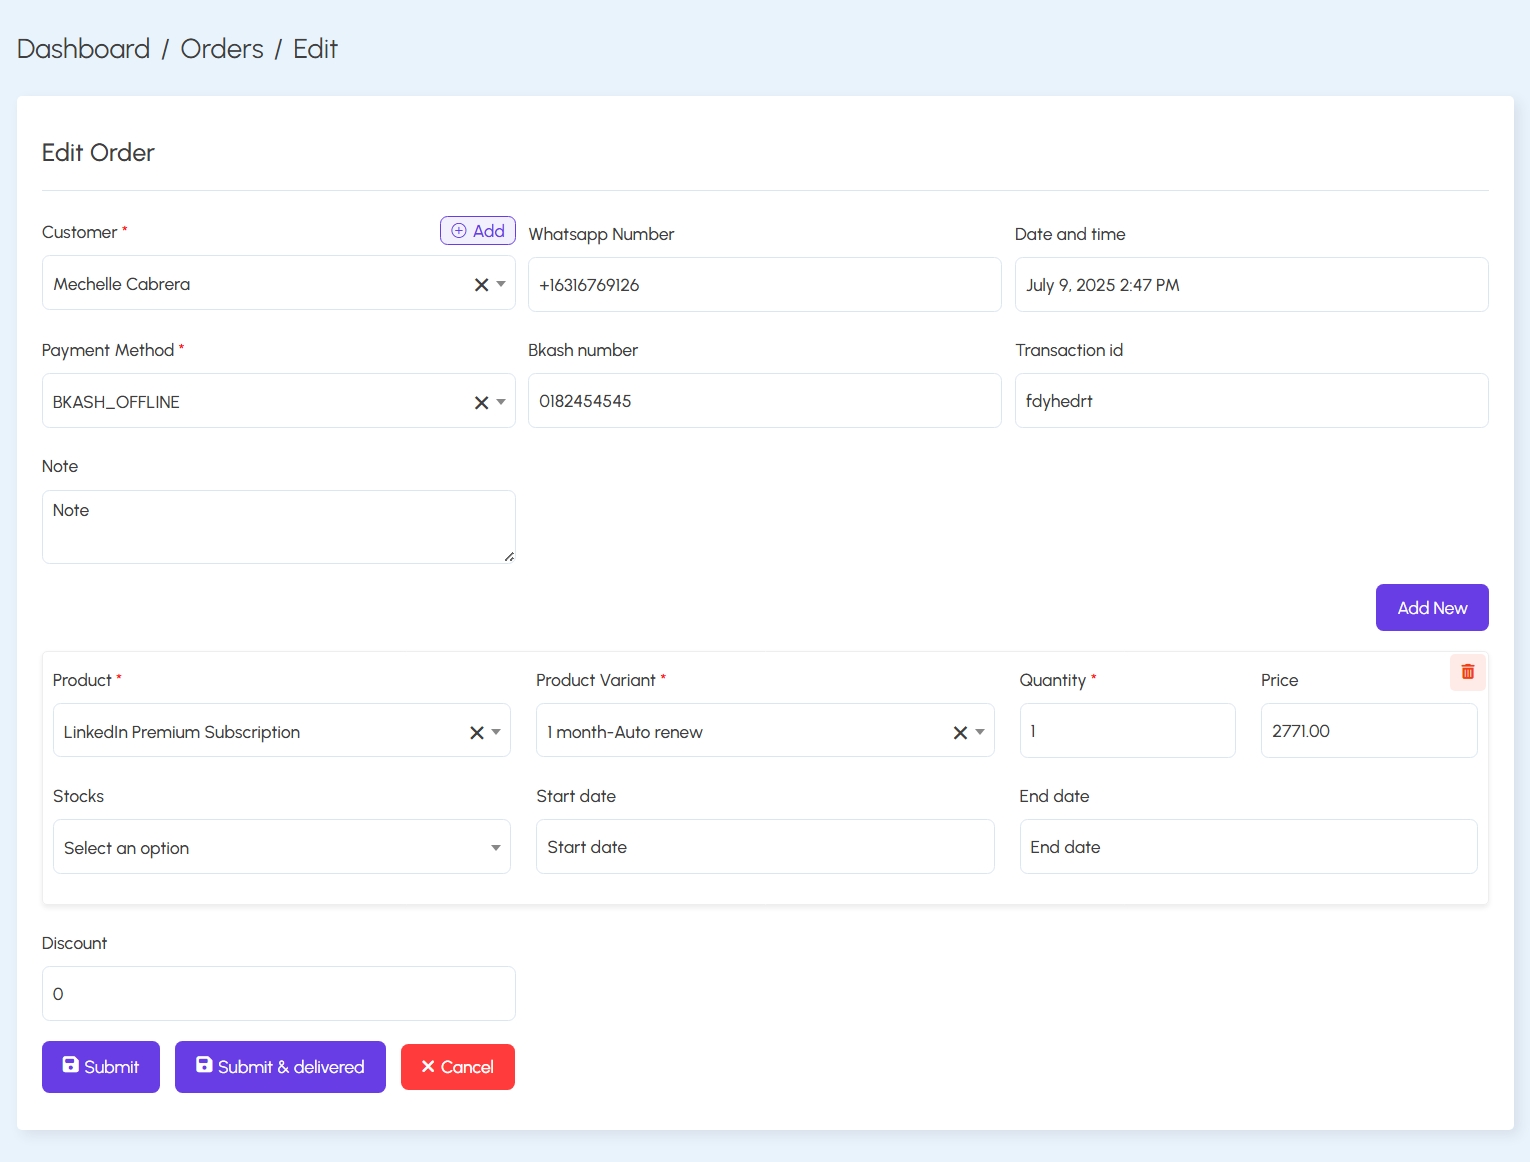
7. Edit & Delete:
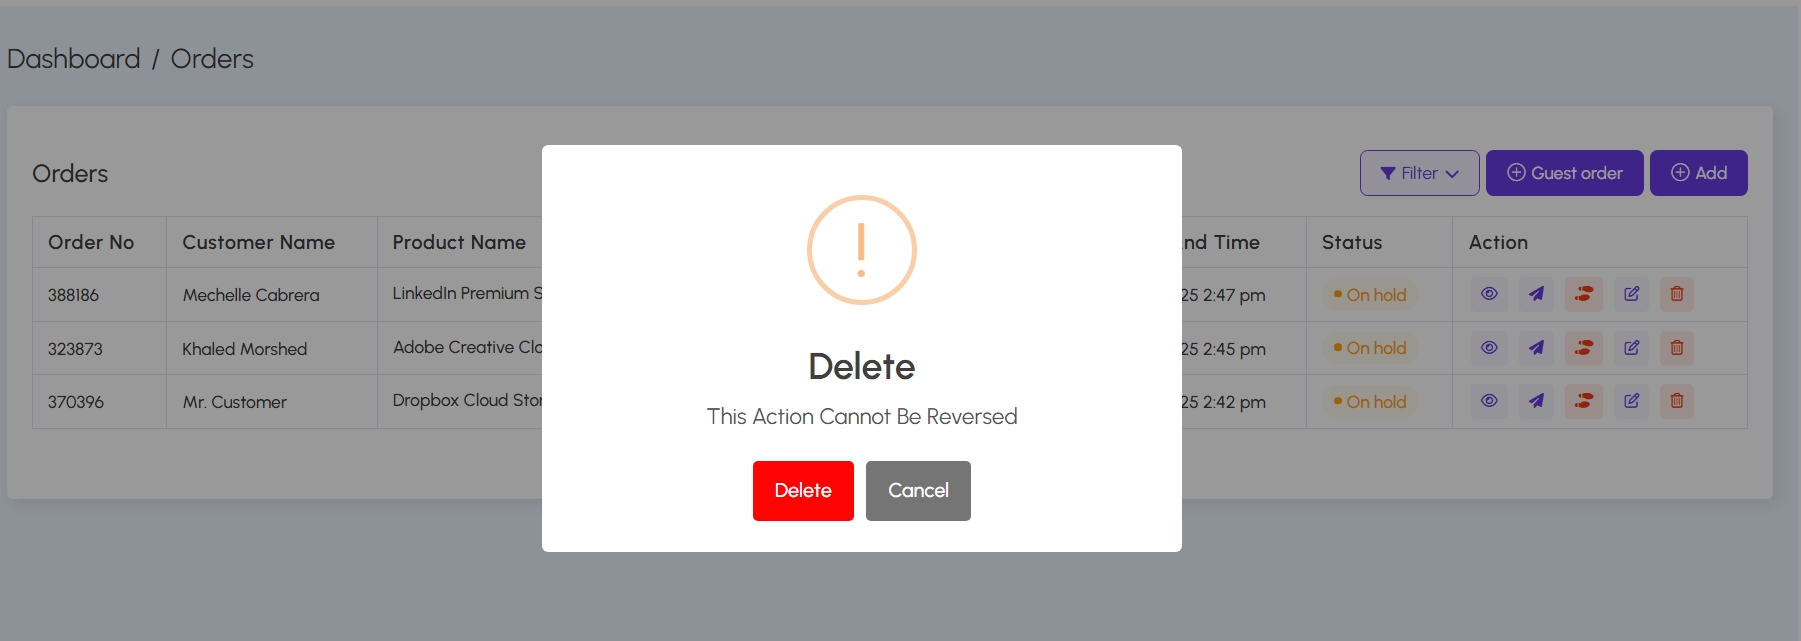
Orders can be edited inline using the form with existing values pre-filled. Deletion prompts a confirmation dialog warning the user that the action cannot be undone.
Website Widget
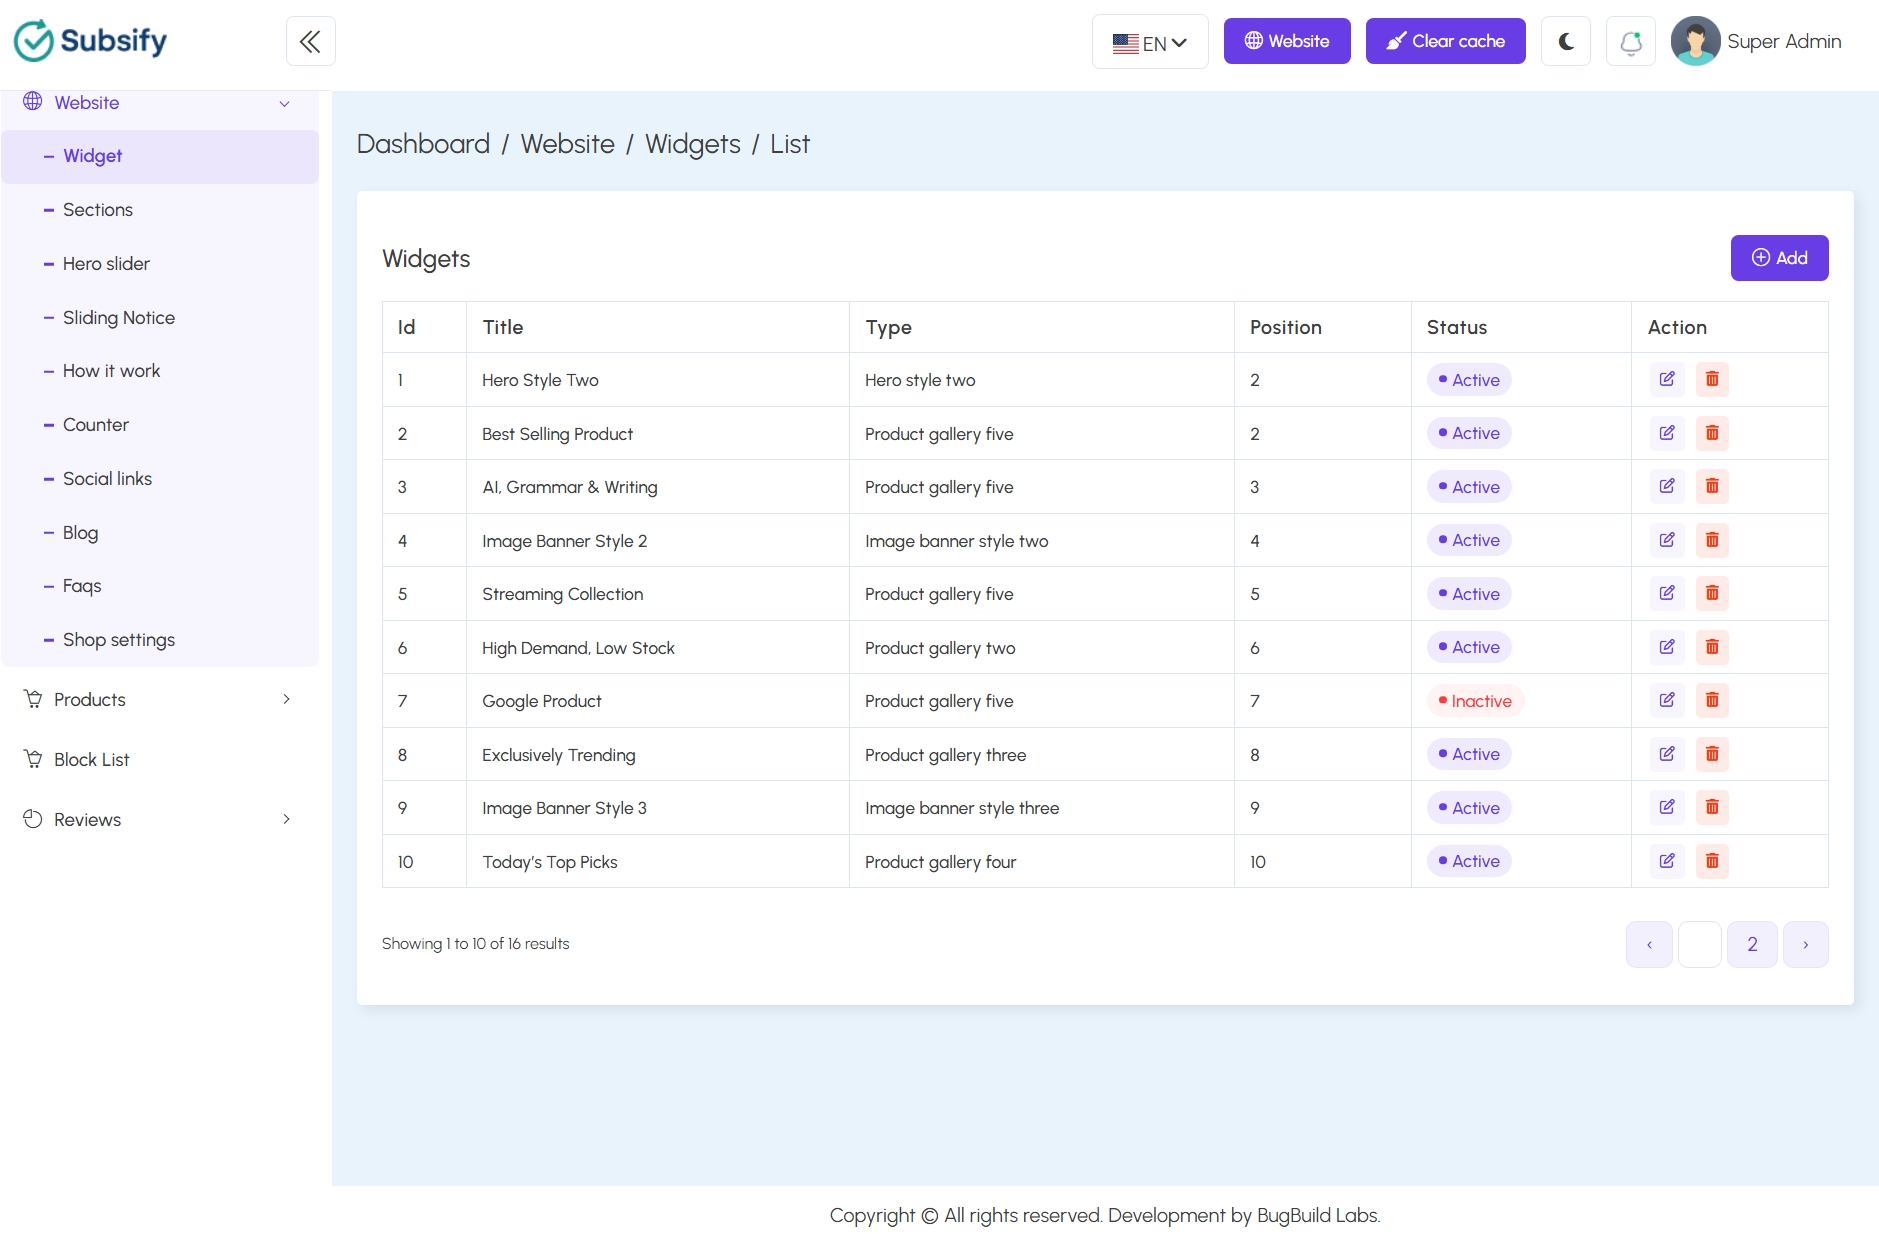
The Website Widget module allows administrators to create, configure, and organize dynamic sections (widgets) on the website's homepage. These widgets may include hero banners, product galleries, promotional blocks, or image carousels. Each widget can be customized in terms of type, layout, design, and assigned content.
Widget Listing:
The listing page displays all active and inactive widgets with attributes such as title, type (e.g., Hero Style, Product Gallery), position, and status. Users can edit or delete widgets directly from this list.
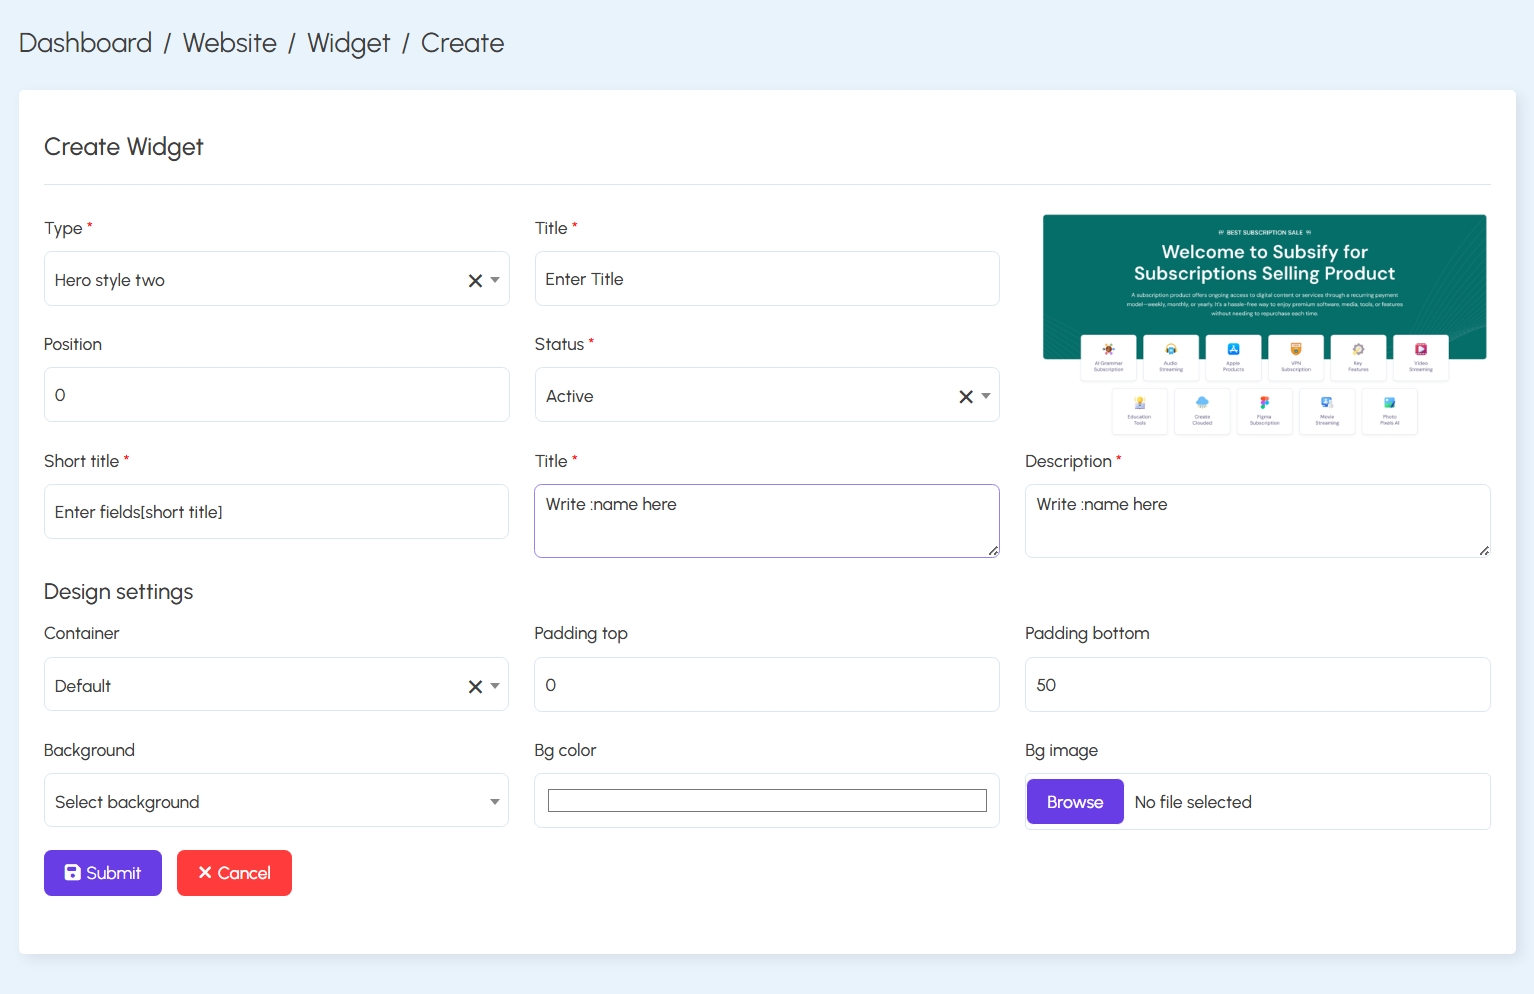
Creating a Widget:
When creating a new widget, users select a Type (e.g., Hero Style, Product Gallery), enter a title, short title, description, and choose status (active/inactive). The design can be adjusted using container size, padding, background color, or image.
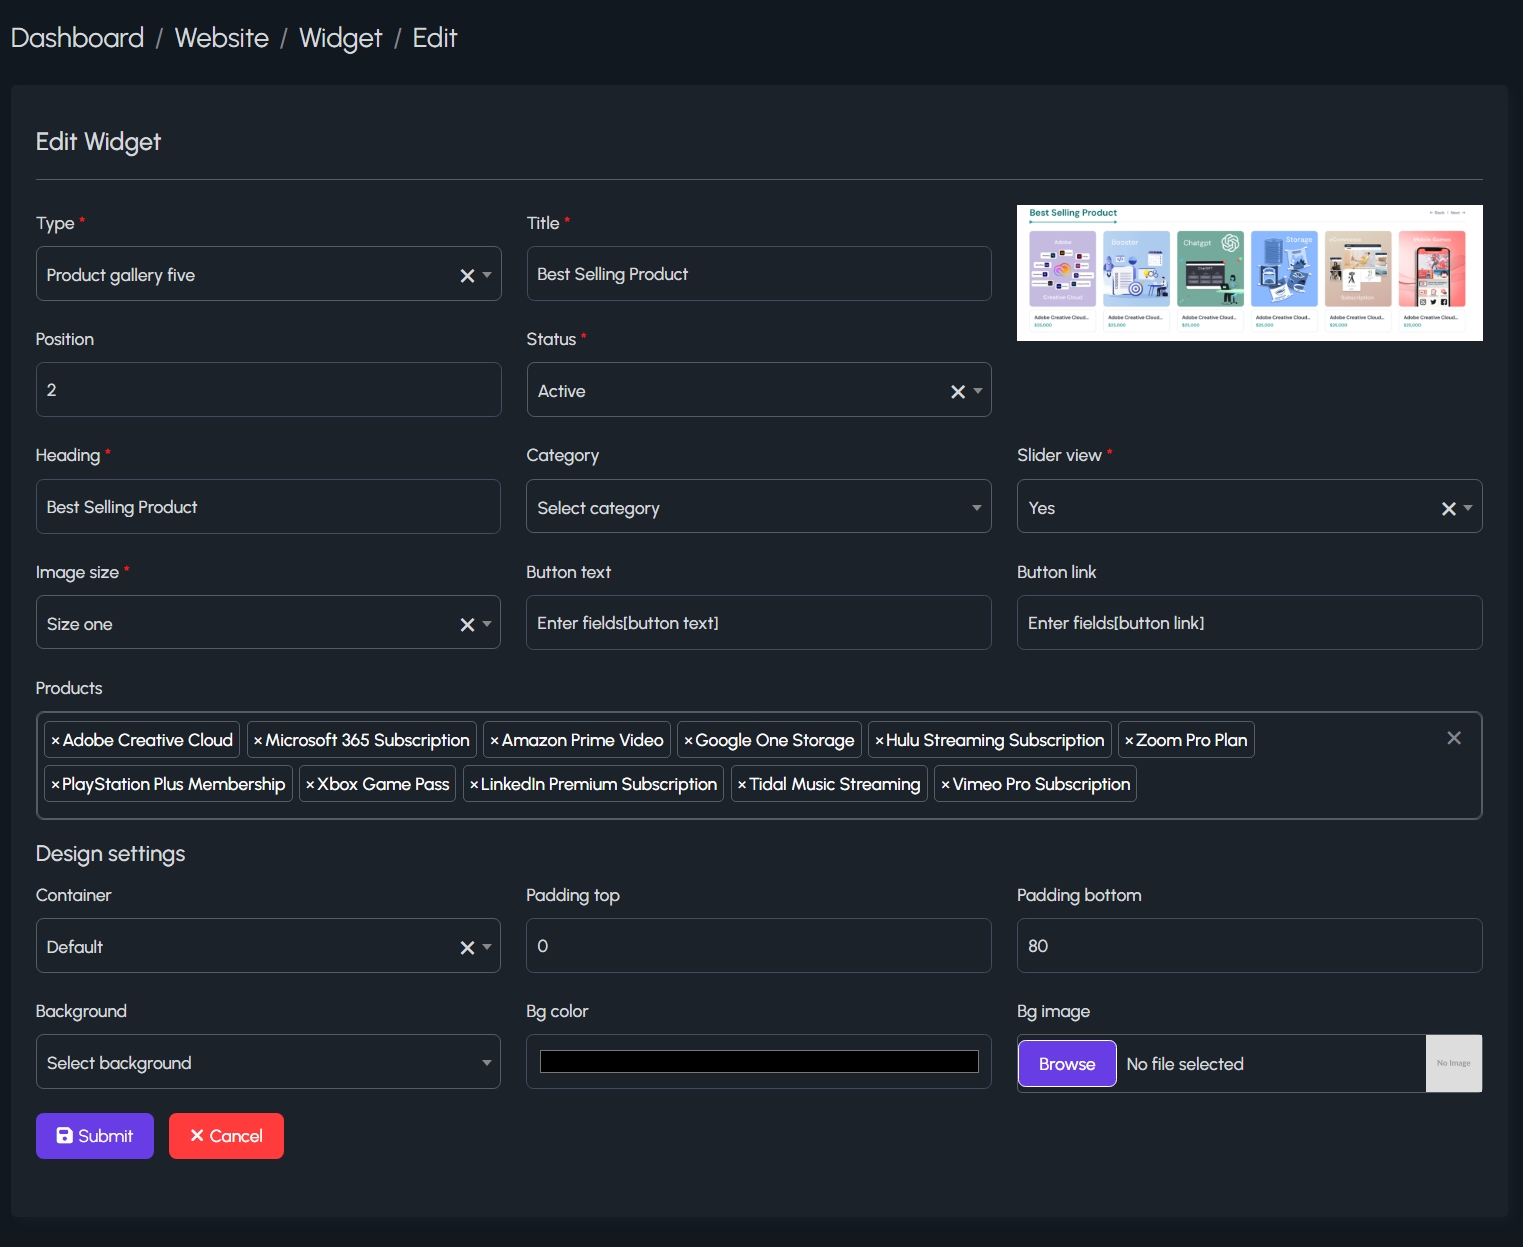
Editing a Widget:
The edit screen allows users to update the type, content (heading, category, slider view, linked products), and design settings. Users can define image size, button text/link, and background style to control visual appearance.
Section Management
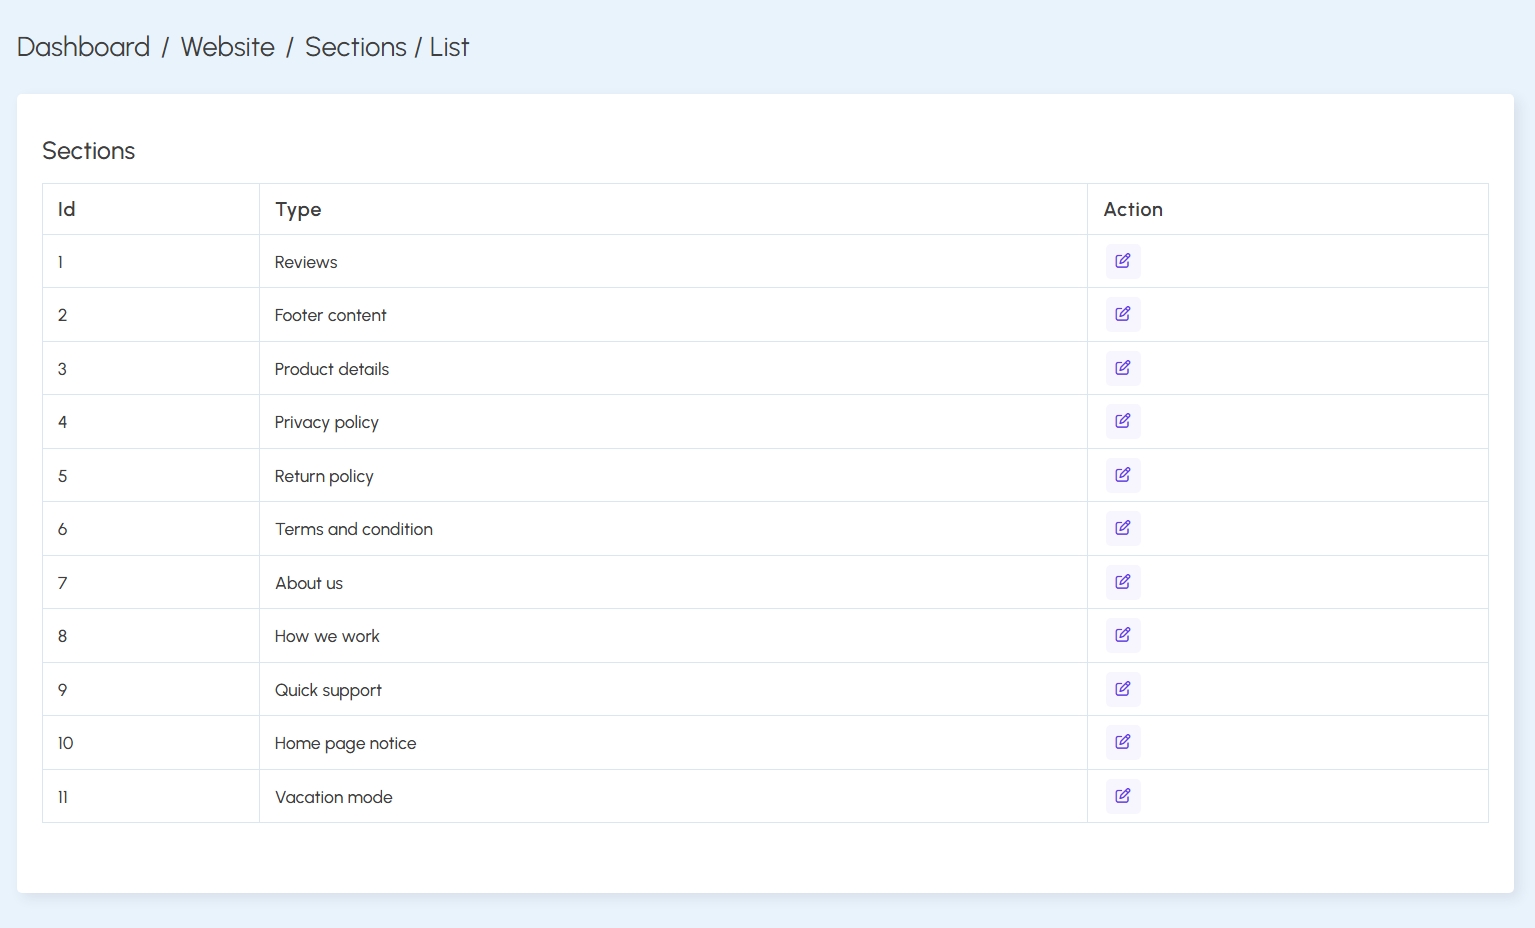
The Section module manages essential website content areas like privacy policy, footer info, product details, and more. Each section can be edited individually to match business requirements.
Section List:
Displays all available editable sections such as:
- Reviews
- Terms & Conditions
- Footer content
- How we work, About us, Return policy, Vacation mode etc.
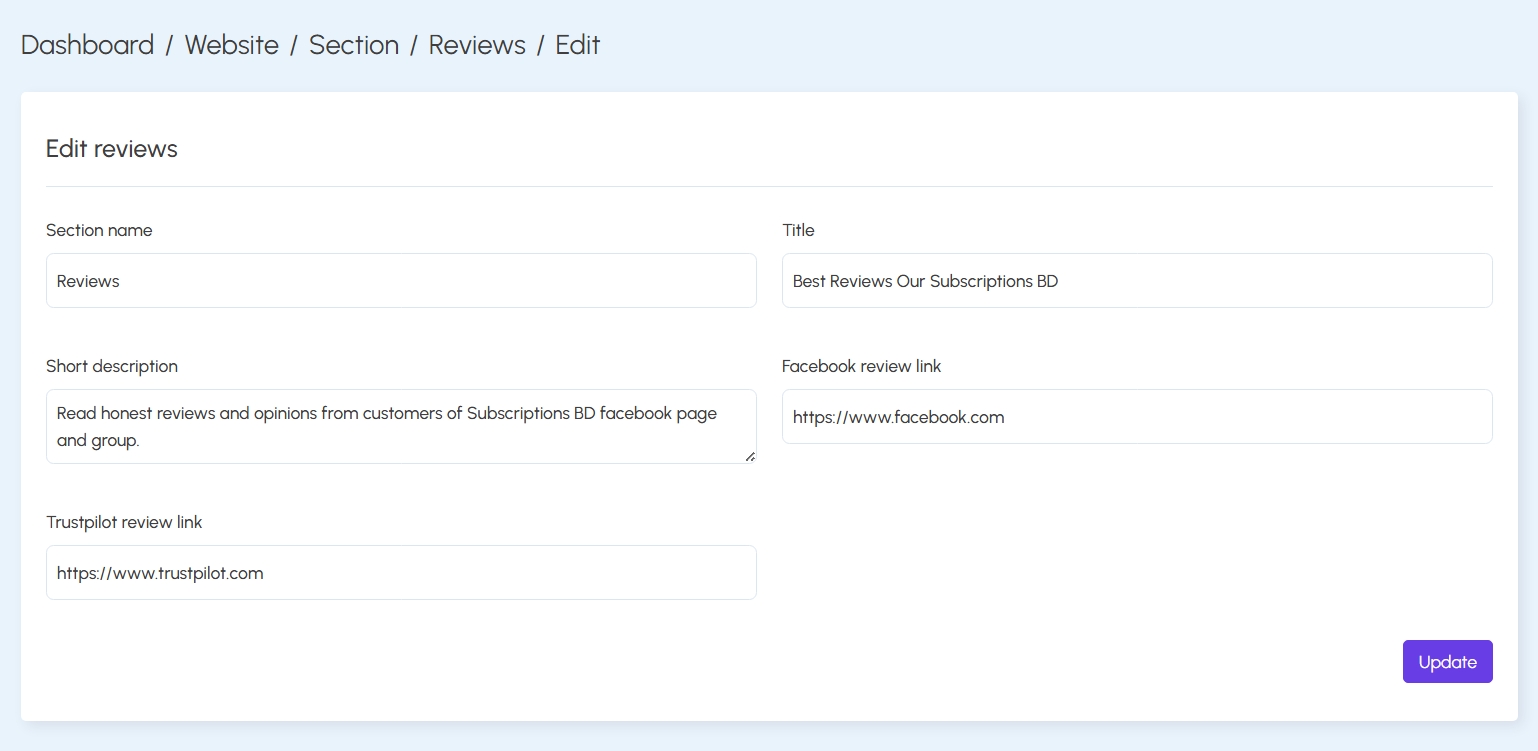
Edit Section – Reviews:
Configure review section with:
- Section name and title
- Short description
- Optional Facebook and Trustpilot review URLs
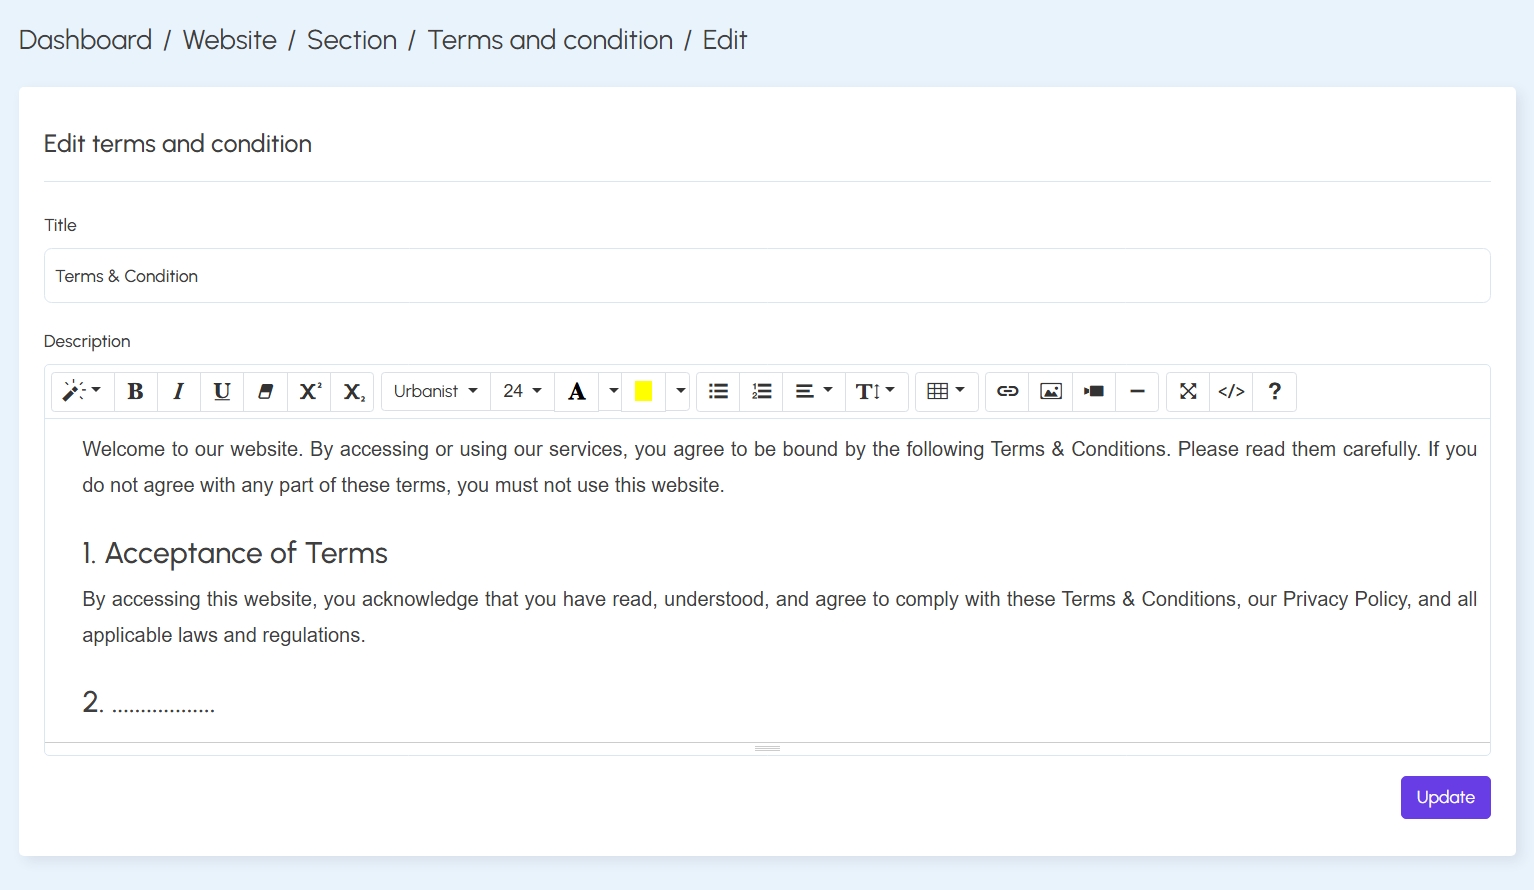
Edit Section – Terms & Conditions:
Rich-text editor to input styled legal content, including bold/italic text, bullet points, and links. This section is crucial for compliance and transparency.
Website – Other Functionalities
This section covers all the customizable components under the Website module of the admin dashboard. These features allow you to manage dynamic content and visual elements shown across your website, including banners, info counters, service guides, and social media links.
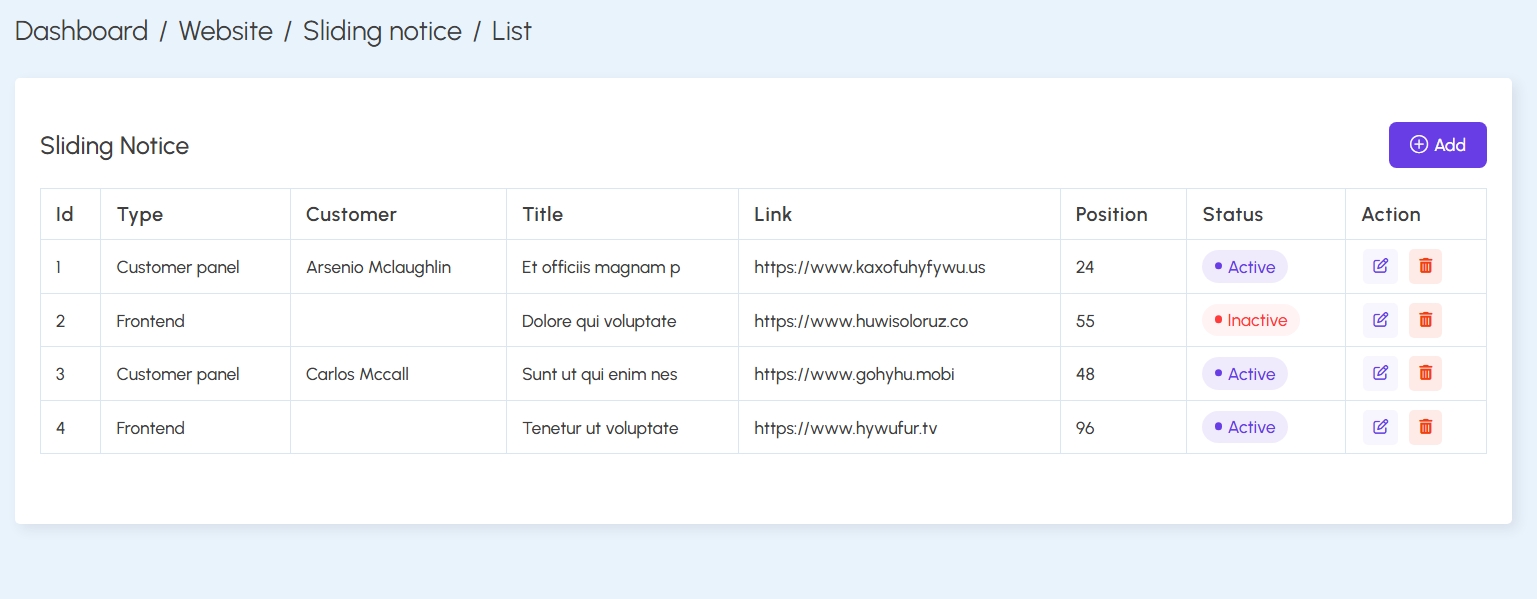
1. Sliding Notice:
Create scrolling announcements for the frontend or customer panel. Includes support for titles, links, display order, and activation toggles.
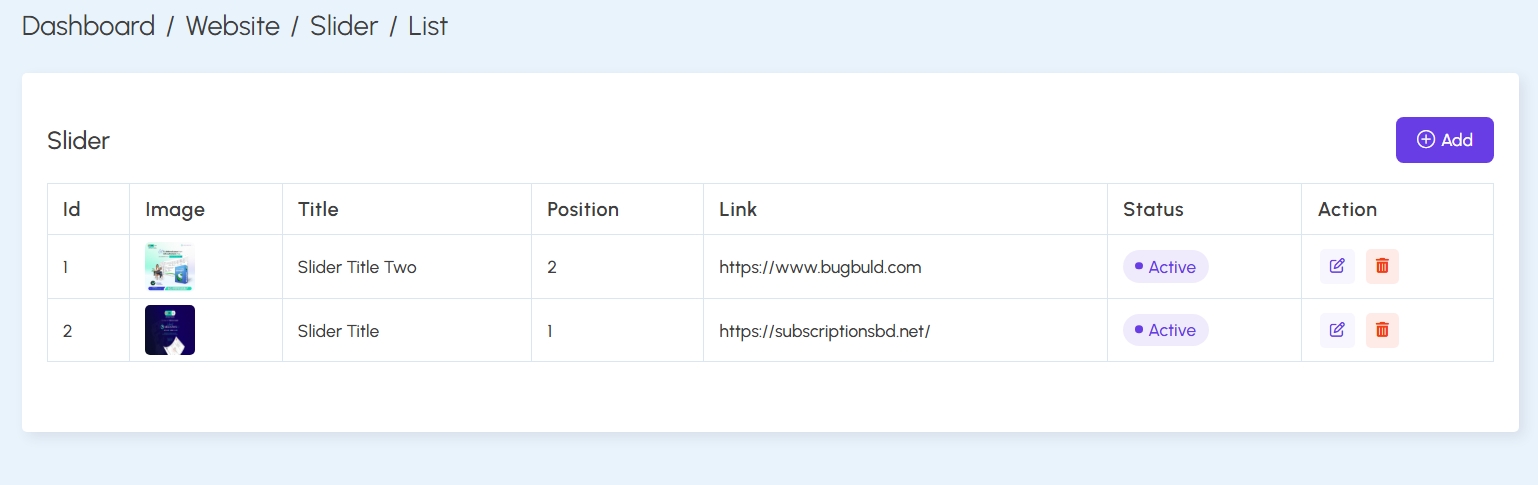
2. Slider:
Manage homepage carousel banners with image uploads, title, link, and position. Helps highlight promotional or informative content.
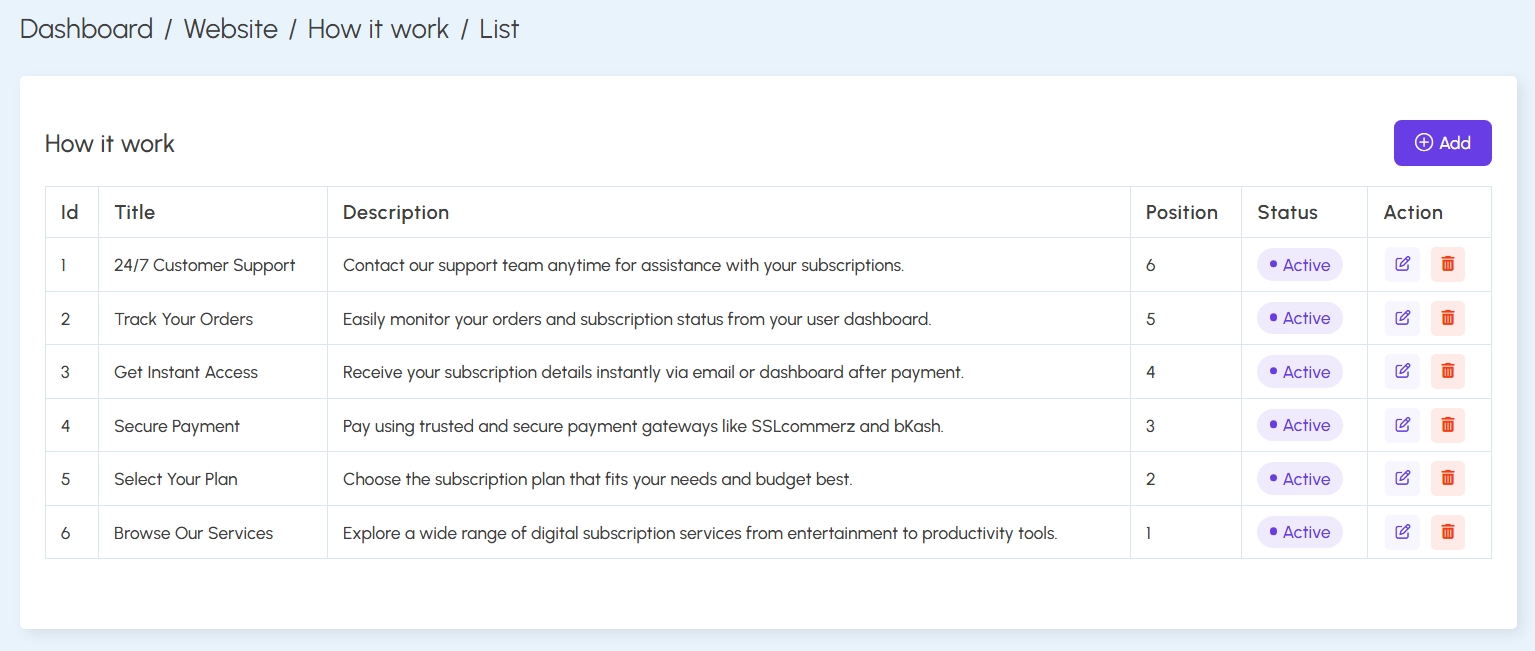
3. How It Work:
Describe how your platform functions via a structured 6-step module, each with its own title, description, and display position.
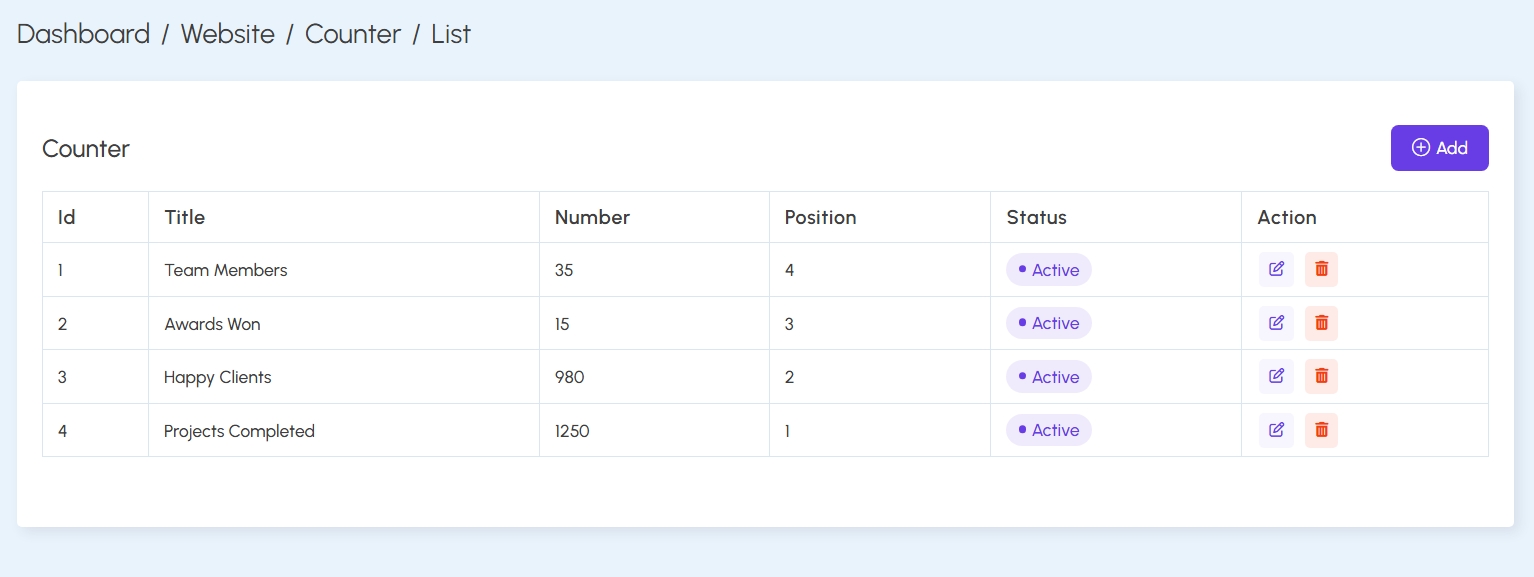
4. Counter:
Add animated counters for milestones like “Team Members” or “Projects Completed” to showcase platform achievements.
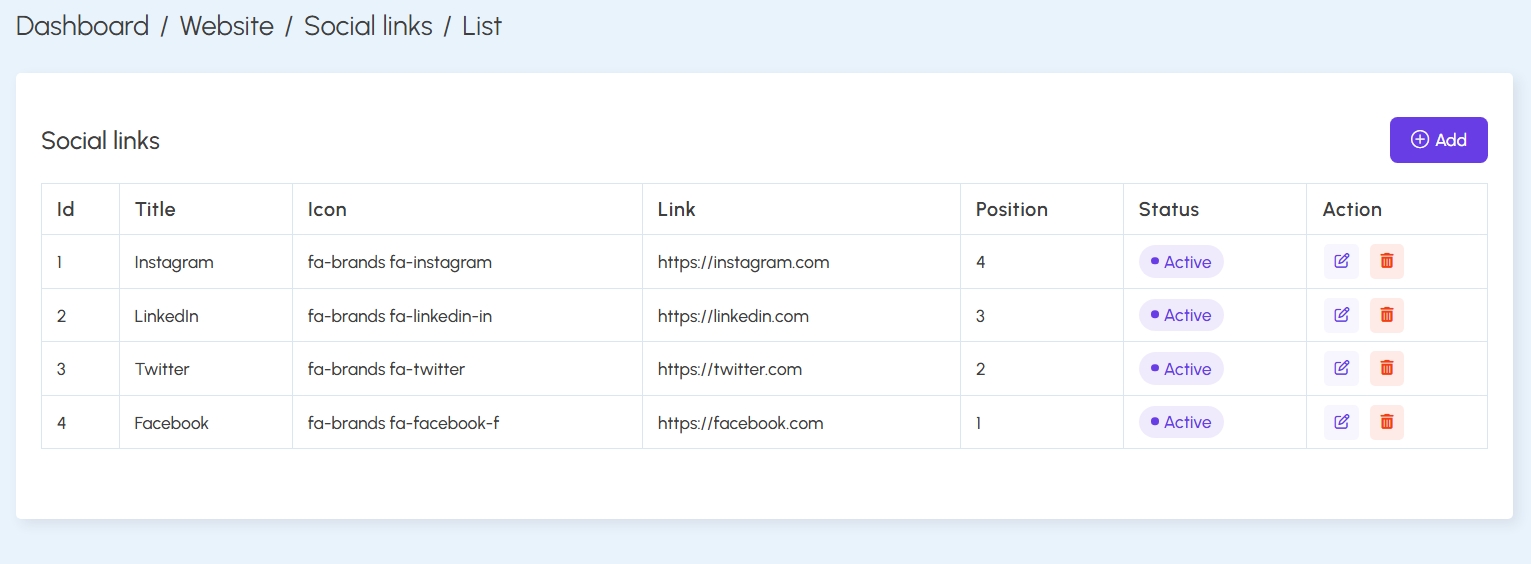
5. Social Links:
Manage the display of social media icons (LinkedIn, Twitter, Facebook, etc.) with icons, links, and sort order for the website footer or contact area.
Website – Blog & FAQs
The Blog and FAQ modules allow administrators to manage informational and support content on the website. These features help enhance SEO, educate users, and reduce support overhead.
1. Blog Management:
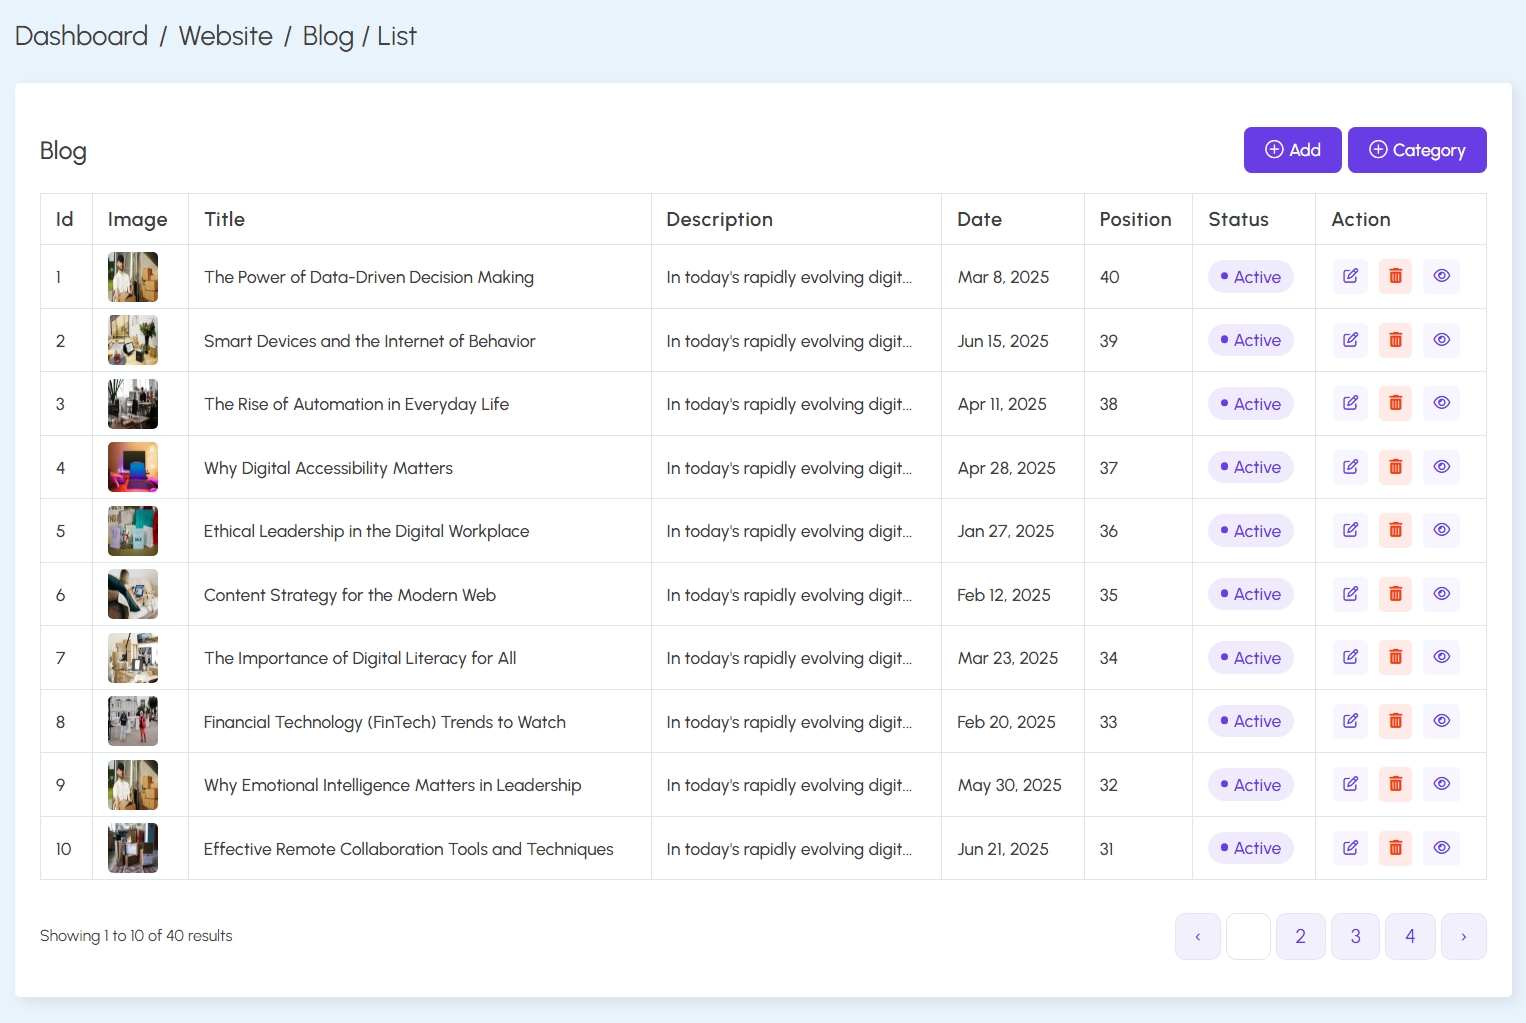
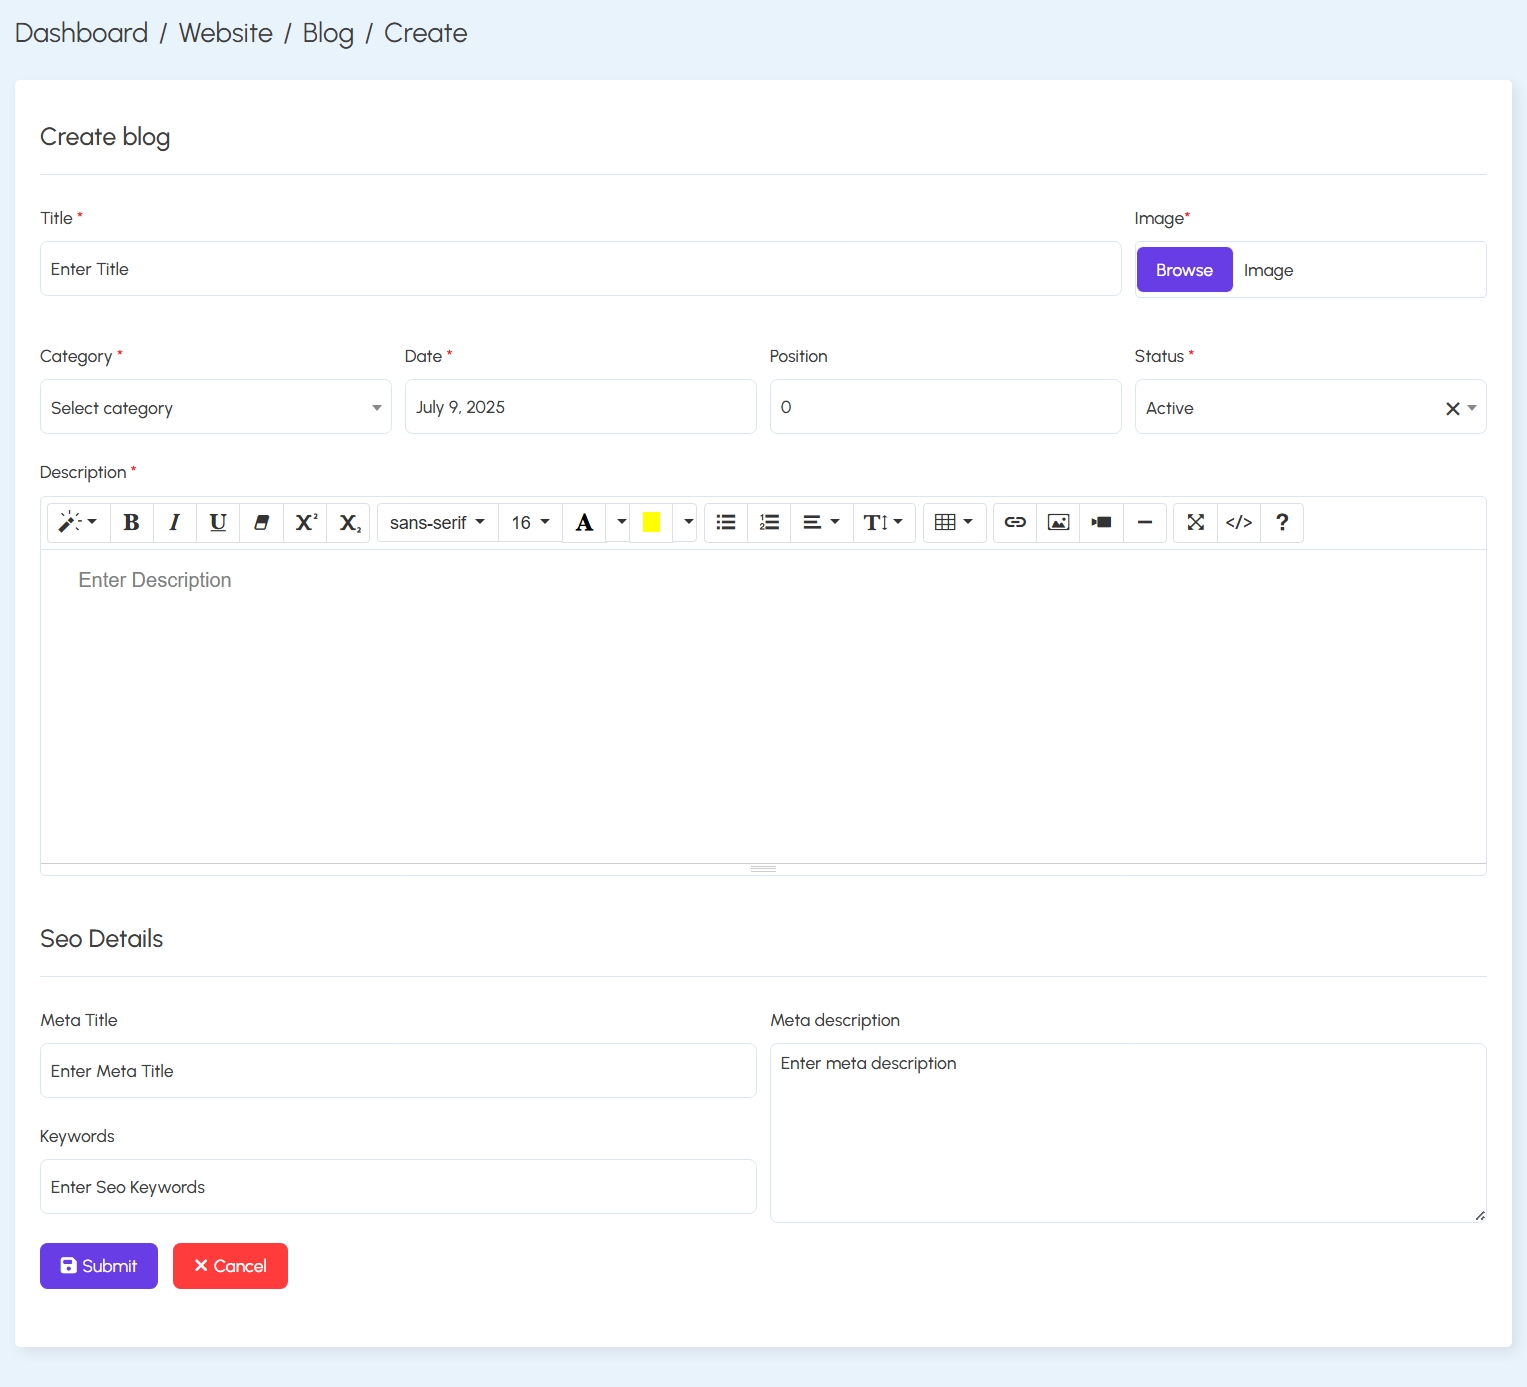
Administrators can create and manage blog entries using the Blog section. Each blog post supports a title, featured image, short description, date, display position, and status. Blogs can also be categorized and enriched with SEO metadata such as meta title, meta description, and keywords.
Key Features:
- WYSIWYG editor for detailed descriptions
- Category tagging and publishing status
- SEO fields for better search visibility
- Bulk list view with Edit, Delete, and Preview actions
2. FAQs Management:
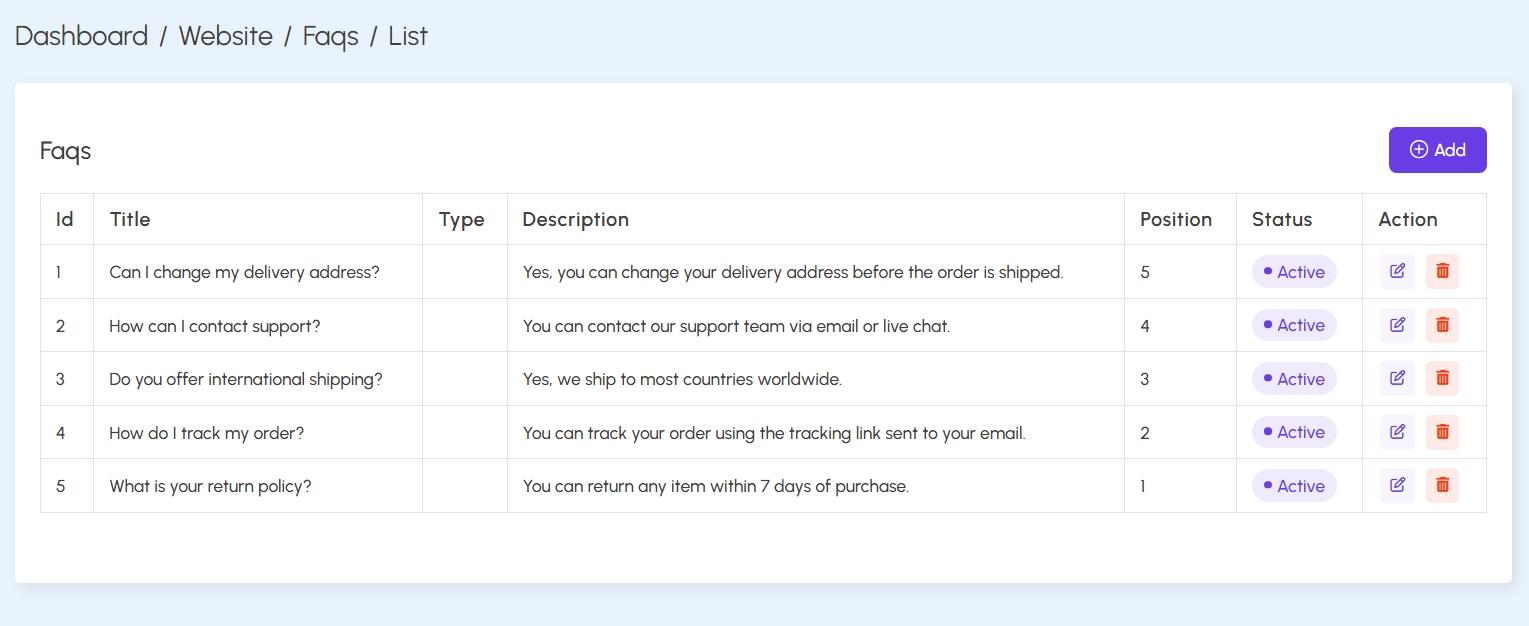
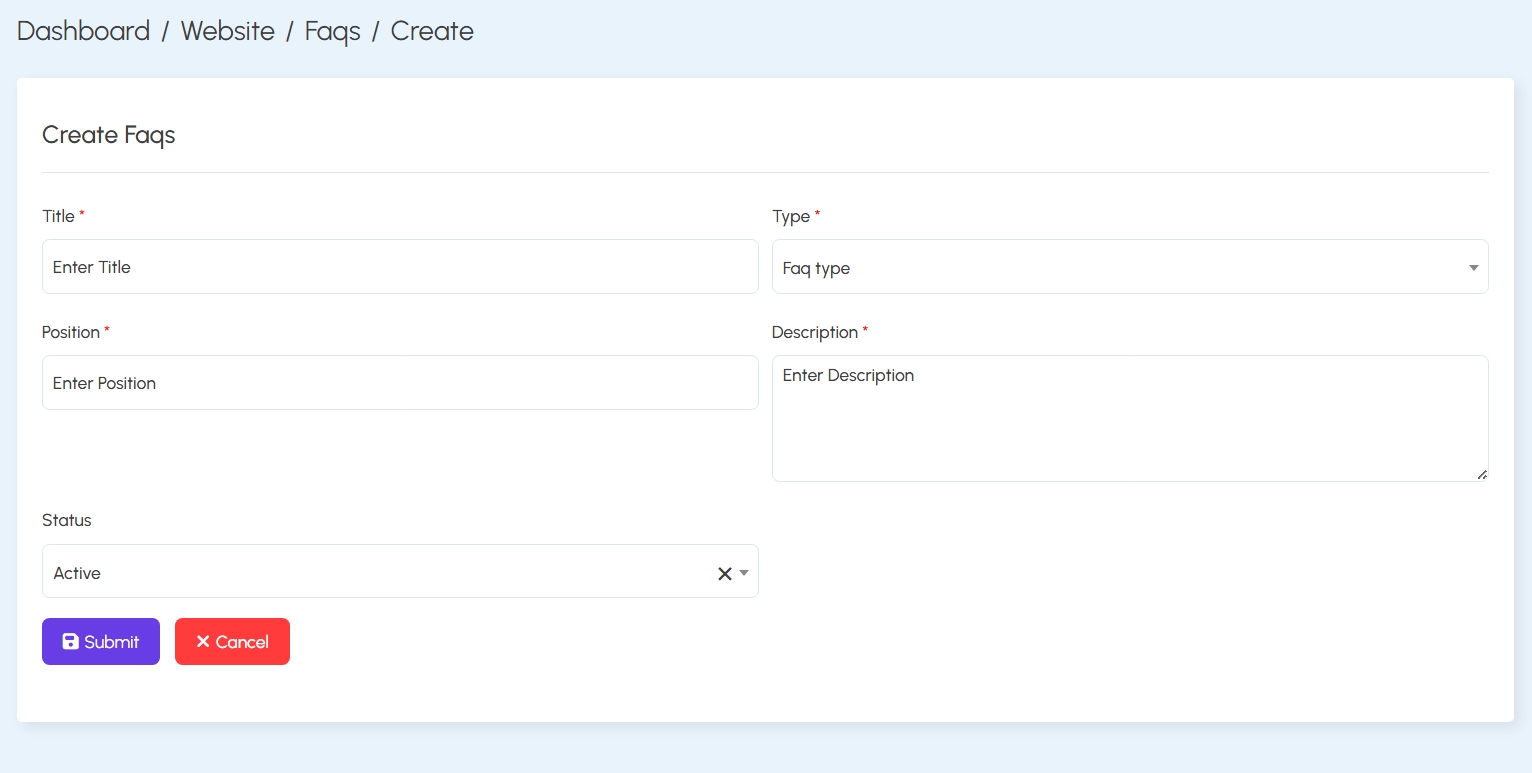
The FAQ module allows you to maintain a searchable list of frequently asked questions. Each FAQ supports a title, type, description, and sorting position.
Key Features:
- Type-based categorization (e.g., shipping, account, billing)
- Editable order of appearance via position
- Status toggle and CRUD controls
Shop Settings
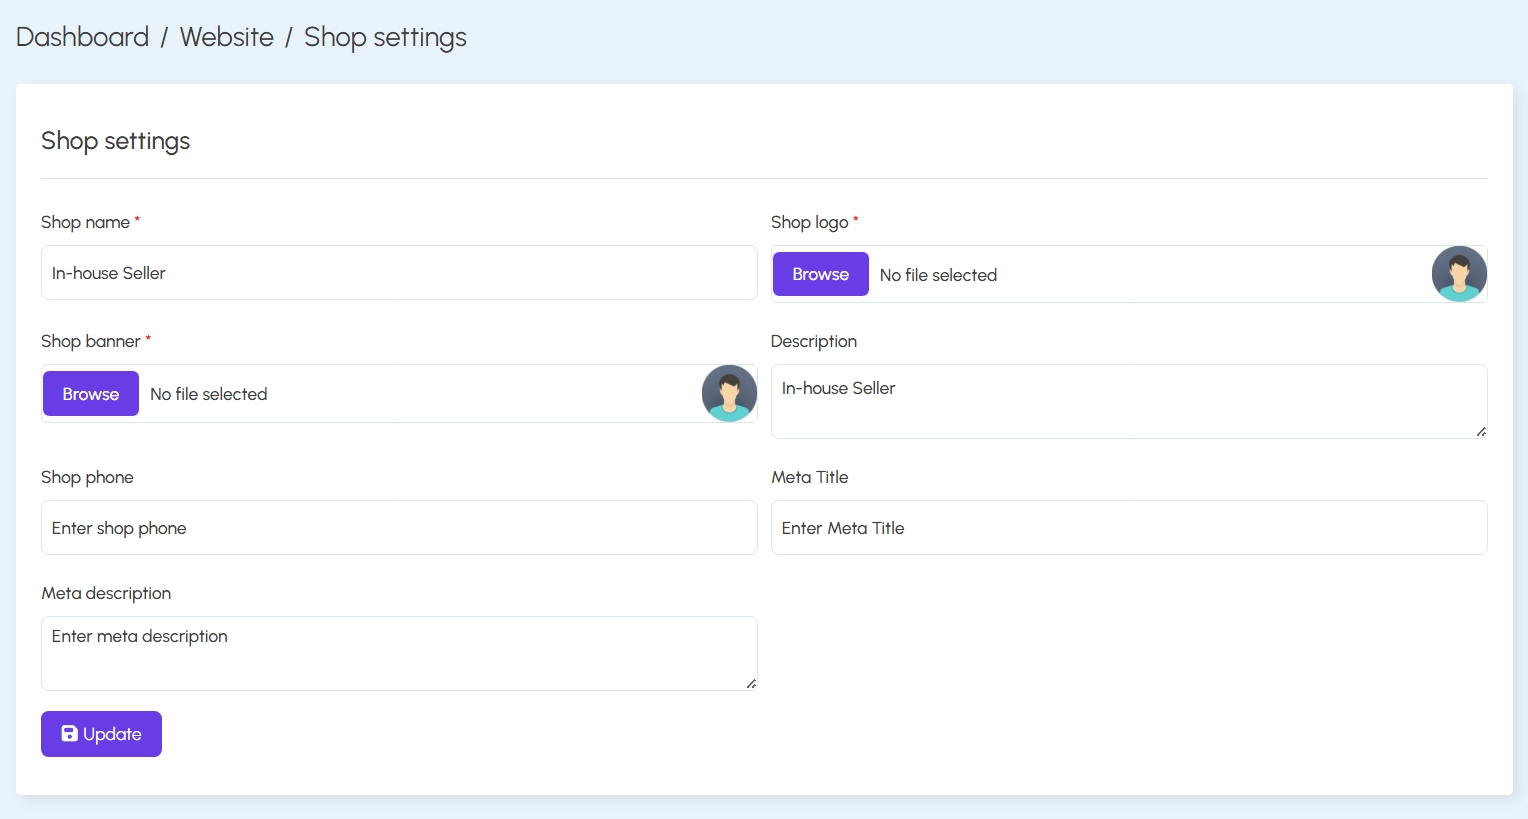
The Shop Settings section allows sellers or admins to configure essential store information and branding details that will be displayed publicly on the site.
Fields and Functions:
- Shop Name: The name displayed as the storefront title (e.g., “In-house Seller”).
- Shop Logo & Banner: Image uploads for the shop’s visual identity. The logo appears in listings and profile; the banner is used for header areas.
- Shop Phone: A contact number for the shop (optional).
- Description: A brief introduction or detail about the seller or shop.
- Meta Title & Meta Description: Used for SEO purposes. Helps optimize search engine visibility of the shop page.
After entering the required data, click Update to save your changes. These settings will reflect immediately on the storefront.
Customer Inquiry
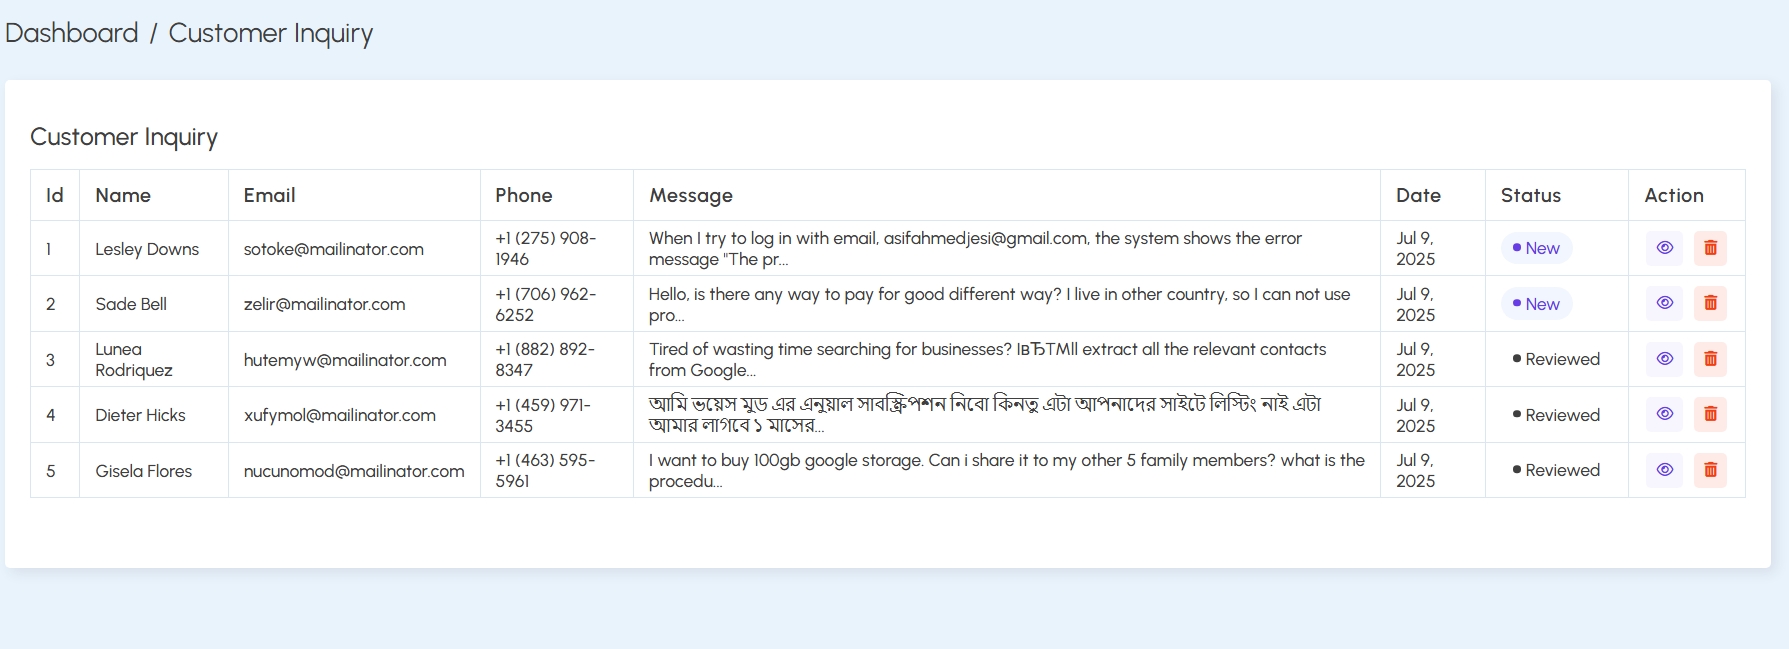
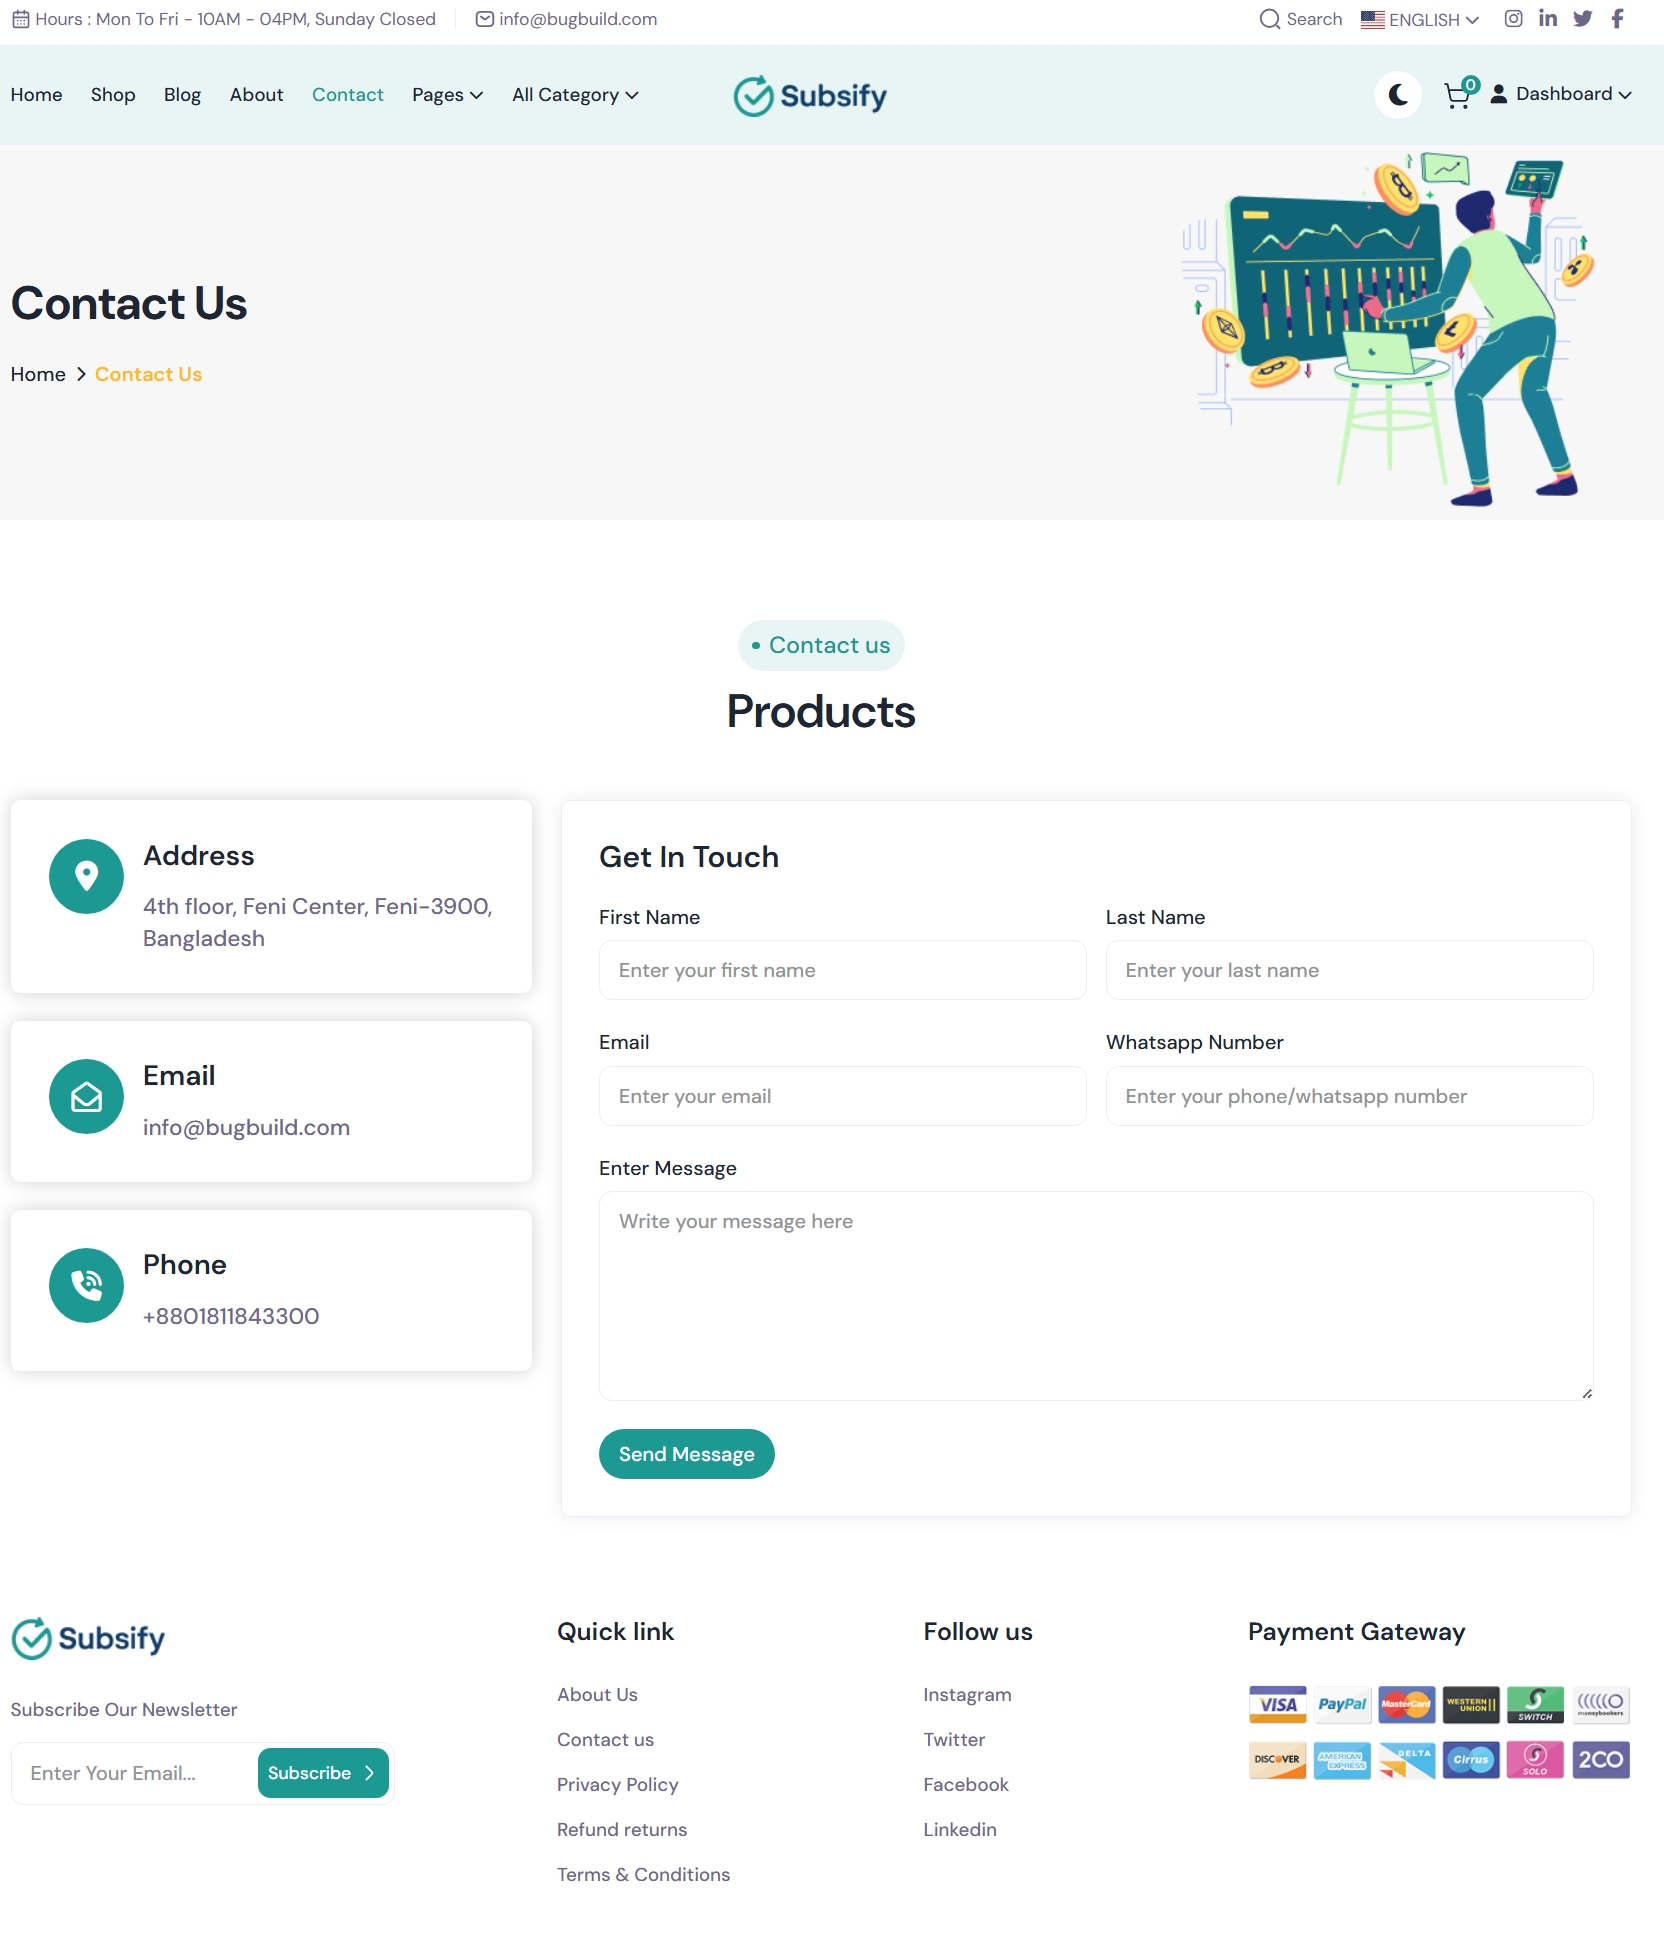
The Customer Inquiry module handles contact form submissions from the public-facing website. Inquiries submitted through the Contact Us page are automatically recorded in the admin panel where administrators can review and manage them.
Key Features:
- Frontend form captures name, email, phone/WhatsApp, and message
- Submissions are displayed in the backend with date, status, and actions
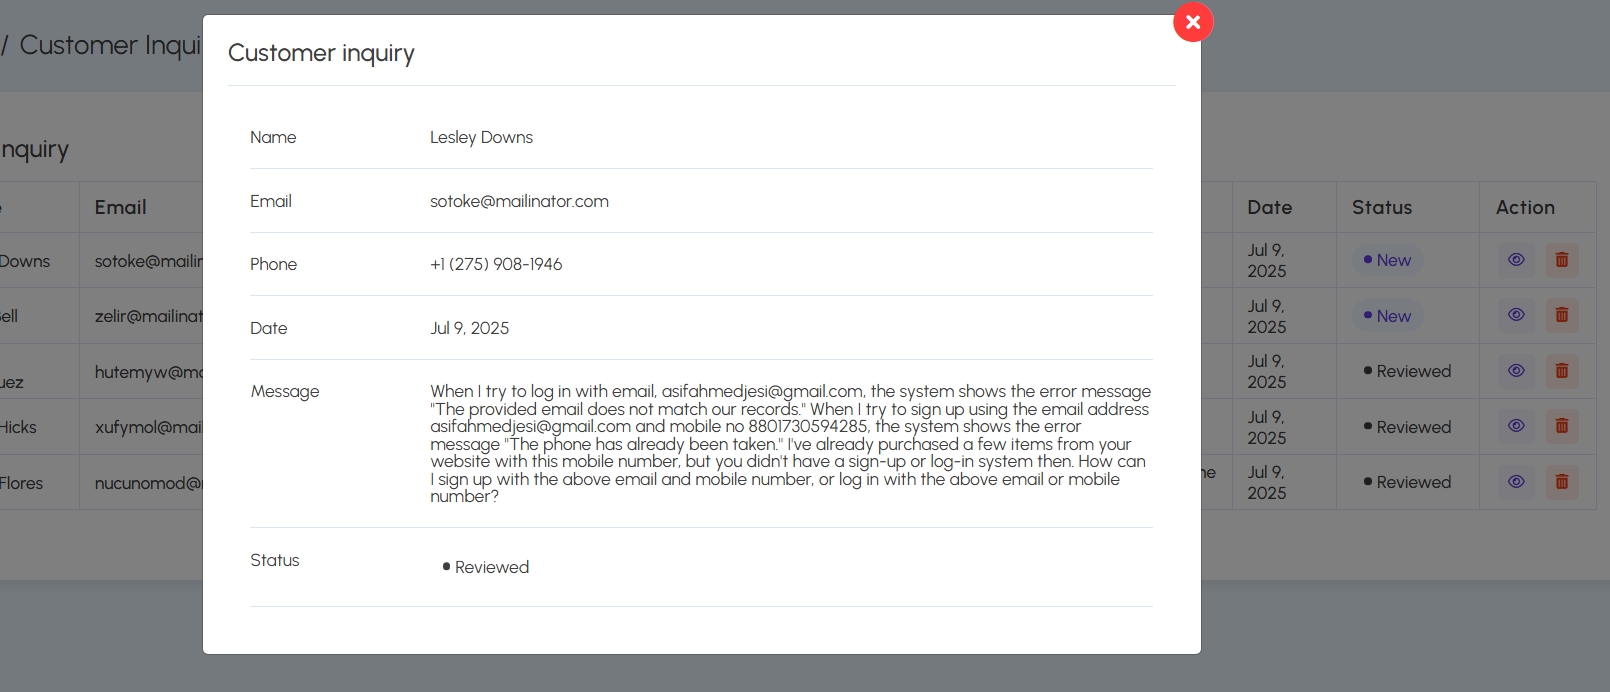
- Each entry includes a full details modal with message and user data
- Status can be updated (e.g.
New,Reviewed) - Admins can view or delete individual inquiries
Workflow:
- User submits the contact form
- Entry appears in the admin inquiry list
- Admin clicks "View" to open details modal
- Admin may update status or take action
Reports
The Reports module provides in-depth analytics on stock usage, sales, customer activity, profit generation, and commission distribution. These reports help administrators track performance and make informed decisions.
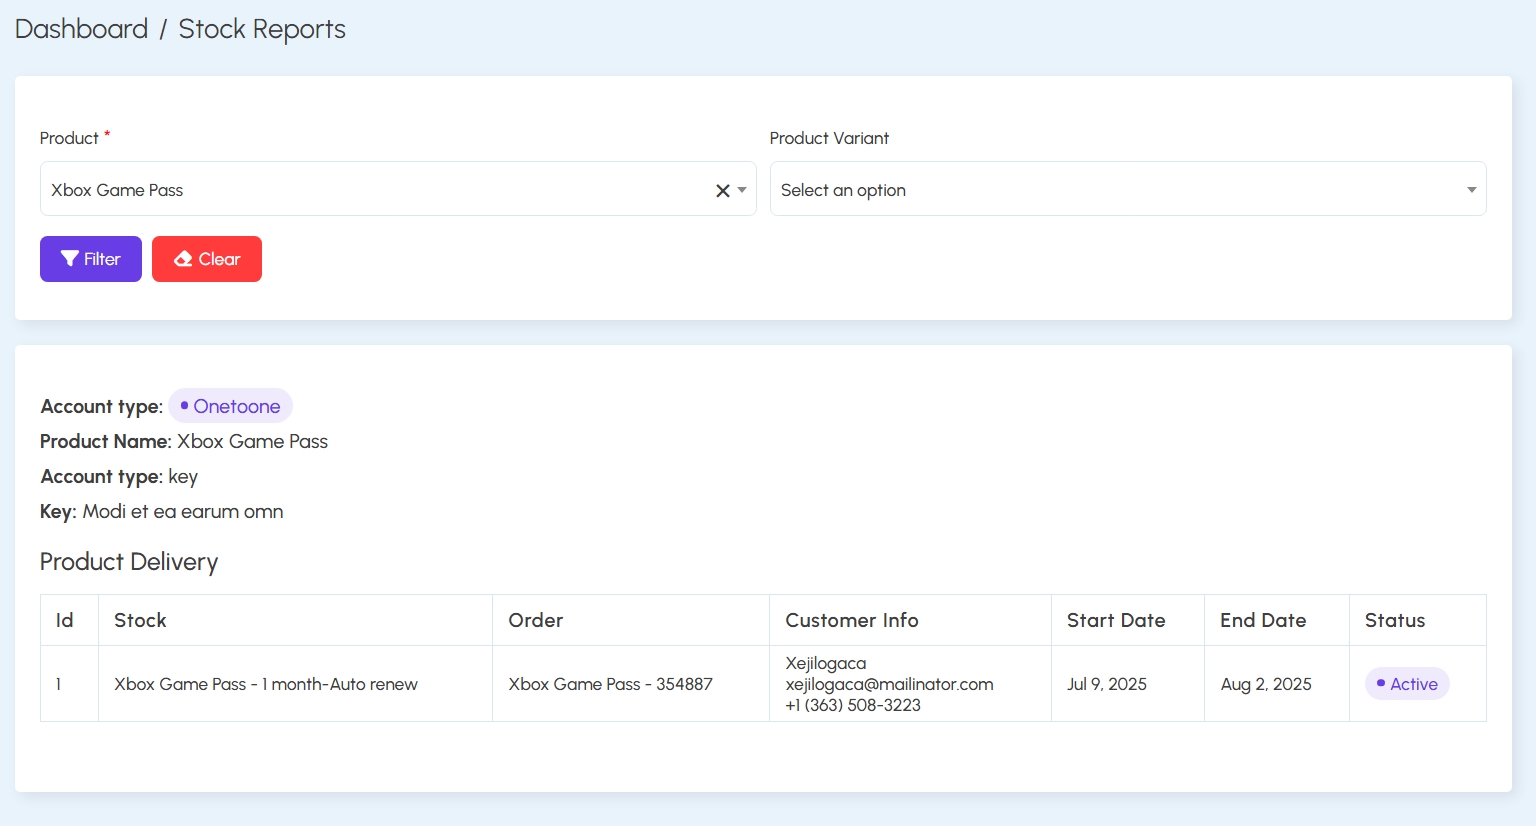
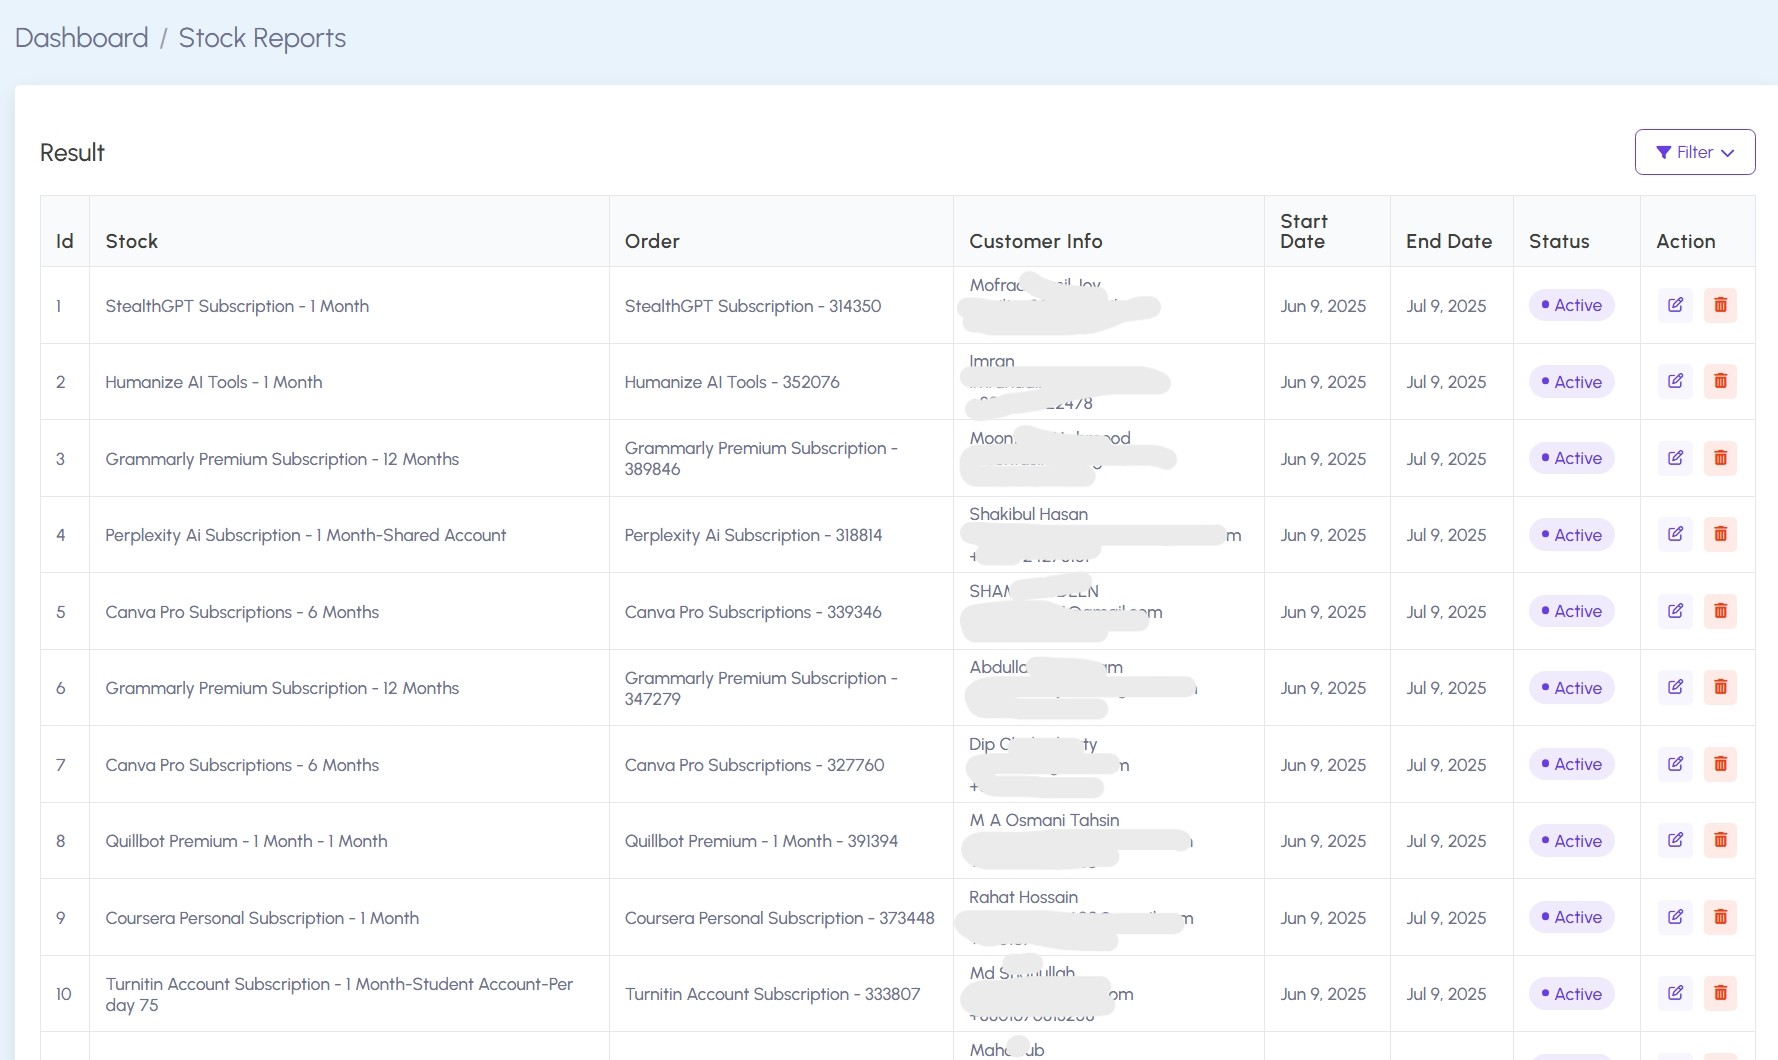
1. Stock Reports:
Displays information about product subscriptions delivered to customers. It includes stock names, order numbers, customer info, subscription periods, and statuses.
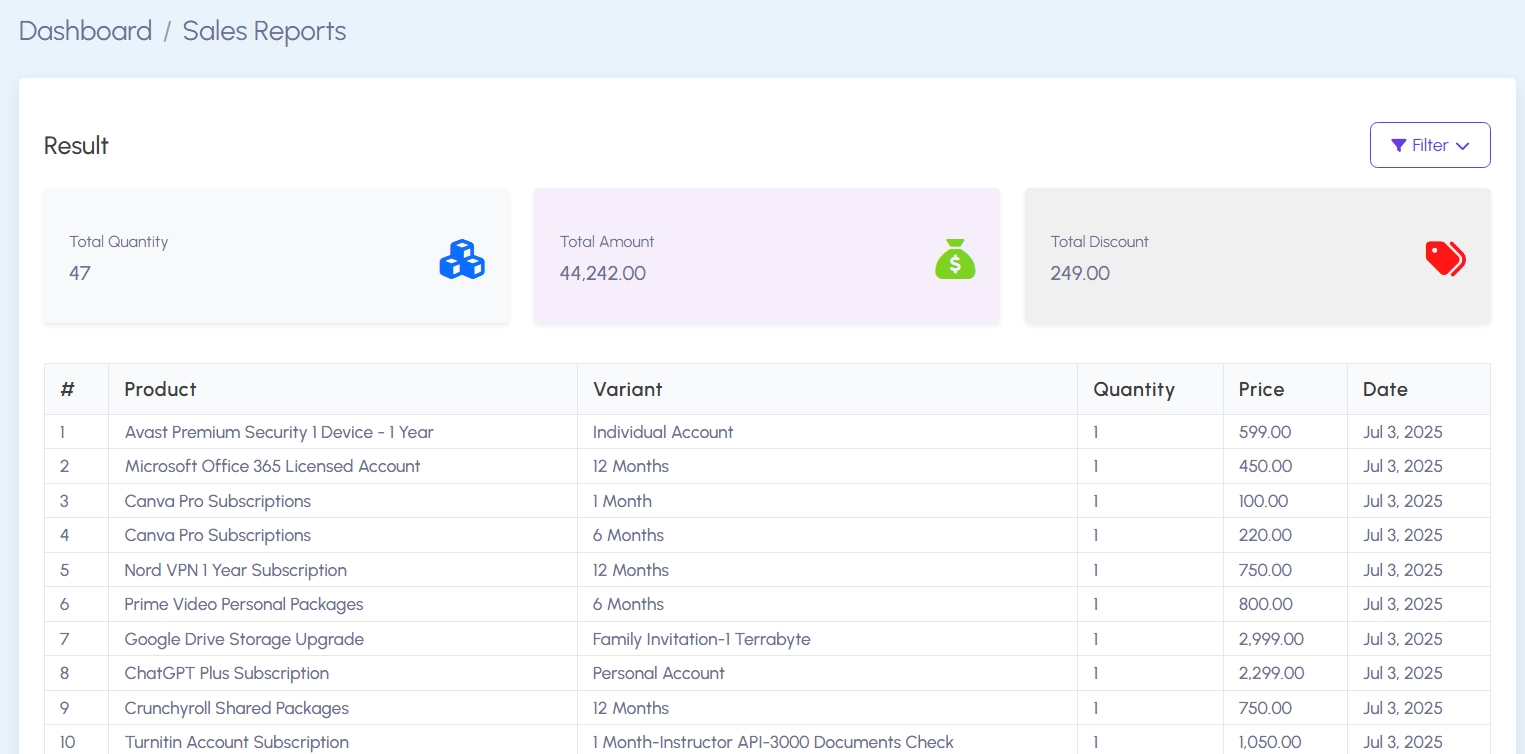
2. Sales Reports:
Summarizes total quantity sold, revenue generated, and discounts applied. It lists each product sold along with its variant, quantity, price, and sale date.
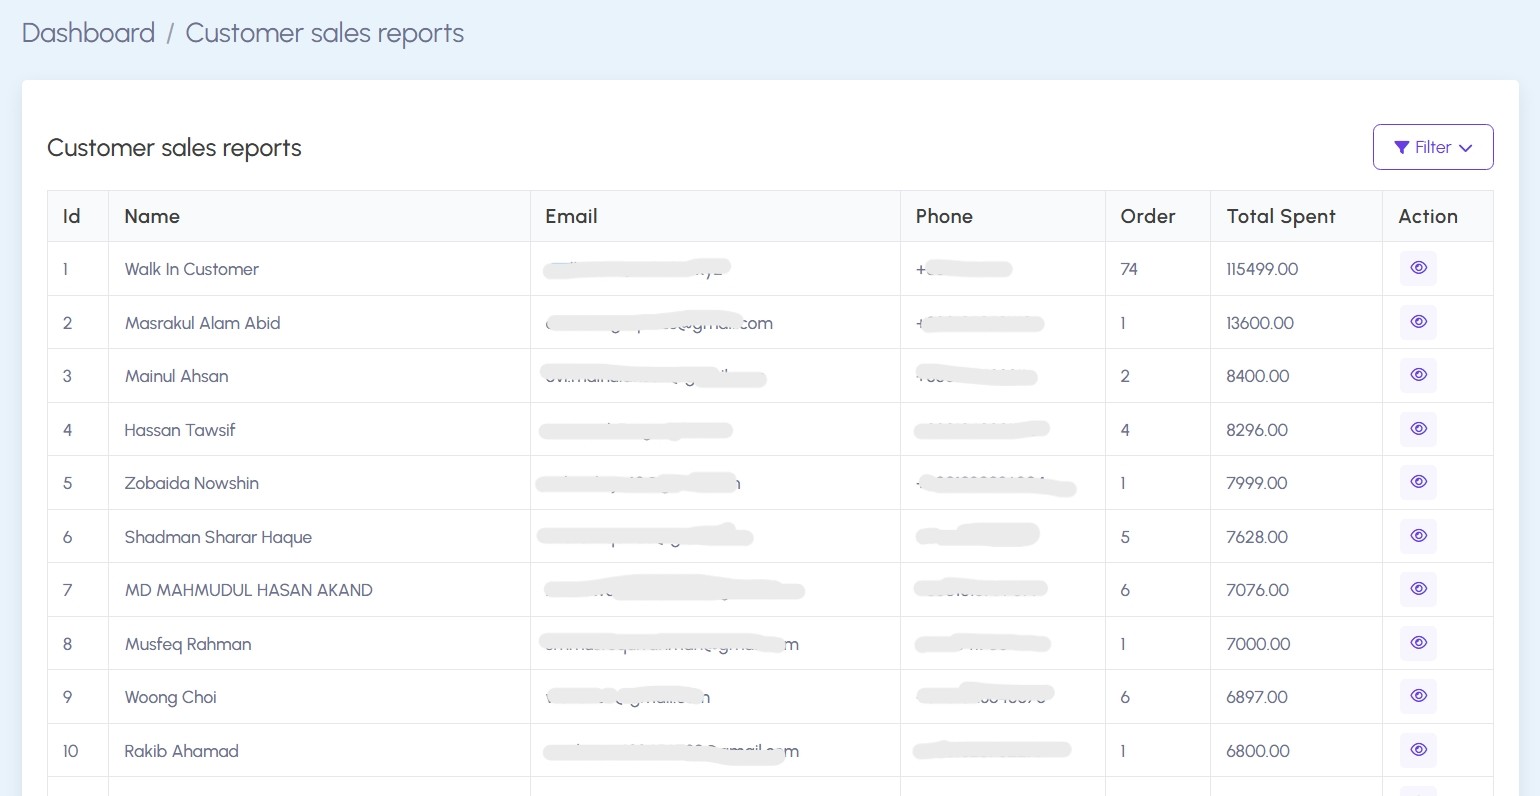
3. Customer Sales Reports:
Breaks down individual customer purchases, including name, contact info, number of orders, and total spending. This report helps identify top customers and buying patterns.
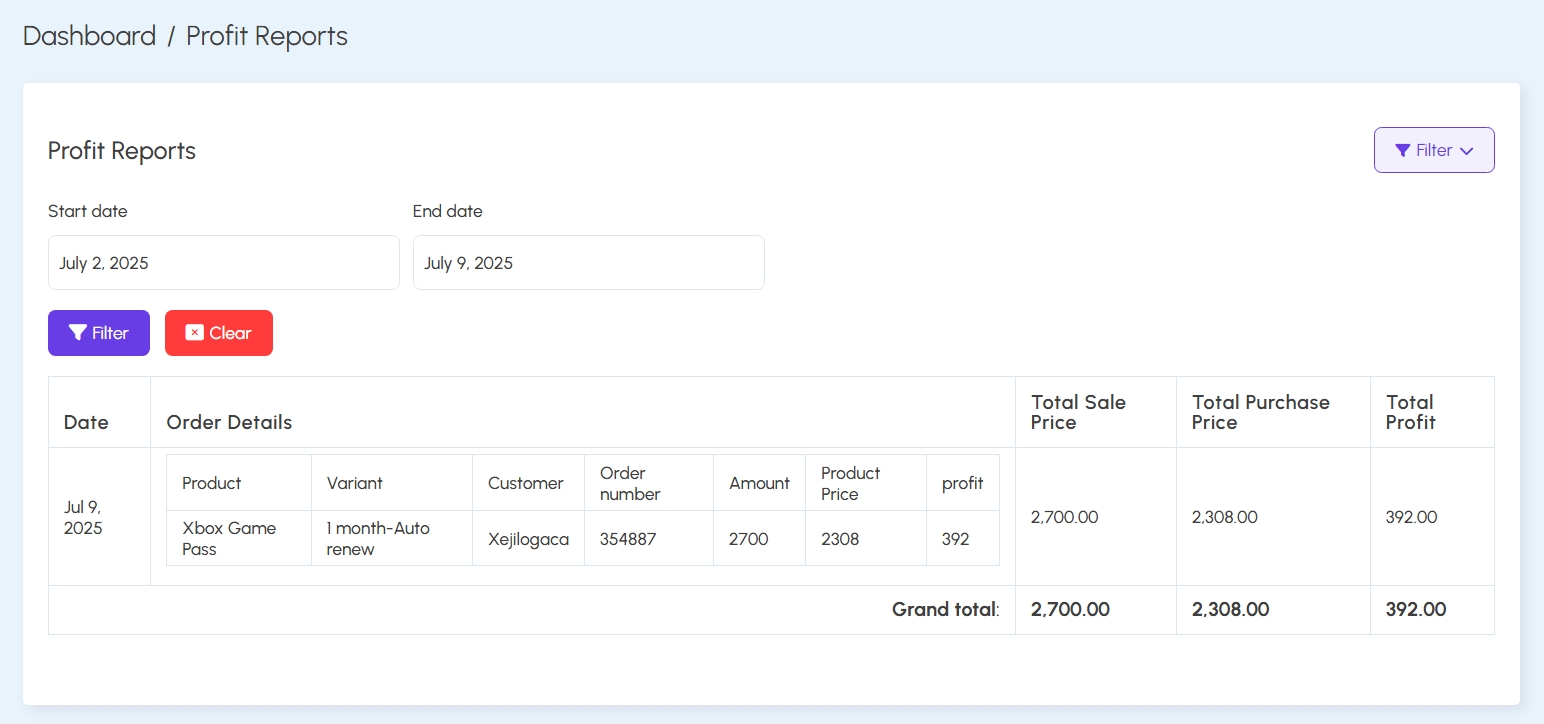
4. Profit Reports:
Calculates profit by comparing total sale prices against purchase prices. Each entry includes product, variant, customer, order ID, amount, cost, and profit earned.
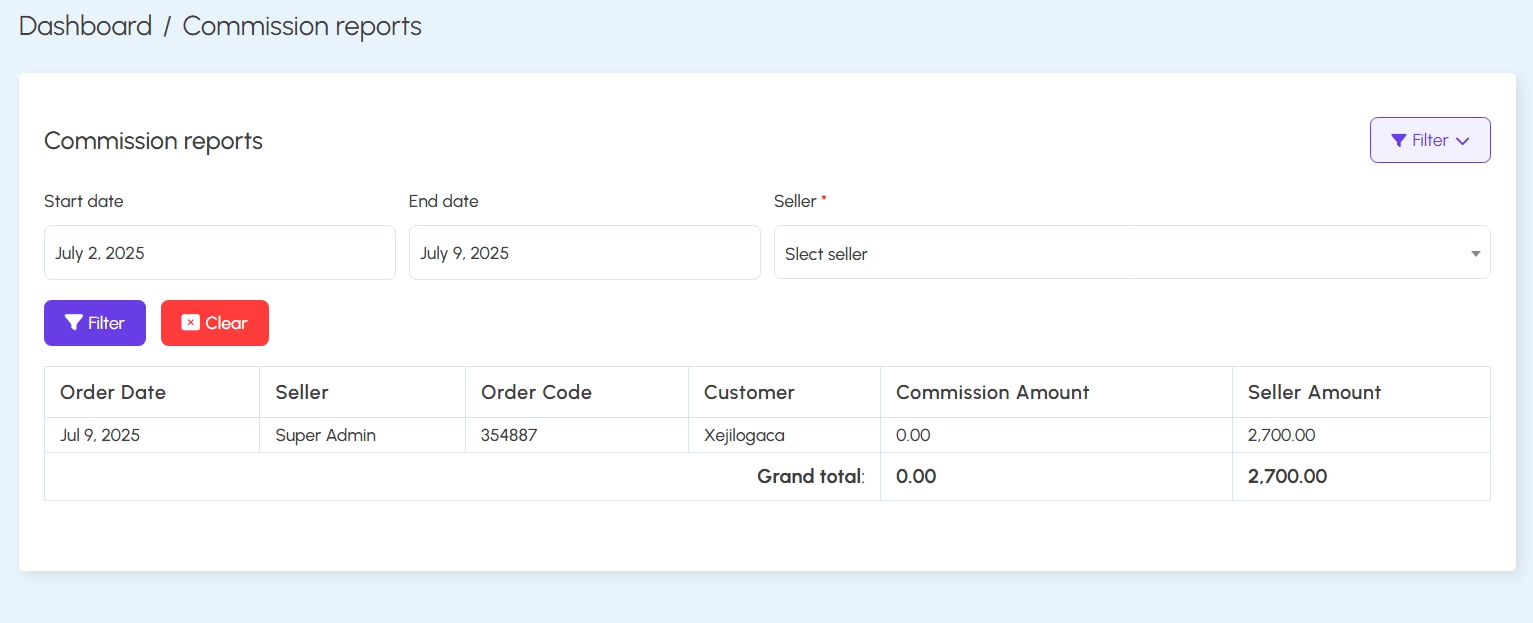
5. Commission Reports:
Displays seller commissions based on completed orders. It includes seller name, order code, customer, and both commission and seller amounts.
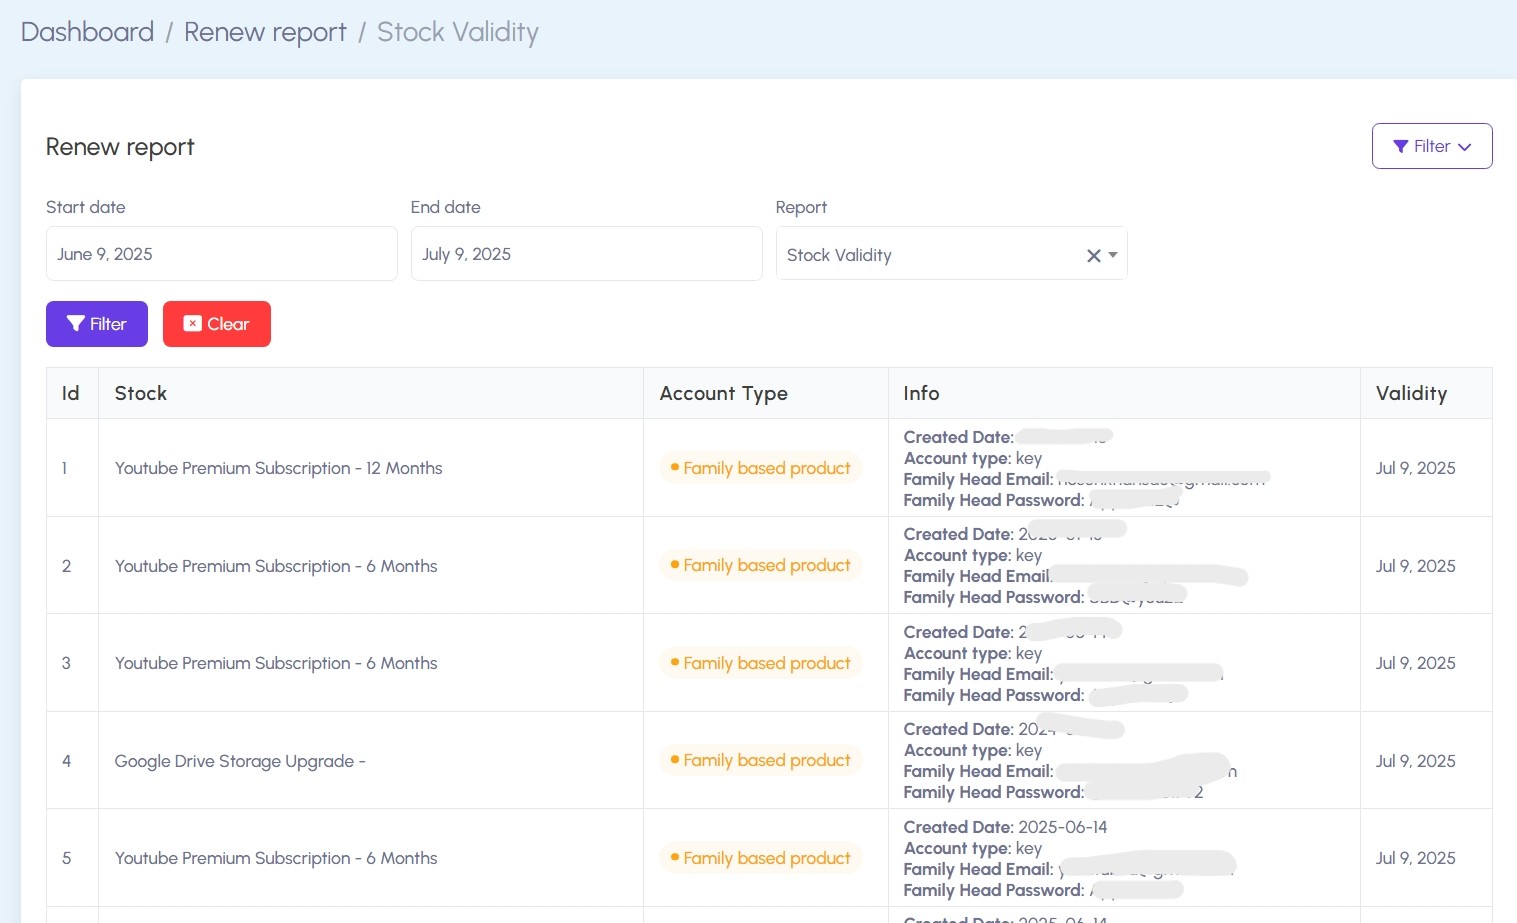
6. Renew Reports:
Tracks the validity of time-limited subscriptions. Includes stock name, account type, family head credentials, and expiry (validity) dates. Useful for managing renewals.
Settings
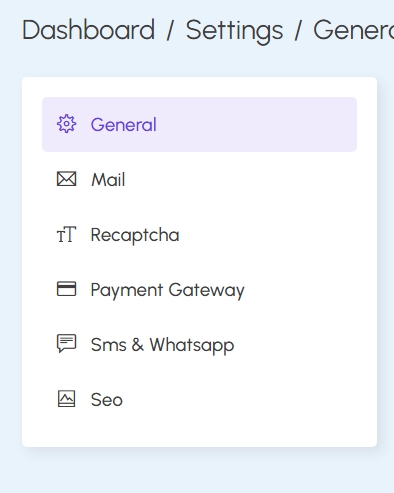
The Settings section provides administrative control over system-wide configurations including branding, contact info, email delivery, payment processing, and SEO optimization. It is divided into multiple tabs for easier management.
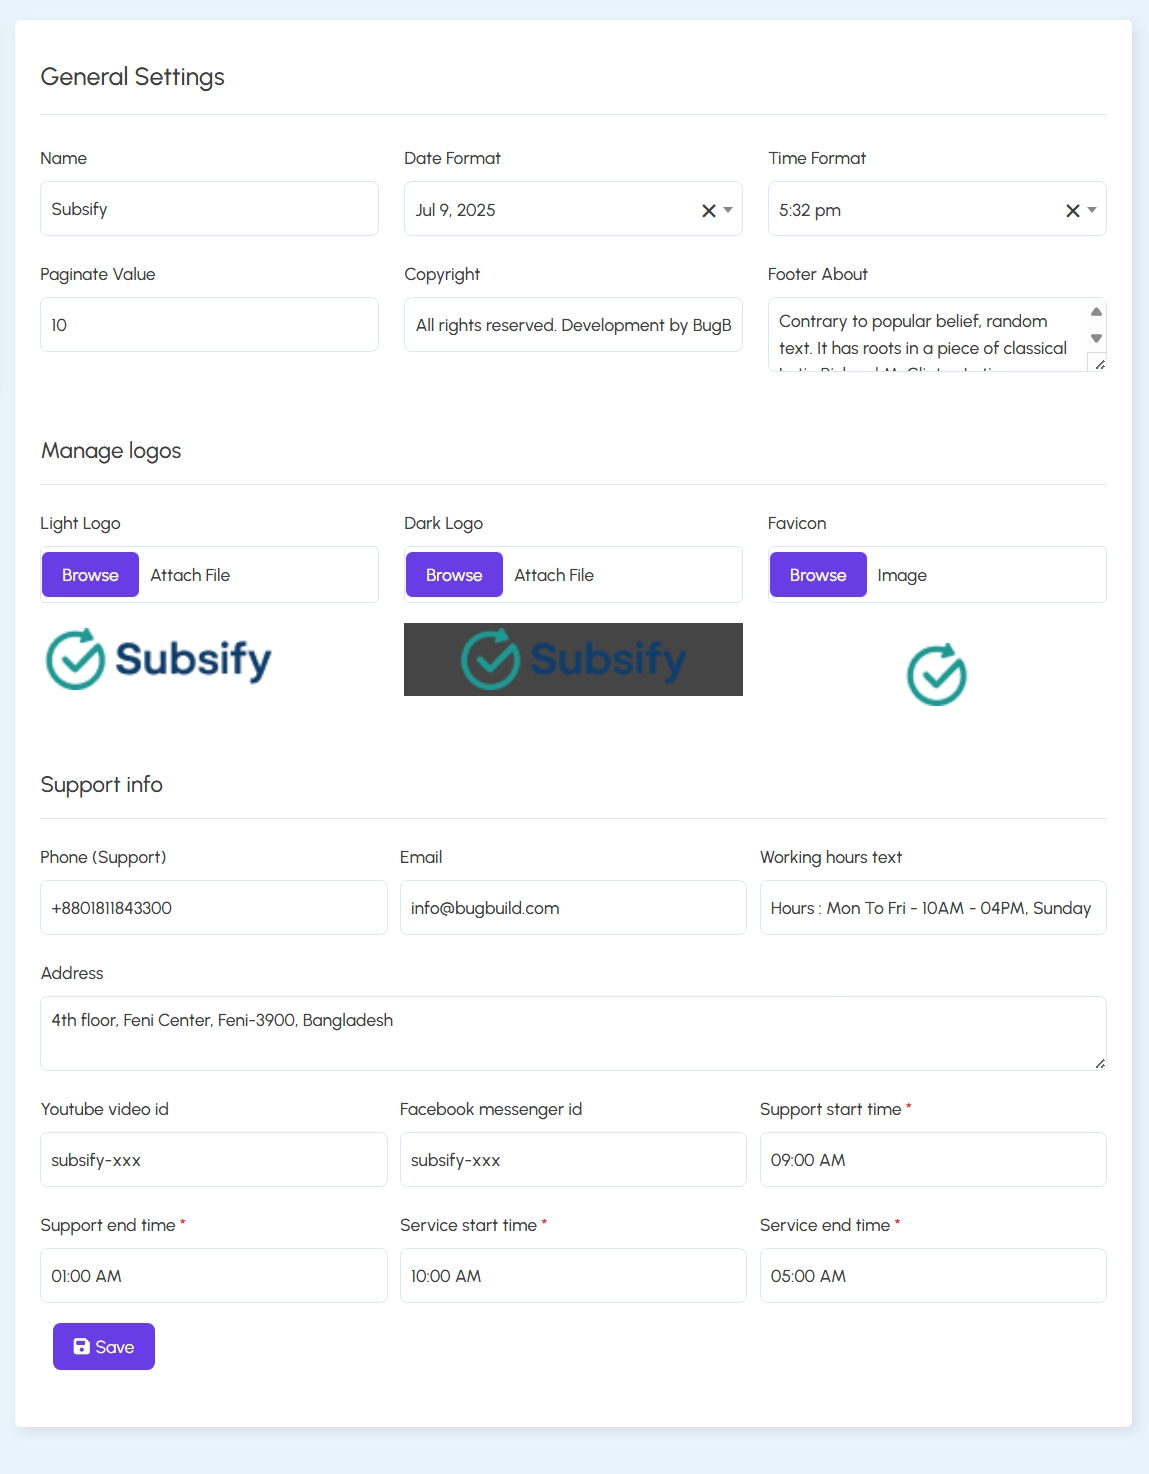
1. General Settings:
Configure system name, date/time format, pagination, footer content, logo uploads, and contact info such as support phone, email, and working hours.
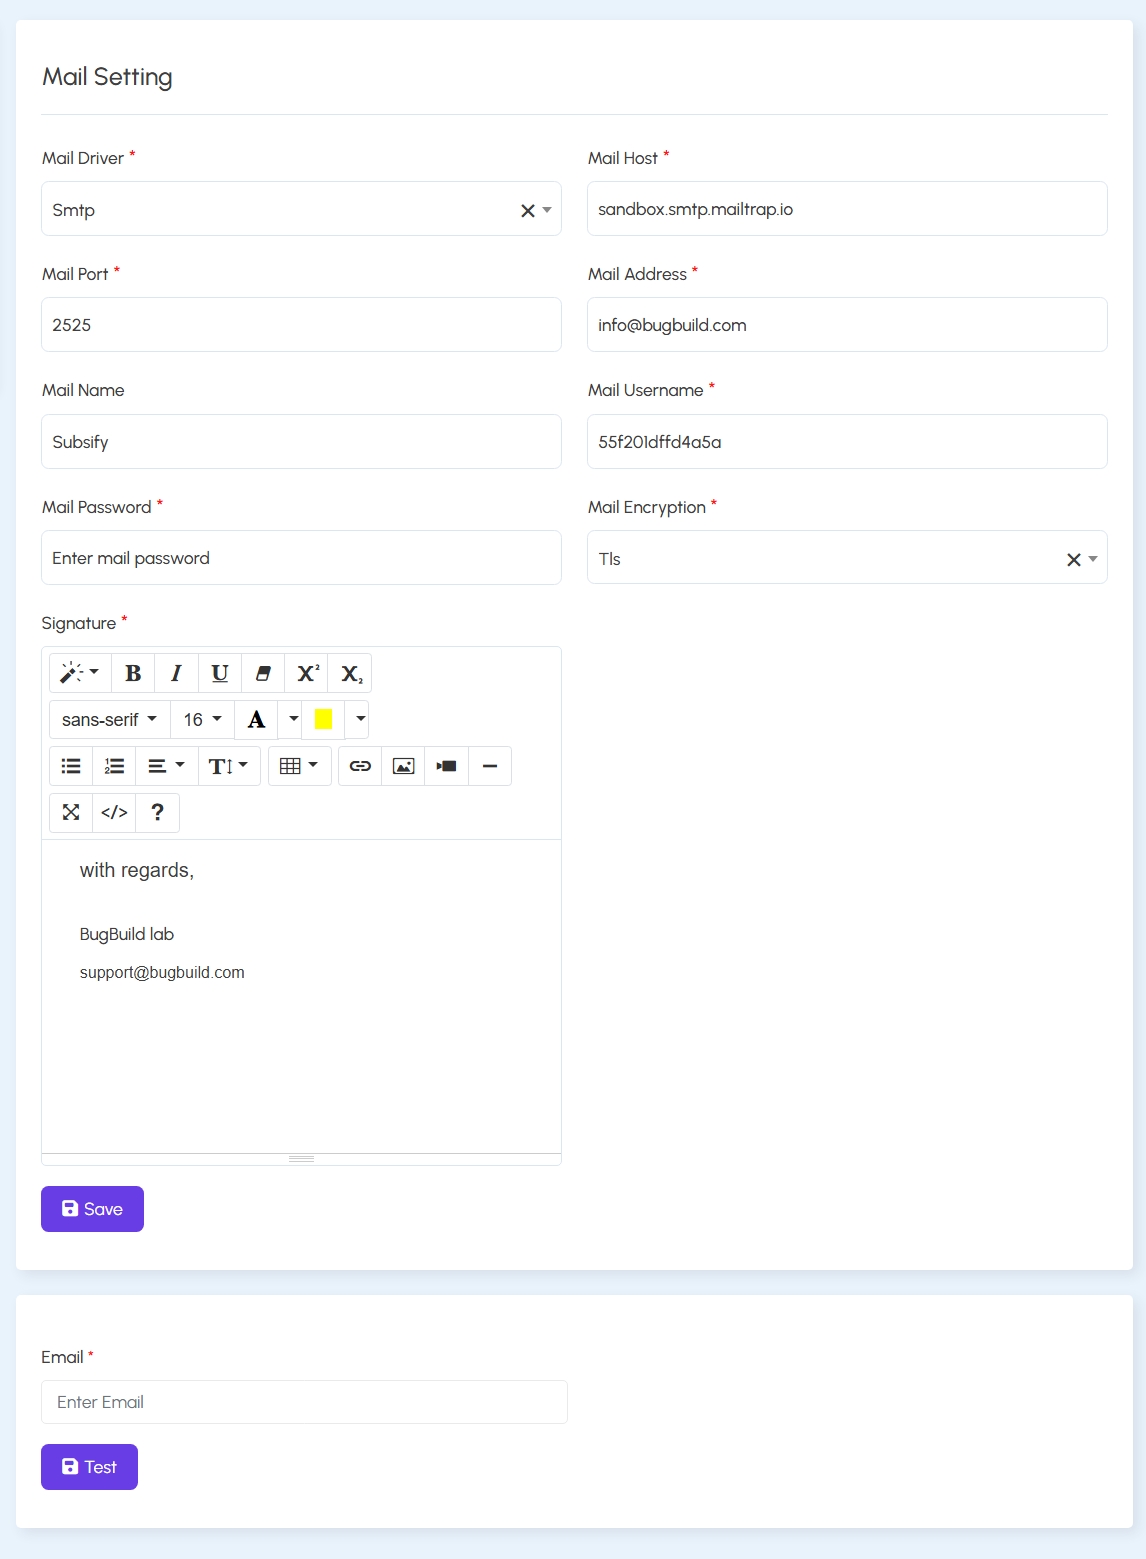
2. Mail Settings:
Define mail server credentials such as SMTP host, port, encryption method, username/password, and custom mail signature. Admins can also test delivery by sending a test email.
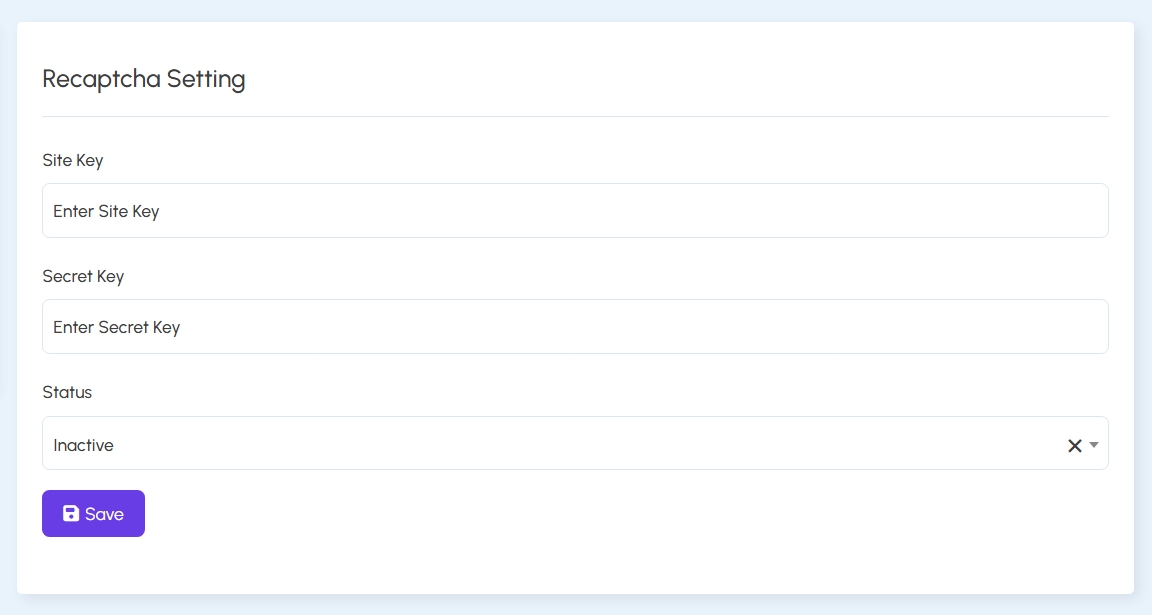
3. Recaptcha Settings:
Protect forms from spam by enabling Google reCAPTCHA. Admins must provide Site Key and Secret Key, and toggle activation status.
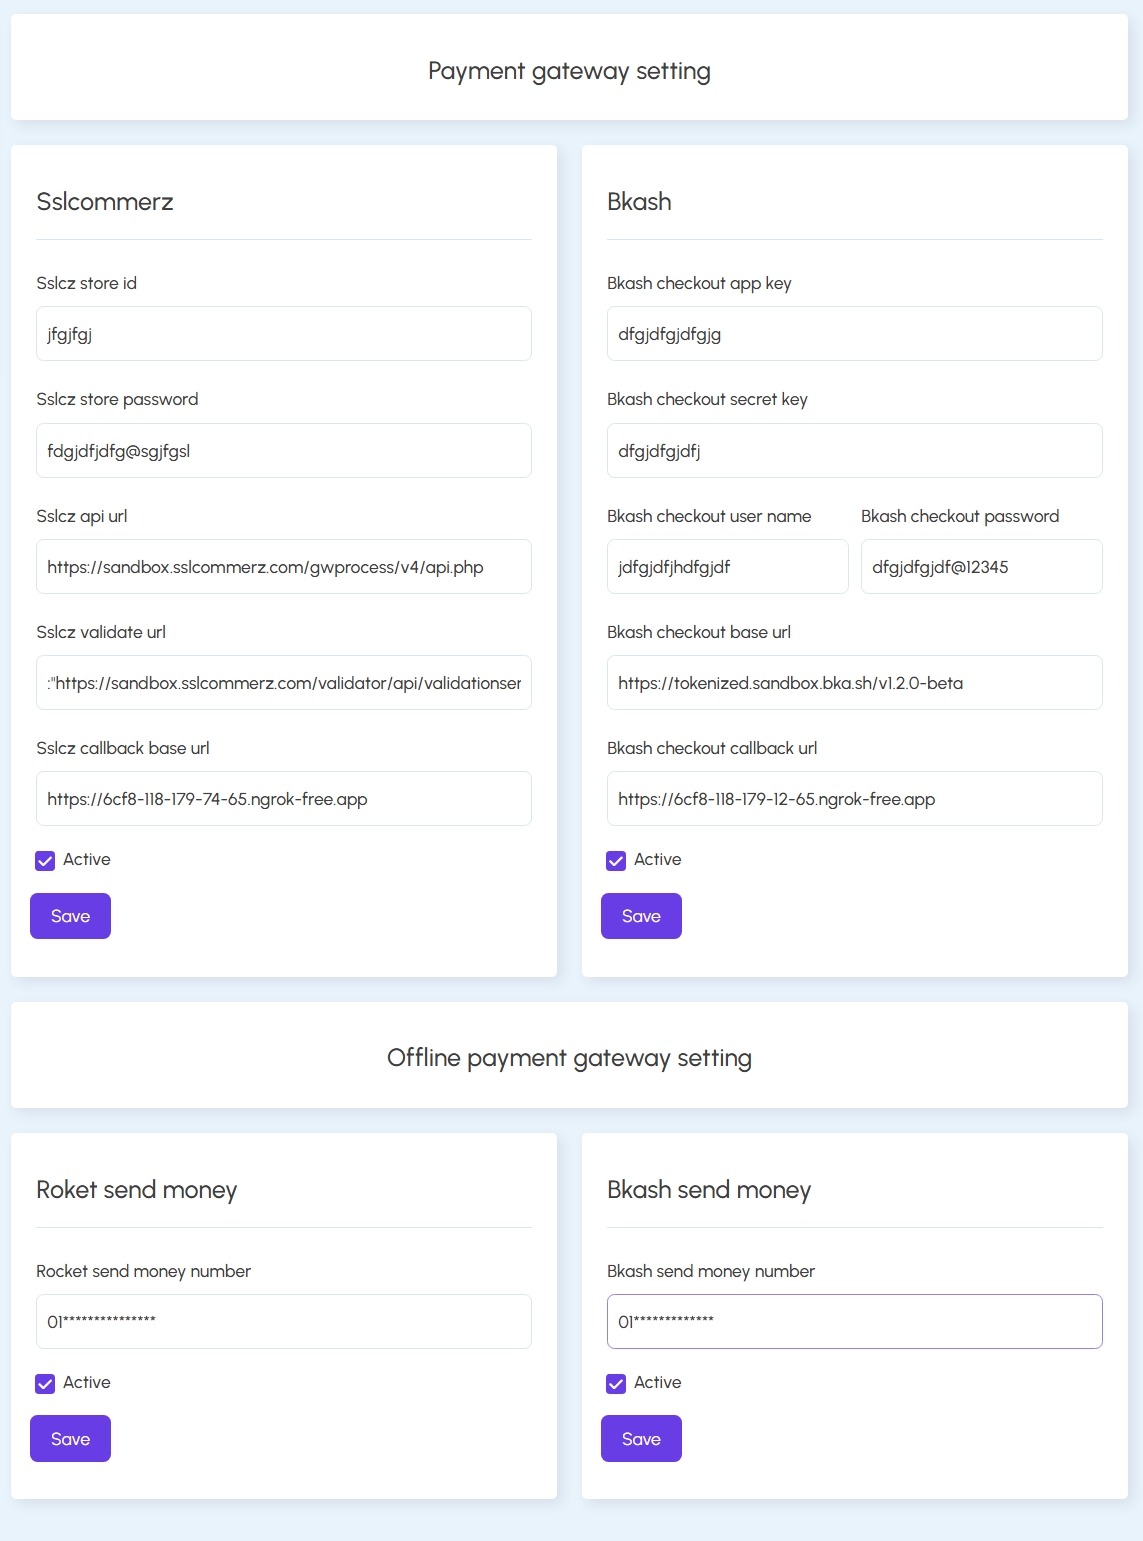
4. Payment Gateway Settings:
Manage online and offline payment methods. Includes credentials for SSLCOMMERZ and bKash, along with URLs for APIs, callbacks, and sandbox testing. Offline methods like Rocket/bKash send money are also available.
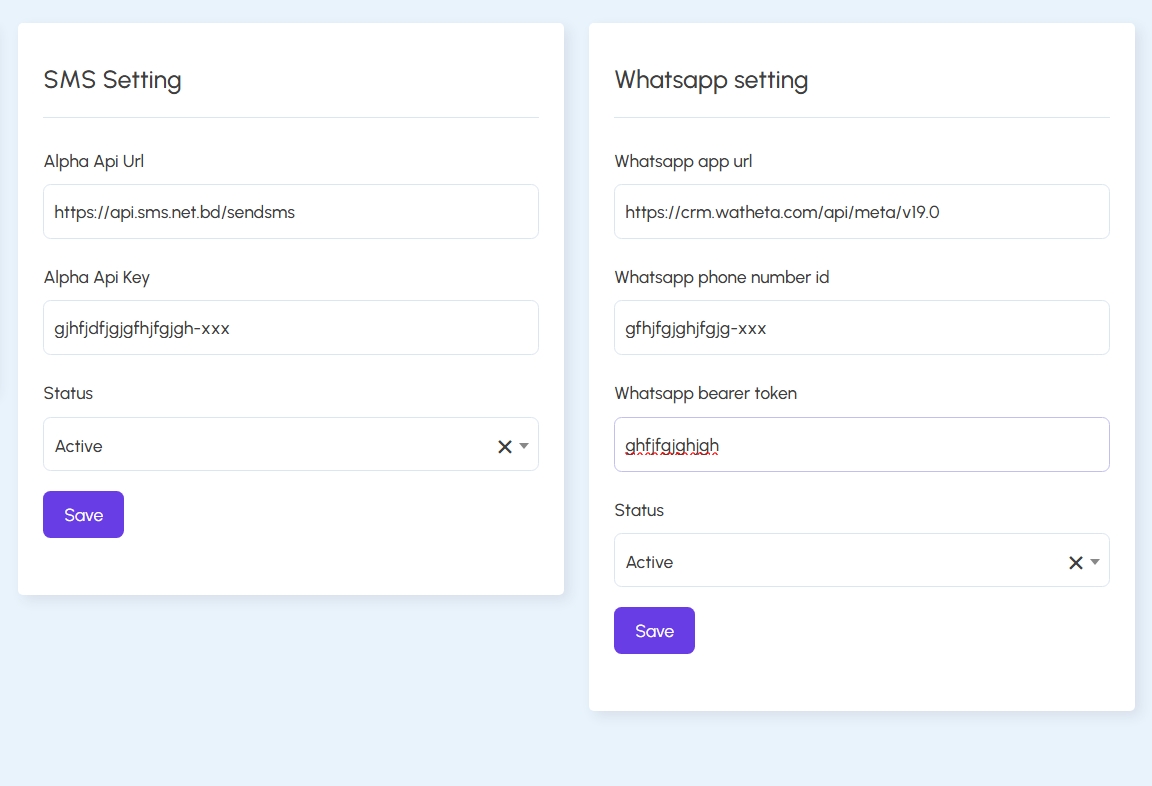
5. SMS & WhatsApp Settings:
Configure API details for Alpha SMS and WhatsApp integrations. This allows automated message delivery for notifications or support.
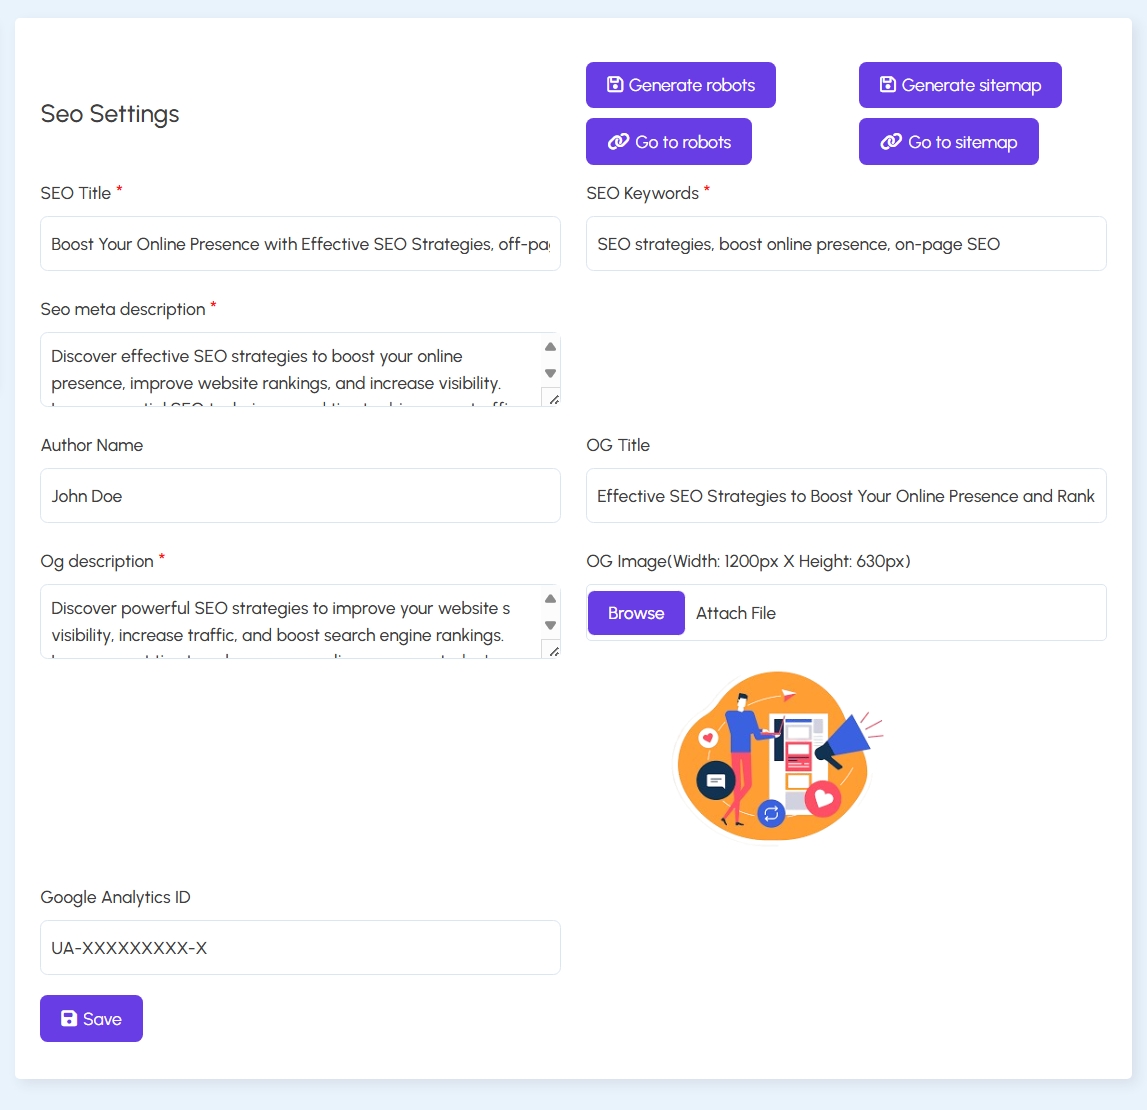
6. SEO Settings:
Improve discoverability by adding SEO titles, descriptions, meta keywords, OG (Open Graph) content, and uploading OG images. Admins can also generate or access robots.txt and sitemap.xml files.
Push Notification Settings
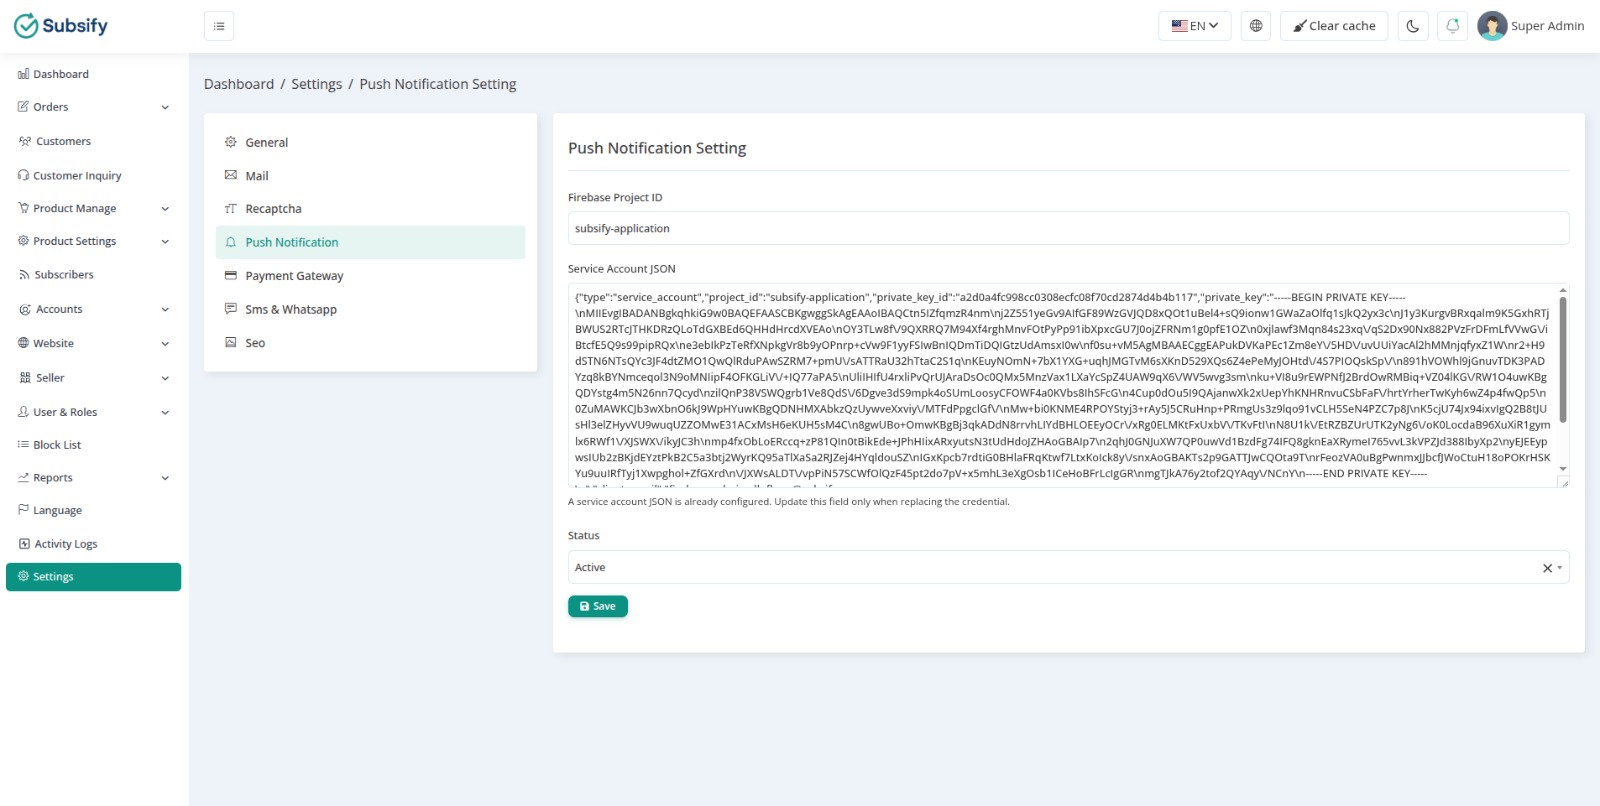
The Push Notification settings allow the admin to connect the platform with Firebase Cloud Messaging (FCM) so that real-time push notifications can be sent to customers via the mobile app.
Step 1 – Create a Firebase Project:
Go to console.firebase.google.com and create a new project (or use an existing one).
Step 2 – Get the Firebase Project ID:
Inside your Firebase project, go to Project Settings → General. Copy the Project ID shown at the top (e.g. subsify-application).
Step 3 – Generate a Service Account JSON:
In Firebase, go to Project Settings → Service Accounts. Click Generate new private key and download the JSON file. Open the file and copy its entire contents.
Step 4 – Enter Credentials in Admin Panel:
In the admin panel, go to Settings → Push Notification. Fill in the following:
- Firebase Project ID: Paste the project ID copied from Firebase General settings
- Service Account JSON: Paste the full JSON content from the downloaded service account key file. If a key is already configured, only update this field when replacing the credential.
- Status: Set to Active to enable push notification delivery
Click Save to apply the configuration.
Step 5 – Send a Notification:
Once configured, the admin can send push notifications to all app users or targeted customers from the admin panel's notification section.
Note: The customer mobile app must also be configured with the same Firebase project using the google-services.json file. See the Customer App Push Notification Setup for details.
Language Management
The Language Management section allows administrators to support multilingual capabilities within the system. It includes features to manage available languages, create new ones, and edit translated phrases for different modules.
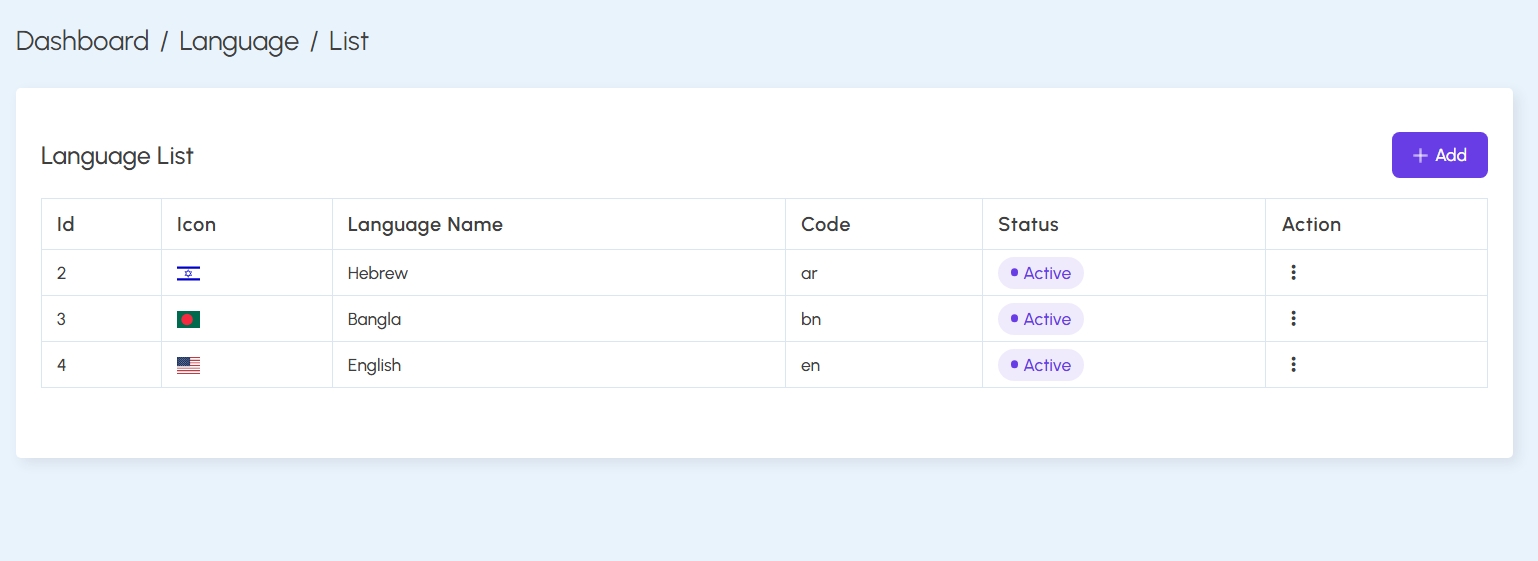
1. Language List:
Displays all available languages in a table format. For each language, it shows:
- Language Name & Flag
- Code (ISO format)
- Text Direction (LTR or RTL)
- Status (Active/Inactive)
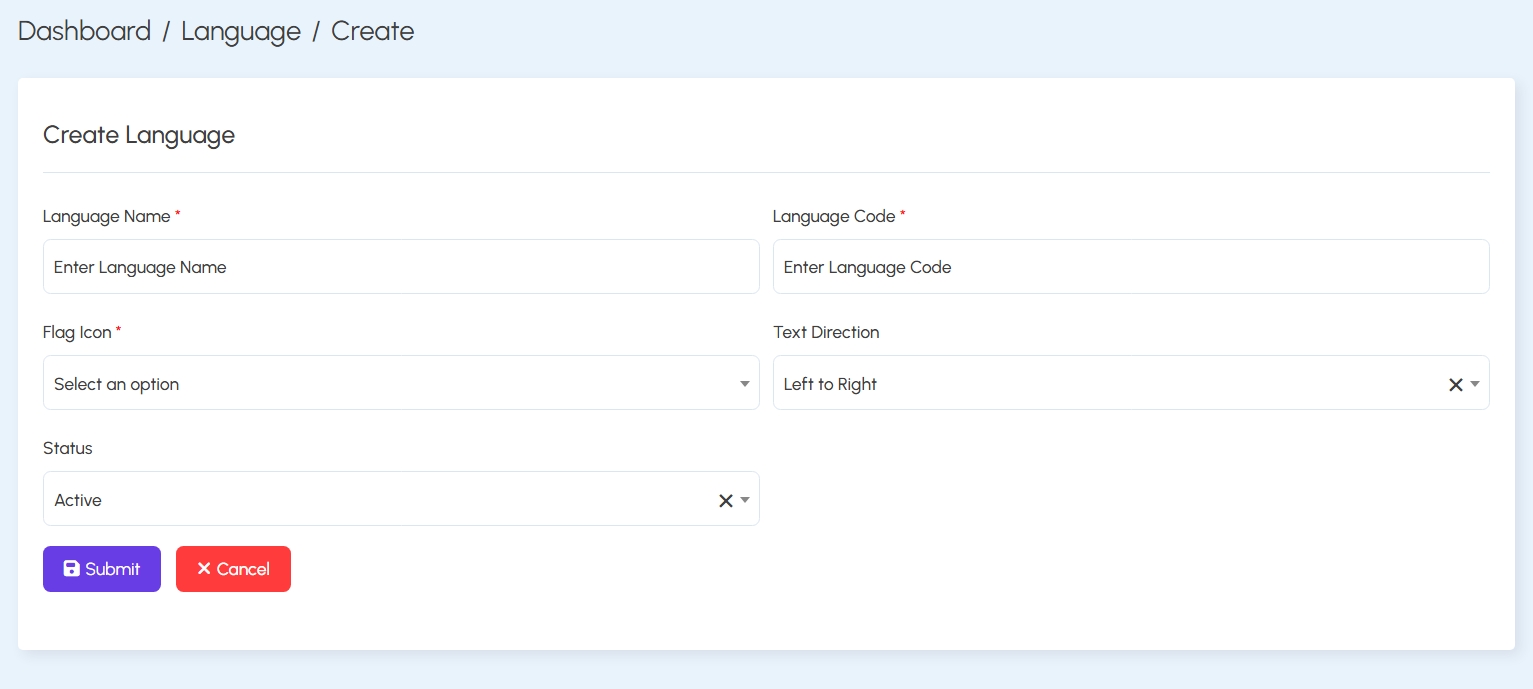
2. Create Language:
Provides a form to add a new language. Required fields include:
- Language Name and Code
- Flag Icon selection
- Text Direction (Left to Right / Right to Left)
- Status (Active or Inactive)
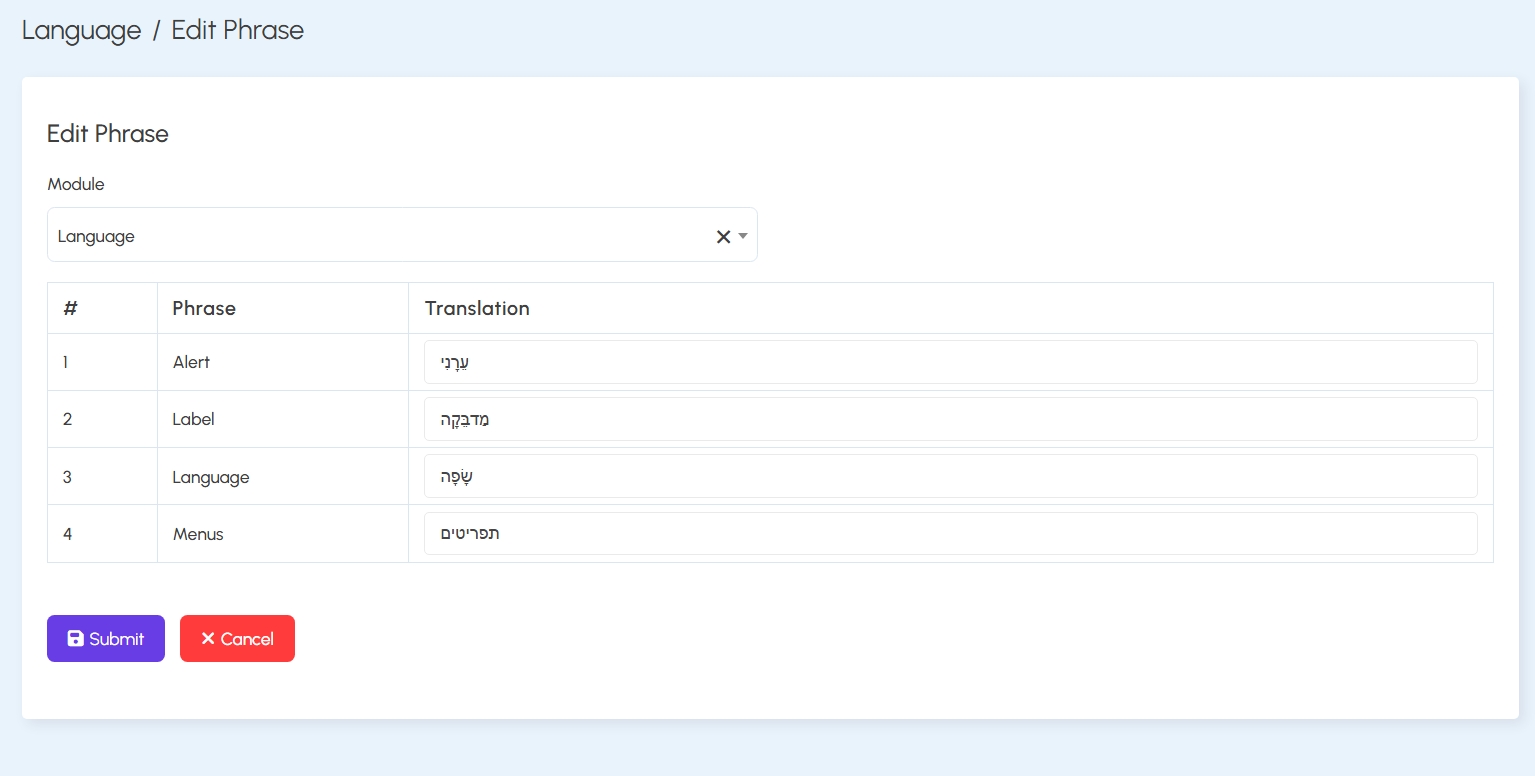
3. Edit Phrase:
This module allows admins to provide translations for specific phrases used throughout the platform. It supports module-based filtering and bulk updating of translations for quick content localization.